12
INSTALLING THE PRINTER DRIVER / PC-FAX DRIVER
X Advanced installation
With the advanced installation, you can select the printer driver to be installed.
When the software selection screen appears in step 6 of "OPENING THE SOFTWARE SELECTION SCREEN (FOR
ALL SOFTWARE)" (page 8), perform the steps below.
When SAPL-c driver is installed, this installation is not performed.
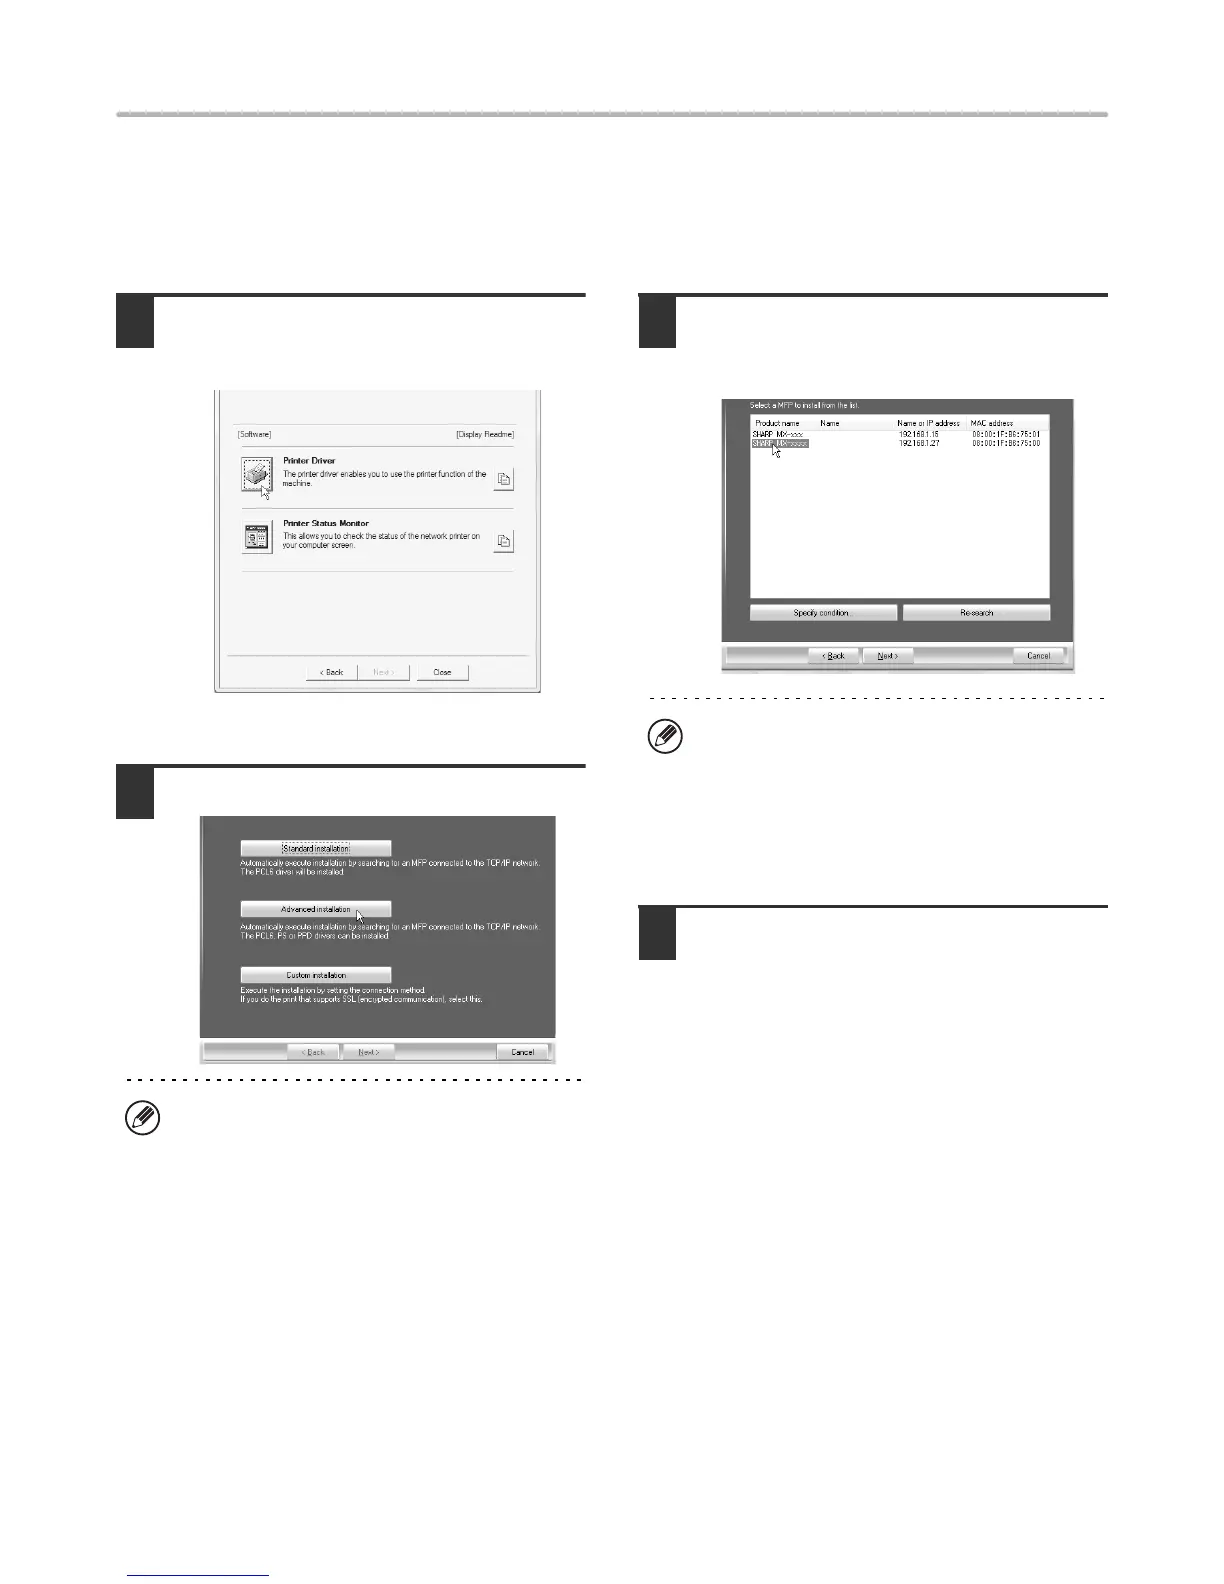
1
Click the [Printer Driver] button.
To install the PC-Fax driver, click the [PC-Fax Driver]
button on the "Disc 2" CD-ROM.
* The above screen appears when using the
"Disc 1" CD-ROM.
2
Click the [Advanced installation] button.
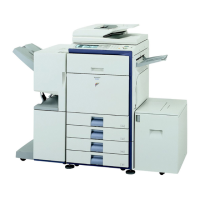
3
Printers connected to the network are
detected. Select the machine and click
the [Next] button.
4
A confirmation window appears. Check
the contents and then click the [Next]
button.
When [Custom installation] is selected, you can
change any of the items below. When [Standard
installation] is selected, the installation will take place
as indicated below.
• Machine connection method: LPR Direct Print
(Auto Search)
• Set as default printer: Yes
(excluding the PC-Fax driver)
• Printer driver name: Cannot be changed
• PCL printer display fonts: Installed
If you selected [Custom installation], select [LPR
Direct Print (Auto Search)] and click the [Next] button.
If you selected other than [LPR Direct Print (Auto
Search)], see the following pages:
• LPR Direct Print (Specify Address): page 14
• IPP: page 16 • Shared printer: page 22
• Connected to this computer: page 18
• If the machine is not found, make sure that the
machine is powered on and that the machine is
connected to the network, and then click the
[Re-search] button.
• You can also click the [Specify condition] button and
search for the machine by entering the machine's
name (host name) or IP address.
☞
Checking the IP address of the machine (page 7)