Do you have a question about the Sharp MX-2300N Guide and is the answer not in the manual?
Explains the various scanning modes and their uses.
Details essential setup steps and checks before network scanning.
Instructions for setting sender details for email and internet fax.
Outlines necessary network and server configurations via the web interface.
Explains how to save destination addresses for different scan modes.
Procedure for setting up computer destinations for Scan to Desktop.
Describes the main screen layout for various scan modes.
How to customize the view of one-touch keys in the address book.
Step-by-step guide for scanning and sending documents.
How to select transmission destinations using the Address Book.
Procedure for selecting a destination via its one-touch key.
How to review and remove chosen destinations.
Method for finding destinations using a search number.
Steps for manually inputting destination addresses.
How to retrieve addresses from an LDAP server.
Resending to recently used destinations.
Basic steps for sending scanned documents to various network destinations.
Instructions on how to position originals for scanning.
How to select the desired scanning mode.
Guide to adjusting settings like exposure and resolution.
Setting the document orientation for scanning.
Selecting and confirming the recipient for transmission.
Initiating the scanning and sending process.
Adjusting exposure levels and modes for optimal scan quality.
Setting the scan resolution for image clarity and file size.
Procedure for scanning both sides of a document automatically.
Adjusting scan and send sizes for enlargement or reduction.
Manual selection of the original scan size.
Setting the final size of the scanned image for transmission.
Selecting the color mode (Auto, Full Color, Mono2, Greyscale).
Choosing the file type and compression for scanned images.
Directly entering a file name for the scanned document.
Steps to save scanned files to a USB memory device.
Instructions for positioning originals for scanning.
How to switch the machine to USB memory mode.
Accessing the screen for scan settings.
Setting the document orientation for scanning.
Initiating the scanning process for USB memory.
Finalizing the scan operation and saving the file.
Adjusting exposure levels and modes for optimal scan quality.
Setting the scan resolution for image clarity.
Procedure for scanning both sides of a document automatically.
Adjusting scan and send sizes for enlargement or reduction.
Manual selection of the original scan size.
Setting the final size of the scanned image for transmission.
Selecting the color mode for scanning.
Choosing the file type and compression for scanned images.
Basic steps for sending faxes using the Internet fax function.
Instructions for positioning originals for scanning.
How to switch the machine to Internet fax mode.
Accessing the screen for scan settings.
Setting the document orientation for Internet fax.
Accessing the Address Book to select destinations.
Selecting and confirming the recipient for the Internet fax.
Initiating the scanning and transmission process.
Adjusting exposure levels for scanning.
Setting the scan resolution.
Procedure for scanning both sides of a document automatically.
Adjusting scan and send sizes for enlargement or reduction.
Manual selection of the original scan size.
Entering scan size dimensions using numerical input.
Setting the final size of the scanned image for transmission.
Choosing the file type for Internet faxes.
Setting the subject, file name, and message for the transmission.
Overview of the screen displaying job status and history.
Details on viewing active and finished transmission jobs.
Explains the information shown for each job in the status screens.
Describes how job statuses change upon completion.
How to review details of past transmissions.
Procedure to cancel active or queued scan jobs.
How to reorder jobs in the queue for immediate processing.
Sending a single scanned image to multiple recipients simultaneously.
Instructions for positioning originals for scanning.
Selecting multiple destinations for broadcast transmission.
Notes on settings when mixing Internet fax and scan destinations.
Feature to remove unwanted shadows from scanned images.
Scanning opposite sides of a book or bound document as separate pages.
Scheduling transmissions to occur automatically at a set time.
Adjusting settings to lighten faint background areas in scanned images.
Capturing both sides of a card onto a single page.
Scanning multiple sets of originals sequentially for a single transmission.
Scanning documents of various sizes together.
Using a slower scan speed to prevent misfeeds with thin paper.
Saving settings and destinations as reusable programs.
Automatically forwarding received faxes to an email address.
How the machine automatically receives and prints incoming Internet faxes.
Initiating the reception of faxes manually.
Printing faxes stored in memory, potentially with password protection.
Combining two pages into one for transmission to save space.
Customizing print settings for transmission and reception reports.
Reviewing logs of recent image sending activities and errors.
Sending faxes from a computer using the machine as a fax modem.
General steps for scanning documents from a computer via TWAIN driver.
Actions performed on the machine for PC scanning.
Actions performed on the computer to initiate scanning.
Viewing the scanned image before finalization.
Adjusting scan settings in the preview window.
Starting the actual scan process from the computer.
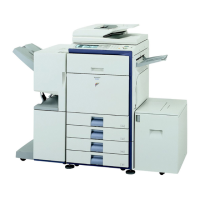
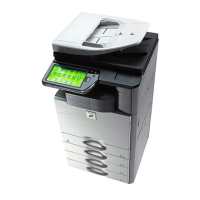
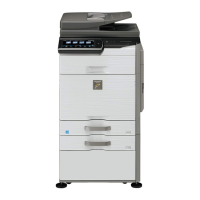
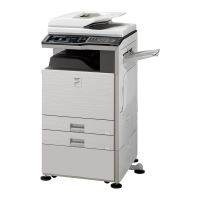
| Brand | Sharp |
|---|---|
| Model | MX-2300N Guide |
| Category | All in One Printer |
| Language | English |