MX-C250 DISASSEMBLY AND ASSEMBLY 10 – 10
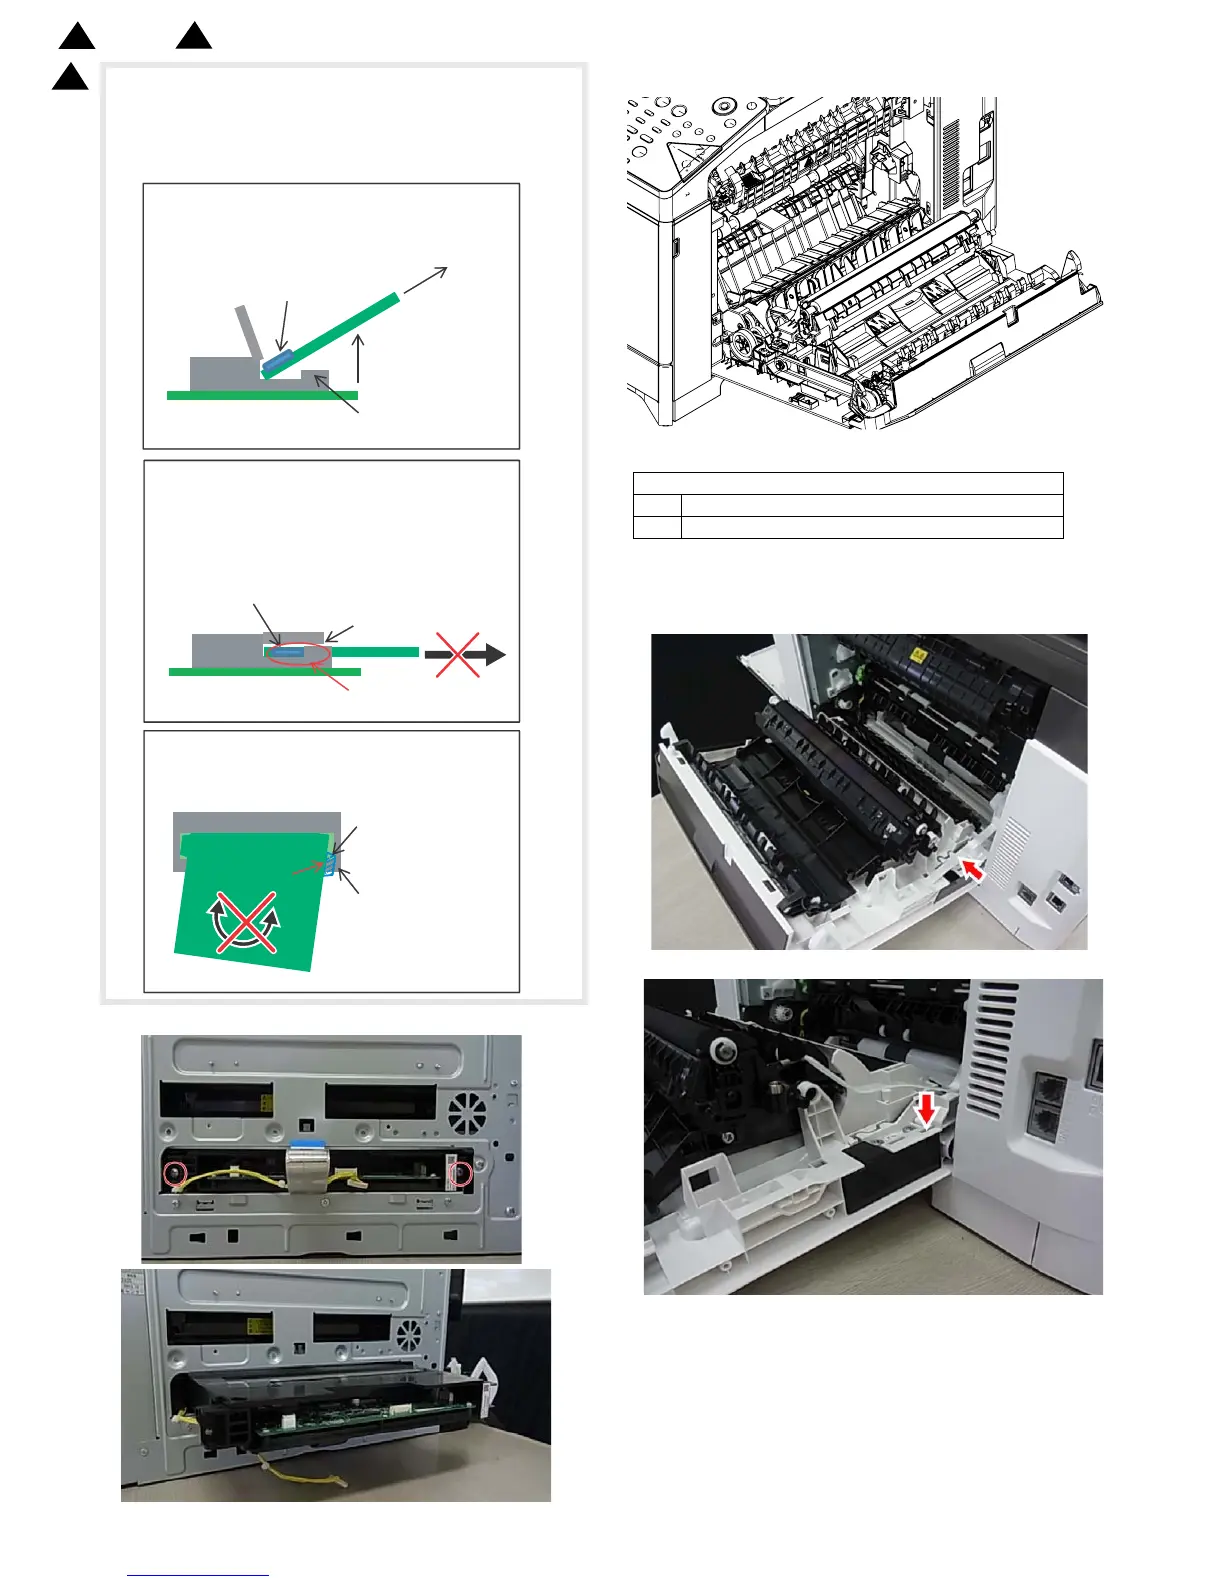
It is necessary to remove the FFC after the FFC is lifted up ,
pulled out obliquely upward and the tab is removed from the
connection part. If the FFC is forced to remove, the FFC and the
connector could be broken.
3) Remove the screws and pull out the LSU unit.
K. Paper transport/Paper exit/ADU section
(1) Right door unit
1) Open the right door unit.
2) Remove the right door unit connection.
3) Remove the humidity sensor cover
<Unlocked connector and FFC from side view>
Connector
FFC
Tab for positioning FFC
Guide for positioning
the connector
FFC
Hook
<Top View>
Interfere
1. Lift up FFC
2. Lift up FFC obliquely upward
<Locked connector and FFC from side view>
Connector
Tab for positioning FFC
Guide for positioning
the connector
Tab for positioning FFC
Guide for positioning
the connector
OK :
Lift up FFC obliquely upward
NG :
Do not pull out the FFC right beside
NG :
Do not pull out the FFC with rotating