MX-FN10 SELF DIAG MESSAGE AND TROUBLE CODE 9 – 1
MX-FN10
Service Manual
[9] SELF DIAG MESSAGE AND
TROUBLE CODE
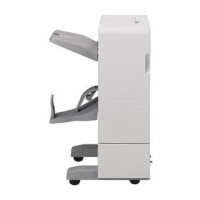
1. Interface transport unit
2. Punch unit
Phenomenon The inlet port reverse pass solenoid does not operate
properly.
Case1 Cause Inlet port reverse solenoid trouble
Check &
Remedy
Perform the coil conduction test to check
conduction. If there is no conduction, replace.
Case2 Cause Electric cable, connector trouble
Check &
Remedy
Check conduction between connector
terminals. If there is no conduction, replace
the electric cable.
Case3 Cause Control PWB trouble
Check &
Remedy
If the solenoid does not work in the solenoid
single operation mode, replace the finisher
control PWB.
Case4 Cause Caught by foreign material.
Check &
Remedy
Check the guide. If it is caught, remove the
cause.
Phenomenon The interface transport motor does not operate
properly.
Case1 Cause Interface transport motor trouble
Check &
Remedy
Perform the coil conduction test to check
conduction. If there is no conduction, replace.
Case2 Cause Electric cable, connector trouble
Check &
Remedy
Check conduction between connector
terminals. If there is no conduction, replace
the electric cable.
Case3 Cause Finisher control PWB trouble
Check &
Remedy
If the motor does not operate in the motor
single operation mode, replace the finisher
control PWB.
Phenomenon The interface transport fan motor does not operation
properly.
Case1 Cause Interface transport fan motor trouble
Check &
Remedy
Perform the coil conduction test to check
conduction. If there is no conduction, replace.
Case2 Cause Electric cable, connector trouble
Check &
Remedy
Check conduction between connector
terminals. If there is no conduction, replace
the electric cable.
Case3 Cause Finisher control PWB trouble
Check &
Remedy
If the motor does not operate in the motor
single operation mode, replace the finisher
control PWB.
Phenomenon Paper jams frequently occur in the interface
transport section.
Case1 Cause Interface transport unit inlet port sensor
trouble
Check &
Remedy
Measure the voltage of TP89 on the finisher
control PWB. Check to confirm that the
voltage is 3.3V when there is no paper, and
3.3V 5% when there is some paper. If the
voltage is outside this range, replace the
sensor.
Case2 Cause Interface transport unit exit port sensor
trouble
Check &
Remedy
Measure the voltage of TP88 on the finisher
control PWB. Check to confirm that the
voltage is 1V or less when there is no paper,
and 3.3V 5% when there is some paper. If
the voltage is outside this range, replace the
sensor.
Case3 Cause Electric cable, connector trouble
Check &
Remedy
Check conduction between connector
terminals. If there is no conduction, replace
the electric cable.
Case4 Cause Finisher control PWB trouble
Check &
Remedy
When each sensor is turned ON/OFF, though
the sensor level is changed, if the
phenomenon is not canceled, replace the
finisher control PWB.
Phenomenon The punch unit is not recognized.
Case1 Cause Electric cable, connector trouble
Check &
Remedy
Check conduction between connector
terminals. If there is no conduction, replace
the electric cable.
Case2 Cause Control PWB trouble
Check &
Remedy
If the harness and the connector are normal,
replace the punch control PWB. If the trouble
still remains, replace the finisher control
PWB.
Phenomenon The punch motor does not operate properly.
(Punching is not performed properly.)
Case1 Cause Punch motor trouble
Check &
Remedy
Perform the conduction test of the coil. If
there is no conduction, replace.
Case2 Cause Punch HP sensor trouble
Check &
Remedy
Measure the voltage at CN 3.3pin on the
punch control PWB to confirm that it is 1V or
less when transmitting, and 5V 5% when
interrupted. If the voltage is outside the range,
replace the sensor.
Case3 Cause Punch positions sensor trouble
Check &
Remedy
Measure the voltage at CN 3.9pin on the
punch control PWB to confirm that it is 1V or
less when transmitting, and 5V 5% when
interrupted. If the voltage is outside the range,
replace the sensor.
Case4 Cause Punch clock sensor trouble
Check &
Remedy
Measure the voltage at CN 3.6pin on the
punch control PWB to confirm that it is 1V or
less when transmitting, and 5V 5% when
interrupted. If the voltage is outside the range,
replace the sensor.
Case5 Cause Electric cable, connector trouble
Check &
Remedy
Check conduction between connector
terminals. If there is no conduction, replace
the electric cable.
Case6 Cause Punch control PWB trouble
Check &
Remedy
If the motor does not operate properly in the
motor single operation mode, replace the
punch control PWB. If the trouble still
remains, replace the punch control PWB.
Phenomenon The horizontal shift motor does not operate properly.
Case1 Cause Horizontal shift motor trouble
Check &
Remedy
Check conduction of the coil. If there is no
conduction, replace.
Case2 Cause Horizontal shift HP sensor trouble
Check &
Remedy
Measure the voltage at CN 5.3pin on the
punch control PWB to confirm that it is 1V or
less when transmitting, and 5V 5% when
interrupted. If the voltage is outside the range,
replace the sensor.
Case3 Cause Electric cable, connector trouble
Check &
Remedy
Check conduction between connector
terminals. If there is no conduction, replace
the electric cable.
Case4 Cause Punch control PWB trouble
Check &
Remedy
If the motor does not operate properly in the
motor single operation mode, replace the
punch control PWB. If the trouble still
remains, replace the punch control PWB.
Phenomenon Paper jams frequently occur in the interface
transport section.
 Loading...