Turning Power On/Off
Caution
• TurnonthemonitorrstbeforeturningonthePCor
playback device.
• WhenswitchingthemainpowerswitchorthePOWER
buttonoffandbackon,alwayswaitforatleast5seconds.
A short interval may result in a malfunction.
Turning on the main power
Caution
• Themainpowermustbeturnedon/offwiththemainpower
switch.Donotconnect/disconnectthepowercordorturn
the breaker on/off while the main power switch is on.
• Foracompleteelectricaldisconnection,pulloutthemain
plug.
Turning power on/off
PressthePOWERbuttonontheremotecontrolunitorthe
monitoritselftoturnthepowerON/OFF.
Whenthemainpowerswitchisoff,themonitorcannotbe
turnedonusingthePOWERbuttonontheremotecontrolunit.
Status of a power LED Status of the monitor
Greenlighting Power on
Orange lighting Power off (Standby mode)
Greenashing Input signal waiting mode
TIPS
• Ifthemonitorisintheinputsignalstandbymodeandyou
pressthePOWERbuttonontheremotecontrolunit,the
monitor enters standby mode.
• SettingtheSCHEDULEashesthepowerLEDalternately
in red and orange in standby mode.
• Todisablethelogoscreenfromdisplayingwhenturning
thepowerON,setLOGOSCREENtoOFFontheSETUP
menu.(Seepage25.)
• IfyouchangetheremotecontrolmodetoALLMONITORS,
powercanbeturnedON/OFFforallsecondarymonitors
connectedwithRS-232cable.(Foroperationwiththe
monitor buttons, use the buttons on the primary monitor.)
n
Operation mode
Whenthemonitoristurnedonforthersttimeafterbeing
shipped from the factory, the operation mode setting screen
willbedisplayed.SetittoMODE1orMODE2.
MODE1 ....OFFIFNOOPERATIONissettoON,and
STANDBYMODEissettoLOWPOWER.(These
settings can not be changed.)
If there is no operation for 4 hours or more, the
monitor automatically enters standby mode. Power
consumptioninstandbymodeisalsominimized.
MODE2 ....Willperformstandardoperation.
OFFIFNOOPERATIONissettoOFF,and
STANDBYMODEissettoSTANDARD.These
settings can be changed.
Evenafterbeingset,changescanbemadeusing
OPERATIONMODE,locatedinthemenuofthemonitor.(See
page 24.)
n
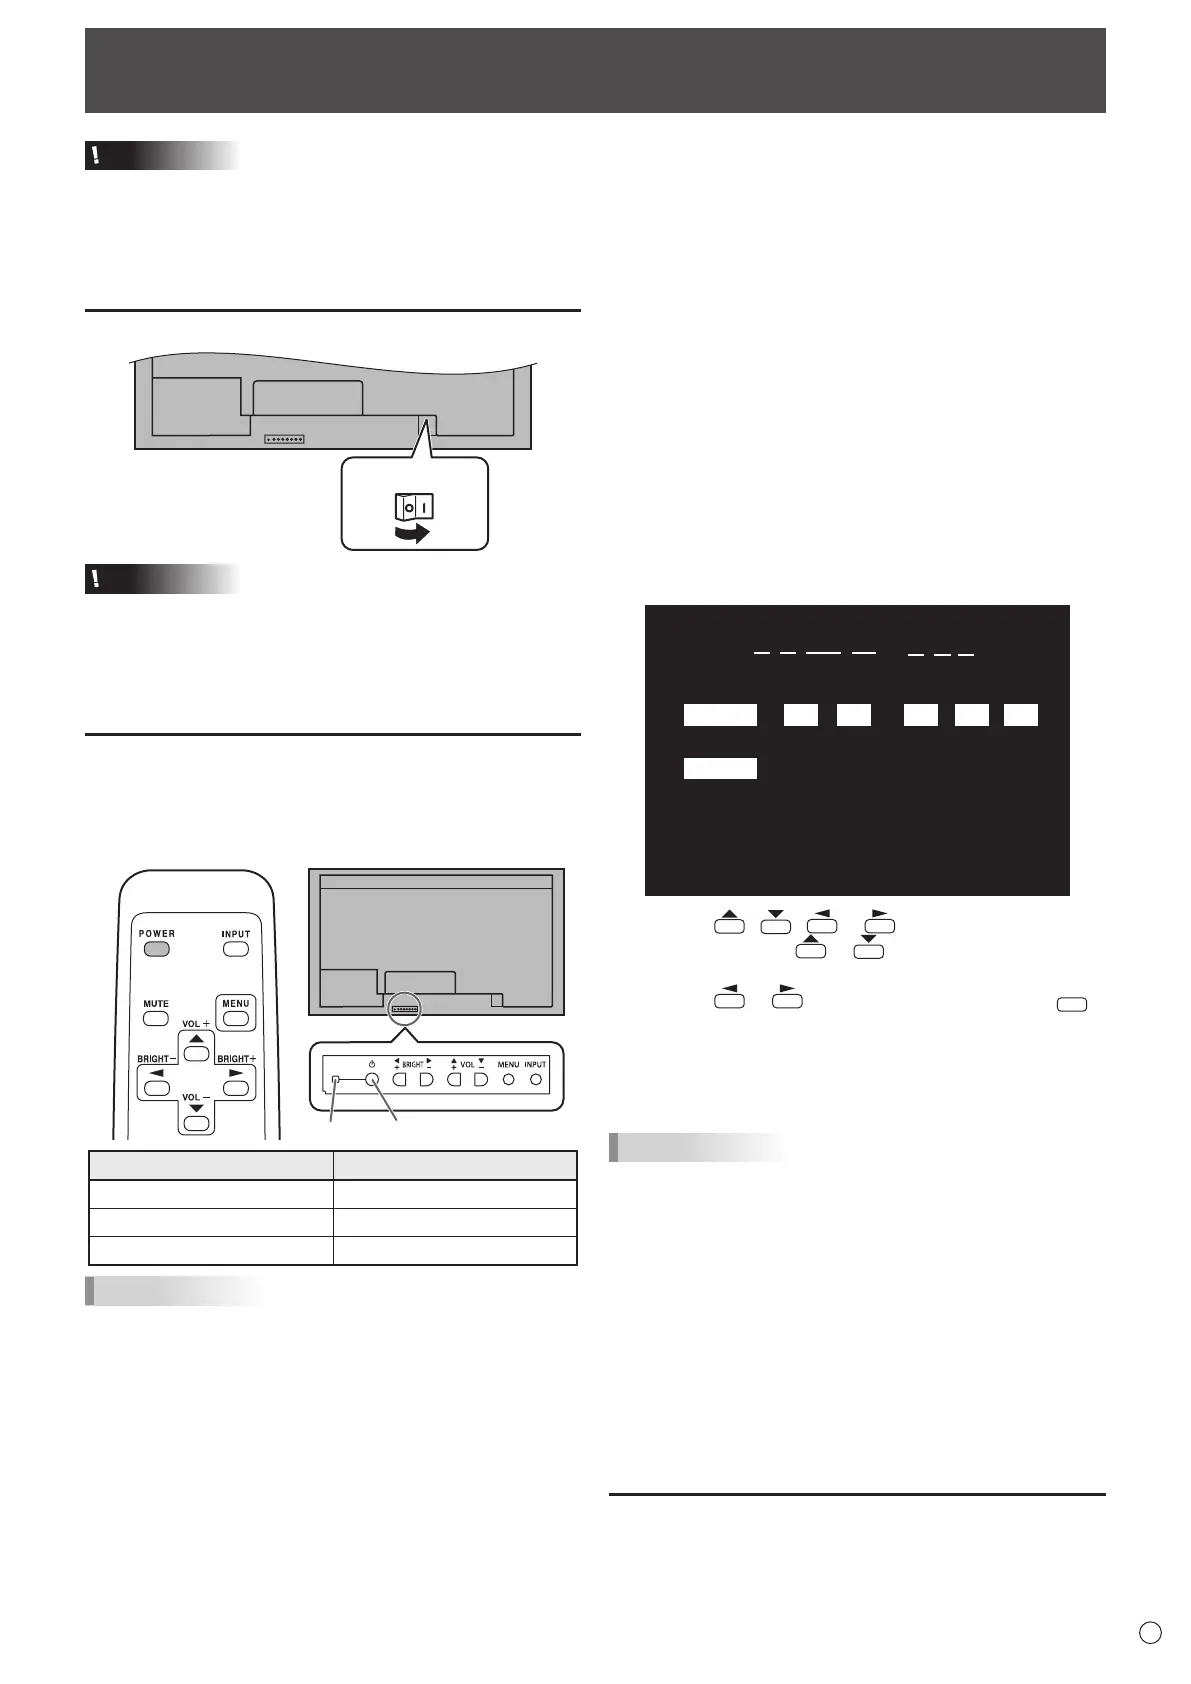
Date/time setting
•
Ifthetimehasyettobesetwhenthemonitorisrstturnedon,
the date/time setting screen appears. Set the date and time.
DATE/TIME SETTING
SET
CANCEL
//
OK···[MENU]
: :
01 01 11
/
00 00
:/ 20
1. Press , , or to select the date and
time, and press
or to change the numerical
values.
2. Press
or toselectSETandthenpress
.
• Besuretosetthedateandtime.
•
The date/time setting screen will close automatically if no
operationisperformedforabout15seconds.Thedate
andtimecanbesetusingDATE/TIMESETTINGfromthe
OPTION menu when the date/time setting screen disappears.
TIPS
•
Setthedatein“Day/Month/Year”order.
•
Setthetimeona24-hourbasis.
•
The clock is maintained by the internal battery.
•
If you already set the time but the date/time setting
screen appears when the power is turned on, the
internal battery may be exhausted. Please contact
your local Sharp servicing dealer or service center for
assistance with battery replacement.
•
Estimatedservicelifeoftheinternalbattery:About5
years (depending on monitor operation)
•
The initial battery was inserted at the factory when the
monitor was shipped, so it may run out of power before
its expected operation life.
Disabling power on/off operations
Power on/power off operations can be disabled in order to protect
themonitorfromanaccidentalpoweroff.SettheADJUSTMENT
LOCKinFUNCTIONmenuto“ON2”.(Seepage31.)