PREPARATIONS
[El
10
Setting Details of operation Buttons on the Remote
procedure Control
Step
E) Setting of either "24H" or "12H"
Example: 12-hour AM/PM dispiay
--7
1 (12H) button
24-hour display
--72 (24H) button
Steps
@ Inputting numerals
to
fI
Example:
Set
the
present
time
to
--7
"1", "0", "2", and "8"
10:28
Example: Set the date to August 5th.
--7
"5", "0", and "8"
Note:
When
the
minute
(Step
(il),
month (Step
@),
or year (Step fj) has
only one digit, put a
0 in front of the
number when you input it.
Example: Set the year to '94.
--7
"9", "4"
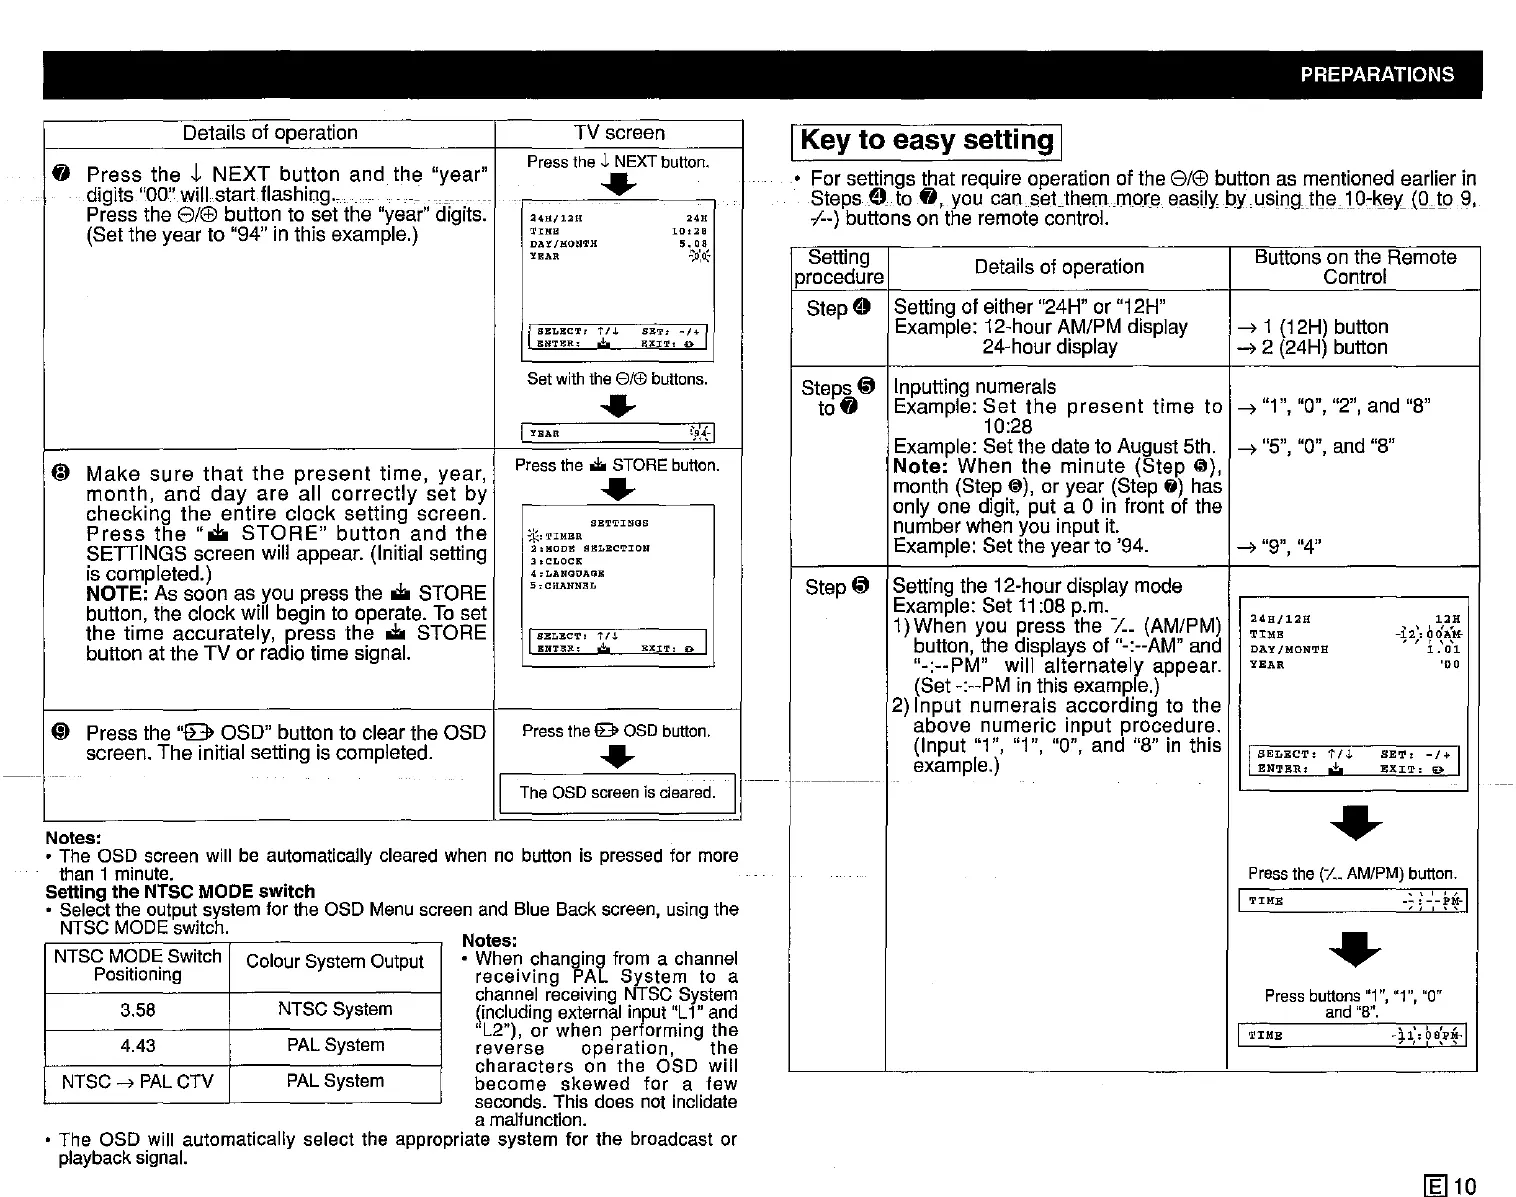
Step
@ Setting the 12-hour display mode
Example: Set
11
:08 p.m.
1)When you press the
/.._ (AM/PM)
~~:~12H
-12"
b~}::'
button, the displays of "-:--AM" and
DAY
/.ONTH
• ,
1.'0\
"-:--PM"
will
alternately
appear.
YNAR
'00
(Set -:--PM in this example.)
2)
Input
numerais
according
to the
above
numeric
input
procedure.
(Input "1", "1", "0", and "8" in this I
SELECT:
1'/,l.
SET:
-/+
I
example.)
ENTER;':'
EXIT:
9
.-----1-
•
Press
the
(1._
AM/PM)
button.
1 ' " " 1
TIME
--:--PM-
'J
, "
•
Pressbuttons"1","1", "0"
and
"8".
1
'''''I
TIME
~J.l:0BPM-
, , , , ,
IKey
to
easy setting I
• For settings that require operation of the
8/®
button as mentioned earlier in
StepsE)to
fI,
you
can.sat.themmora
easily
byusingtOe10,liedQJp9,
,1--)
buttons on the remote control.
Notes:
• The OSD
screen
will be automatically
cleared
when
no button is
pressed
for more
than t minute.
Setting the NTSC
MODE switch
• Selectthe outputsystem for the OSD
Menu
screen
and Blue Back
screen,
usingthe
NTSC
MODE
switch. N
otes:
• When changing from a
channel
receiving PAL System to a
channei
receiving NTSC
System
(including external input"L1" and
"L2"). or when performing the
reverse operation, the
characters
on the OSD will
become skewed for a few
seconds.
This does not inclidate
a malfunction.
• The OSD will automatically select the appropriate system for the broadcast or
playback
signal.
NTSCMODESwitch
ColourSystemOutput
Positioning
3.58
NTSCSystem
4.43
PALSystem
NTSC
-->
PAL
CTV
PAL
System
Details of operation TV screen
fI
Press
the
J-
NEXT
button
and
the
"year"
Press
theJ, NEXT
button.
..
__
digits "00" wiil startflashlnq.,
_.
-
Press the
8/®
button to set the "year" digits.
24H/12H
""
(Set the year to "94" in this example.)
TrME
10,28
DA'l/gON'I'H
5.08
YEAR
.':'..0:'*
I
SELECT:
t/.L
SET:
~/"I
IUI'l'I!:R,
.t..
EXIT,
0
Set with the 8ft£) buttons.
..
I
YEAR
'~{·I
~
Make
sure
that
the
present
time,
year,
Press
the
... STORE
button.
month,
and
day
are
ail
correctly
set
by
..
checking
the
entire
clock
setting
screen.
SETTINGS
Press
the
".to
STORE"
button
and
the
*.,TIMBR
SETIINGS
screen will appear. (Initial setting
:I,HODE
SBLECTION
3.CLOCR
is compieted.)
',LANGOAGB
NOTE: As soon as you press the
.to
STORE
5:CHANNllL
button, the clock will begin to operate. To set
the
time
accurately,
gress
the
.to
STORE
I
SELECT'
t n.
EXIT,
Iil> I
button at the TV or ra io time signal.
BNT!UI.:
.;.
(;)
Press the
"8
OSD" button to clear the OSD
Press
thee OSD
button.
screen.
The
initial setting is compieted.
..
'
..
I I
The asoscreen is cleared.
 Loading...