31
If problems persist contact the SHARP Helpline on tel: 0990-274277
CUSTOMISED INSTALLATION
MANUALLY SETTING THE CLOCK
This procedure will allow you to set the clock manually.
1. Press MENU.
2. Press the [ / ] menu select buttons to
select SET UP. Press
SET to confirm.
3. Press [ / ] to select CLOCK. Press SET to
confirm.
4. Press [ / ] to select either 12 or 24 hour
clock.
5. Press [/] to select TIME. Enter the time
using the
NUMBER BUTTONS or
[ / ]. If the minutes or hours are less than
10, enter the leading 0. If using the 12 hour clock
enter AM or PM by pressing on the remote
control.
6. Press [/] to select DATE. Enter the date
using the
NUMBER BUTTONS or the
[ / ]. For example, for 1st April
enter
01 04.
7. Press [/] to select YEAR. Enter the last two
digits of the year using the
NUMBER
BUTTONS or [ / ]. For example, for
2000 enter
00. For the year 2001 enter 01.
NOTE:
• You will need to update the clock for Winter/Summer daylight saving.
SET UP
CHANNEL PRESET
CHANNEL SORT
CLOCK
: SELECT : CHANGE
SET : ENTER MENU : EX I T
CLOCK
MODE T I ME DATE YEAR
24H 0:00 01/04 00
MODE : 2 4H / 12H
: SELECT : CHANGE
SET : ENTER MENU : EX I T
AM/PM
MENU SET
CLEAR
DISPLAY
PLUSCODE
MODE OSD
TIMER
ON/OFF
AUDIO
OUT
SKIP
SEARCH
ZERO
BACK
231
4
5
6
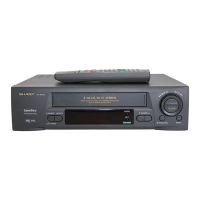
Remote Control
Menu select buttons
➘
TINS-3776 ENGLISH.book Page 31 Thursday, May 25, 2000 4:18 PM