Preparation
Setting the Date and Time
Example:
Setting the date to 2 June 1998 (2. 6.1998) and
the time to IO:30 am (10:30).
Notes:
l Check that the memory backup lithium battery has
been installed before setting the date and time.
l The date and time, once set, are stored in memory.
1
2
3
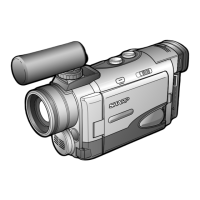
Power switch
I
MODE DISPLAY button
MENU button
Hold down the Lock
Lot k button
button and slide the
r-l-7
OFF
VCR
Power switch to
‘I’
CAMERA.
Press the MENU button until W
appears on the monitor.
bDATE/TIME
:~:fi;~;'
OFF
DATE+TIME
FSETTING
l 12H/24H
24H
l 16:9
OFF
*ZOOM SPEED STANDARD
mm
v 1 * 1 SET %;I
Press the v or * button to move the b
pointers to “DATE/TIME” and “SETTING”
(‘iJ, then press the SET button (m)
( )
‘S .
l When the
memory backup
is not operating,
e.g. when the
VIEWCAM is first
received from
the factory, the
pointers auto-
matically point at
these items.
bDATE/TIME
.DISPLAY
OFF
@SELECT
bSETTING
iJAJE+TIME
;;,-9p997
l 12Hl24H
24ii
l 16:9
OFF
*ZOOM SPEED STANDARD
pars,
v 1 * 1 SET i,':i;l
4 Press the v or * button to select “2.”
(day), and press the SET button.
HETTING
2.hFi997
o:[ro.
5
Press the v or * button to select “6.”
(month), and press the SET button.
FSETTING
,\ L I,
; . o;.;1/9;97-
.
1’
.
6 Press the v or A button to select
“1998” (year), and press the SET button.
)SETTING
,2, 6. 1998
-$oo
7 Press the v or * button to select “10”
(hour), and press the SET button.
FSETTING
2.,. t6, 1998
10 :;oo-
8 Press the v or * button to select “30"
(minutes), and press the SET button.
bSETTING
2. 6.1998
10:30
9 The date and time settings are now
complete.
Changing to the 12 hour-time mode
After performing step 8 above, press the v or
A button to move the b pointers to “DATE/
TIME” and “12H/24H” ( < ), and then press the
SET button (m) ( 2‘ ) to select “12H”.
bDATE/TIME
.OISPLAY
OFF
*SELECT
DATE+TIME
*SETTING
2. 6.1998
lo:30 AM
b12H/24H
12H
.16:9
OFF
*ZOOM SPEED STANDARD
To turn off the menu display
Press the MODE DISPLAY button.
Note:
l The internal clock starts operating when the SET
button is pressed in step 8 above.