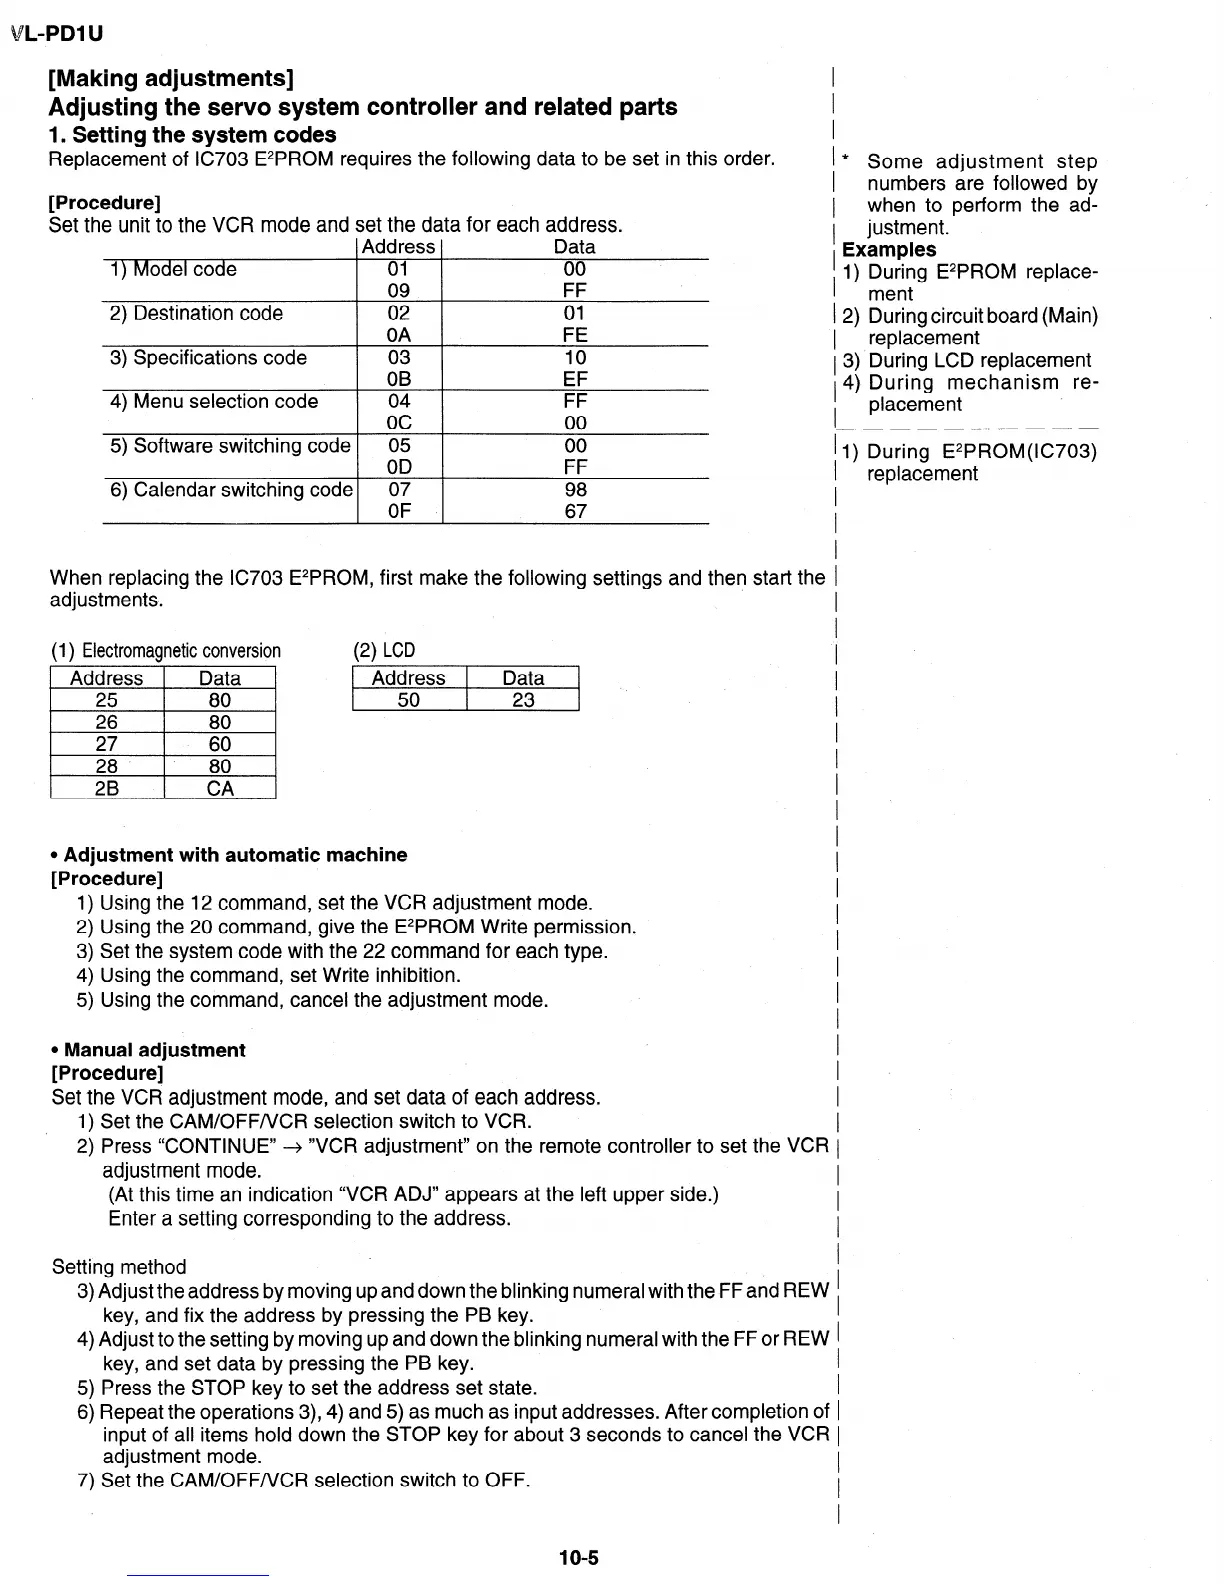
L-PDl U
[Making adjustments]
I
Adjusting the servo system controller and related parts
I
1. Setting the system codes
I
Replacement of IC703 E2PROM requires the following data to be set in this order. I
* Some adjustment step
[Procedure]
Set the unit to the VCR mode and set the data for each address.
Address
Data
1) Model code 01 00
09 FF
2) Destination code
3) Specifications code
4) Menu selection code
02 01
OA FE
03 10
OB EF
04 FF
oc 00
5) Software switching code 05 00
OD FF
6) Calendar switching code 07 98
OF 67
I
numbers are followed by
I
when to perform the ad-
1 justment.
I Examples
I
1) During E2PROM replace-
ment
1 2) During circuit board (Main)
I
replacement
1 3) During LCD replacement
I 4) During mechanism re-
I
placement
-_---------
II) During E2PROM(IC703)
I replacement
When replacing the IC7O3 E2PROM, first make the following settings and then start the I
adjustments.
I
(1) Electromagnetic conversion (2) LCD
I
Address
Data
I 25 26 27 28 80 80 60 80
’
Address Data
I
50 23 I I I
2B
CA
I
I
I
l Adjustment with automatic machine
[Procedure]
I
1) Using the 12 command, set the VCR adjustment mode.
I
2) Using the 20 command, give the E2PROM Write permission.
I
3) Set the system code with the 22 command for each type.
I
4) Using the command, set Write inhibition.
I
5) Using the command, cancel the adjustment mode.
I
I
l Manual adjustment
I
[Procedure]
I
Set the VCR adjustment mode, and set data of each address.
I
1) Set the CAM/OFF/VCR selection switch to VCR.
I
2) Press ‘CONTINUE” ---+ “VCR adjustment” on the remote controller to set the VCR I
adjustment mode.
I
(At this time an indication “VCR ADJ” appears at the left upper side.)
Enter a setting corresponding to the address.
I
I
Setting method
I
3) Adjust the address by moving up and down the blinking numeral with the FF and REW
I
key, and fix the address by pressing the PB key.
I
4) Adjust to the setting by moving up and down the blinking numeral with the FF or REW 1
key, and set data by pressing the PB key.
I
5) Press the STOP key to set the address set state.
I
6) Repeat the operations 3), 4) and 5) as much as input addresses. After completion of I
input of all items hold down the STOP key for about 3 seconds to cancel the VCR I
adjustment mode.
7) Set the CAM/OFF/VCR selection switch to OFF.
1 o-5
 Loading...