Do you have a question about the Sharp VL-E41X and is the answer not in the manual?
Variable-angle shooting, 8x zoom, and Scene Menu AE for versatile recording.
Cat's Eye illumination, Neuro Auto Exposure, and Digital White Balance for better low-light performance.
On-screen menus, remote control, and editing features for ease of use.
Supports AC, battery pack, and optional car battery for flexible operation.
Explains dew formation, its causes, prevention, and the camera's warning feature.
Covers temperature, humidity, magnetic sources, and avoiding contaminants like dust and smoke.
Advises on avoiding shocks, dropping, and removing the battery pack when not in use.
Warns against sun exposure to the lens and handling the LCD monitor screen.
Recommends using stable tripods for secure mounting of the VIEWCAM.
Instructions for cleaning the camcorder casing, LCD monitor, and lens.
Discusses battery usage, extending life, and handling tips.
Details the process for charging battery packs and performing a refresh cycle.
Explains using battery markers and temperature considerations for charging.
How to protect recordings from erasure and notes on tape storage.
Details AC power compatibility and optional car adapter for global use.
Explains PAL system compatibility for TV playback in foreign countries.
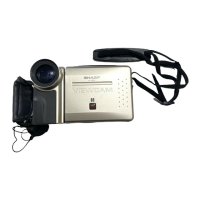
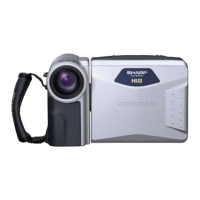
Identifies and labels external parts visible from the front of the VIEWCAM.
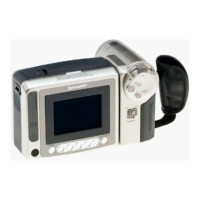
Illustrates and labels parts visible from the side, including the rotating camera module.
Identifies and labels components visible from the top of the VIEWCAM.
Shows and labels components located inside the cassette compartment door.
Details the operate switch, record, pause buttons, and other controls on the rear.
Identifies the audio/video input/output and earphone jacks.
Details the plug-in power MIC jack, its voltage, and compatible microphones.
Labels and identifies parts visible from the bottom of the VIEWCAM, including the tripod socket.
Explains the buttons and operational notes for the infrared remote control.
Important notes regarding remote control menu settings and usage limitations.
Details the arrangement and types of indicators on the LCD monitor screen.
Explains indicators for recording mode, edit/auto functions, and tape counter.
Covers indicators for battery, tape, dew, lamp, and other operational warnings.
Step-by-step guide for installing the lithium battery for calendar and memory functions.
Instructions for inserting the battery into the infrared remote control.
Details the process of charging the battery pack using the AC adaptor.
Explains how and when to perform battery pack refreshing for optimal performance.
Step-by-step instructions for powering the VIEWCAM using the AC adaptor.
Guide for using the optional car battery adaptor to power and charge the VIEWCAM.
Instructions for attaching and removing the battery pack from the VIEWCAM.
Provides advice on handling battery packs for optimal performance and safety during use.
Step-by-step guide for inserting video cassettes into the VIEWCAM.
Instructions for removing video cassettes from the VIEWCAM.
Important precautions to avoid damage during cassette insertion or removal.
How to navigate menus and adjust day, month, year, hour, and minute values.
Explains how the date/time data is displayed and recorded along with the subject.
How to adjust brightness and colour for the picture display.
Instructions for adjusting playback volume and screen backlight.
Instructions for fitting and using the hand strap for secure handling of the VIEWCAM.
Precautions for handling and cleaning the LCD monitor screen to prevent damage.
Introduces camera recording and the benefit of the LCD monitor for shooting.
Step-by-step guide for simple recording using the camera's full auto mode.
Explains how to pause recording and enter Recording Standby mode.
Details how to use the zoom function to approach or move away from subjects.
Instructions for choosing between normal and slow zoom speeds for recording.
Explains how to quickly return to the end of the last recorded scene on the tape.
Details how to search for specific tape points for editing without switching modes.
How to use buttons like MODE DISPLAY, FOCUS, and SCENE MENU to enable auto settings.
Provides advice on comfortable and stable camera handling for recording.
Details how to hold the VIEWCAM and position your hands for stable shooting.
Offers tips on framing shots, using tripods, and panning for improved video quality.
How to choose between AUTO, ON, or OFF for date/time display.
How to choose between recording DATE+TIME or DATE only.
Explains how the remaining tape time is displayed on the monitor during recording.
Guide on how to turn off the LCD backlight to conserve battery power.
Introduces the playback function using the LCD monitor and built-in speaker.
Instructions for adjusting the volume level for playback audio.
Explains how to search for specific scenes during playback.
Details how to freeze a picture during playback for closer examination.
Explains the tape counter display showing elapsed recording time.
Guide on how to use the counter for easy replay of recorded scenes.
Instructions on how to reset the tape counter to zero.
Explains how to use the counter memory to return to specific scenes.
Details how to turn off the counter memory mode.
Guide on operating the VIEWCAM using the infrared remote control.
Instructions for deploying and using the built-in stand for stable positioning.
How to set the "SELF REC" menu item to "AUTO CORRECT" and rotate the monitor.
Explains how the auto focus feature works and when to keep the subject centred.
Instructions on switching to and using manual focus for precise focusing.
Guide on returning the focus function to automatic mode.
Details how to select scene settings for optimal automatic recording.
Instructions for returning the camera to the default auto mode from scene settings.
Explains how to use BLC to improve image quality in backlit situations.
Details the gain-up function for brighter pictures in low-light conditions.
Instructions for shooting close-up images of small objects.
Explains how to activate the 16:9 widescreen aspect ratio for a cinematic look.
Discusses lux levels required for good recording and lighting's role in white balance.
Explains the "LIGHT" indicator and its meaning for low illumination.
Step-by-step guide for connecting the VIEWCAM to a TV for playback.
Instructions for connecting the VIEWCAM to a TV through a VCR.
Explains the automatic switching of the audio/video jack's input/output mode.
Instructions for attaching and detaching the AV pack from the VIEWCAM.
Explains the function of the MONITOR IN jack on the AV pack for external video input.
Details connecting the antenna cable and coaxial cable to the RF converter and TV.
Step-by-step guide for removing unwanted segments from video tapes.
Instructions on how to properly stop the editing process.
How to set the operate switch and start recording from an external source.
Explains how to stop the recording process from an external source.
Detailed instructions for replacing the fluorescent lamp unit.
Solutions for problems related to power, recording, and picture quality.
Troubleshooting steps for playback problems and non-functional remote control.
Lists the technical specifications of the VIEWCAM, including signal system, dimensions, and power requirements.
Lists the accessories that are supplied with the VIEWCAM.
| Type | Camcorder |
|---|---|
| Focus Adjustment | Auto / Manual |
| Image Sensor | CCD |
| LCD Screen Size | 2.5 inches |
| Input/Output Ports | AV output |
| Connector Type | AV output |