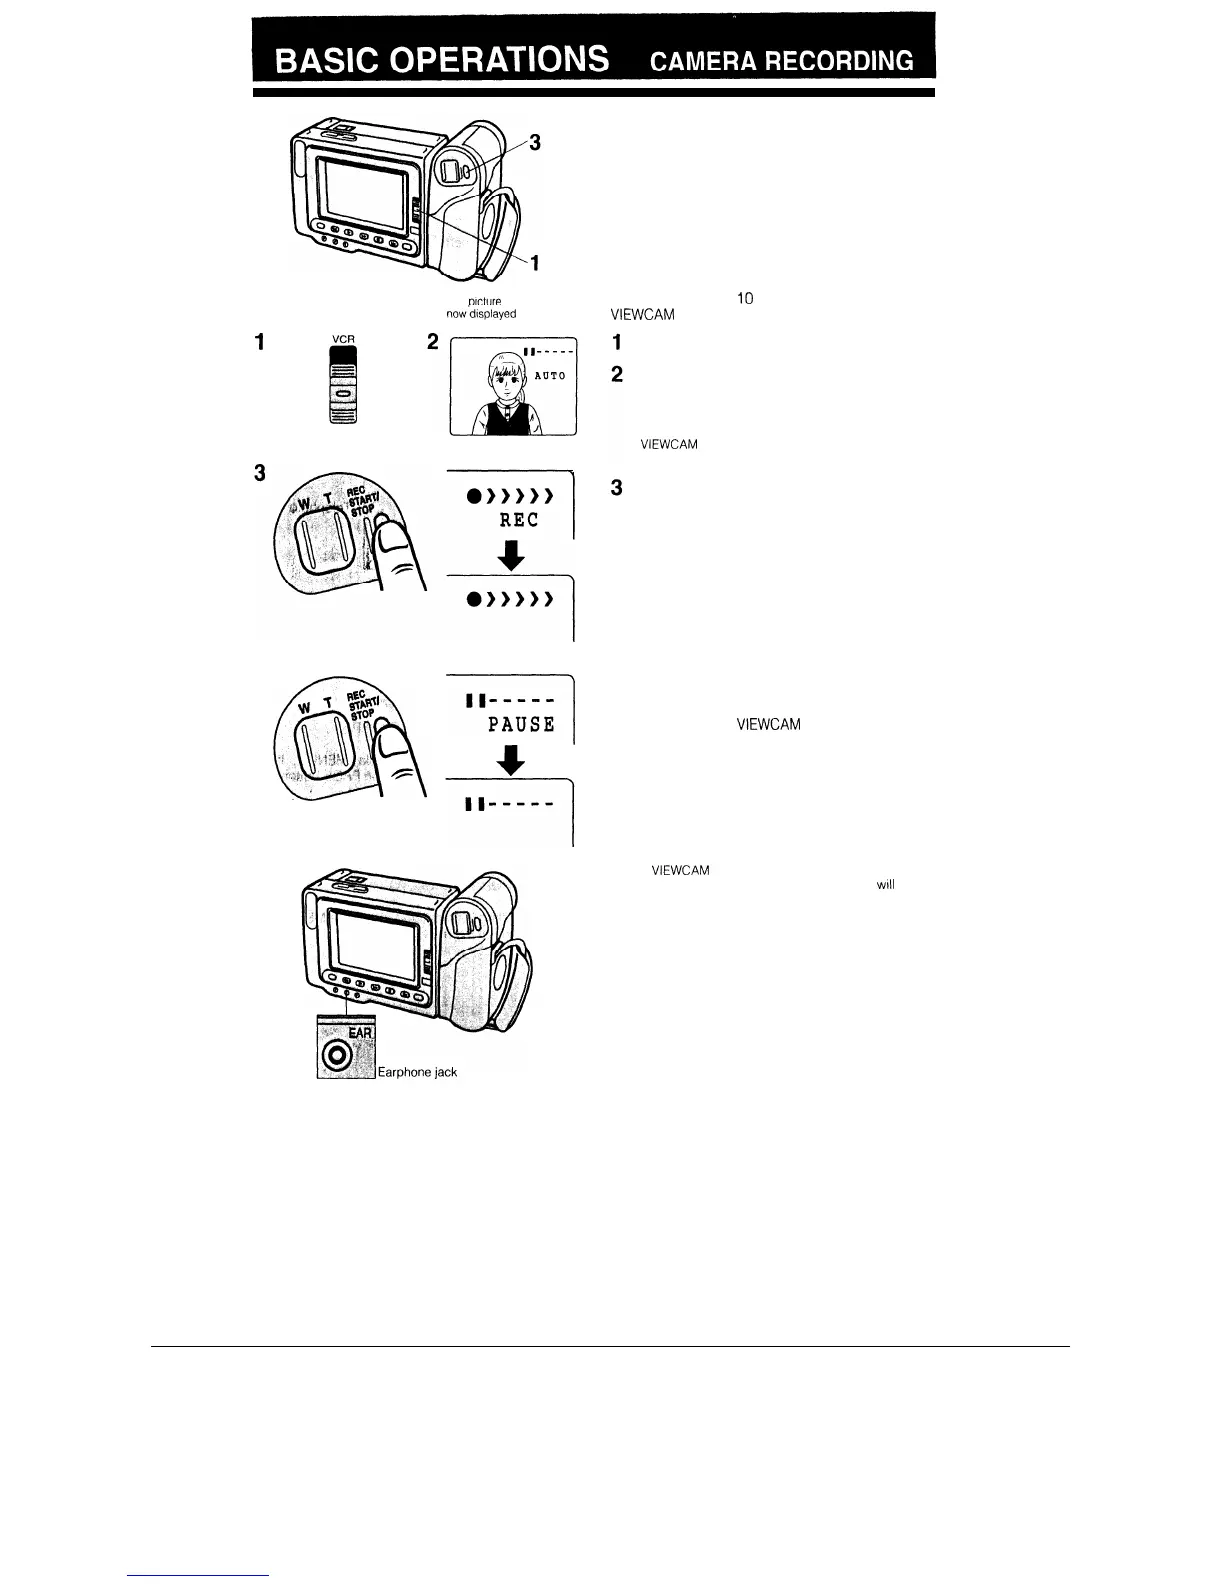
1
OFF:
.
1
CAMERA
The Picture from the lens
IS
now’displayed
on the LCD
monitor
((,,---
-1
PAUSE
+
Unlike conventional camcorders, this model frees
you from having to peer into a small viewfinder. You
can watch the subject on the large LCD monitor
screen for easier, more enjoyable video-shooting.
EASY CAMERA RECORDING
WITH FULL AUTO
Before you start recording, perform the operations
described on pages
IO
through 17 to prepare your
VIEWCAM
for recording.
Set the Operate switch to CAMERA.
Make sure that the Full Auto mode indicator
“AUTO” is displayed on the monitor screen.
Note:
l If, at this time, “AUTO” does not appear, set the
VIEWCAM
to Full Auto mode by following the proce-
dure described on page 21.
Press the REC START/STOP button to start re-
cording.
TO PAUSE RECORDING
Press the REC START/STOP button again. Record-
ing pauses, and the
VIEWCAM
is engaged in Re-
cording Standby mode.
Notes:
l To leave Camera mode, set the Operate switch to OFF.
l The speaker is turned off during recording. To monitor
the sound from the microphone during recording, plug a
monaural earphone into the EAR jack. You can adjust the
volume by following the procedure described on page
16.
l If the
VIEWCAM
IS kept in Recording Standby mode for
more than approximately 5 minutes, the power
WIII
be
automatically turned off to save battery power and to pro-
tect the tape from being damaged. To continue record-
ing after this, set the Operate switch to OFF, and then
back to CAMERA again.
l If you will not be recording again for a while, turn off the
power by sliding the Operate switch to OFF. This will
make the battery last longer.
18