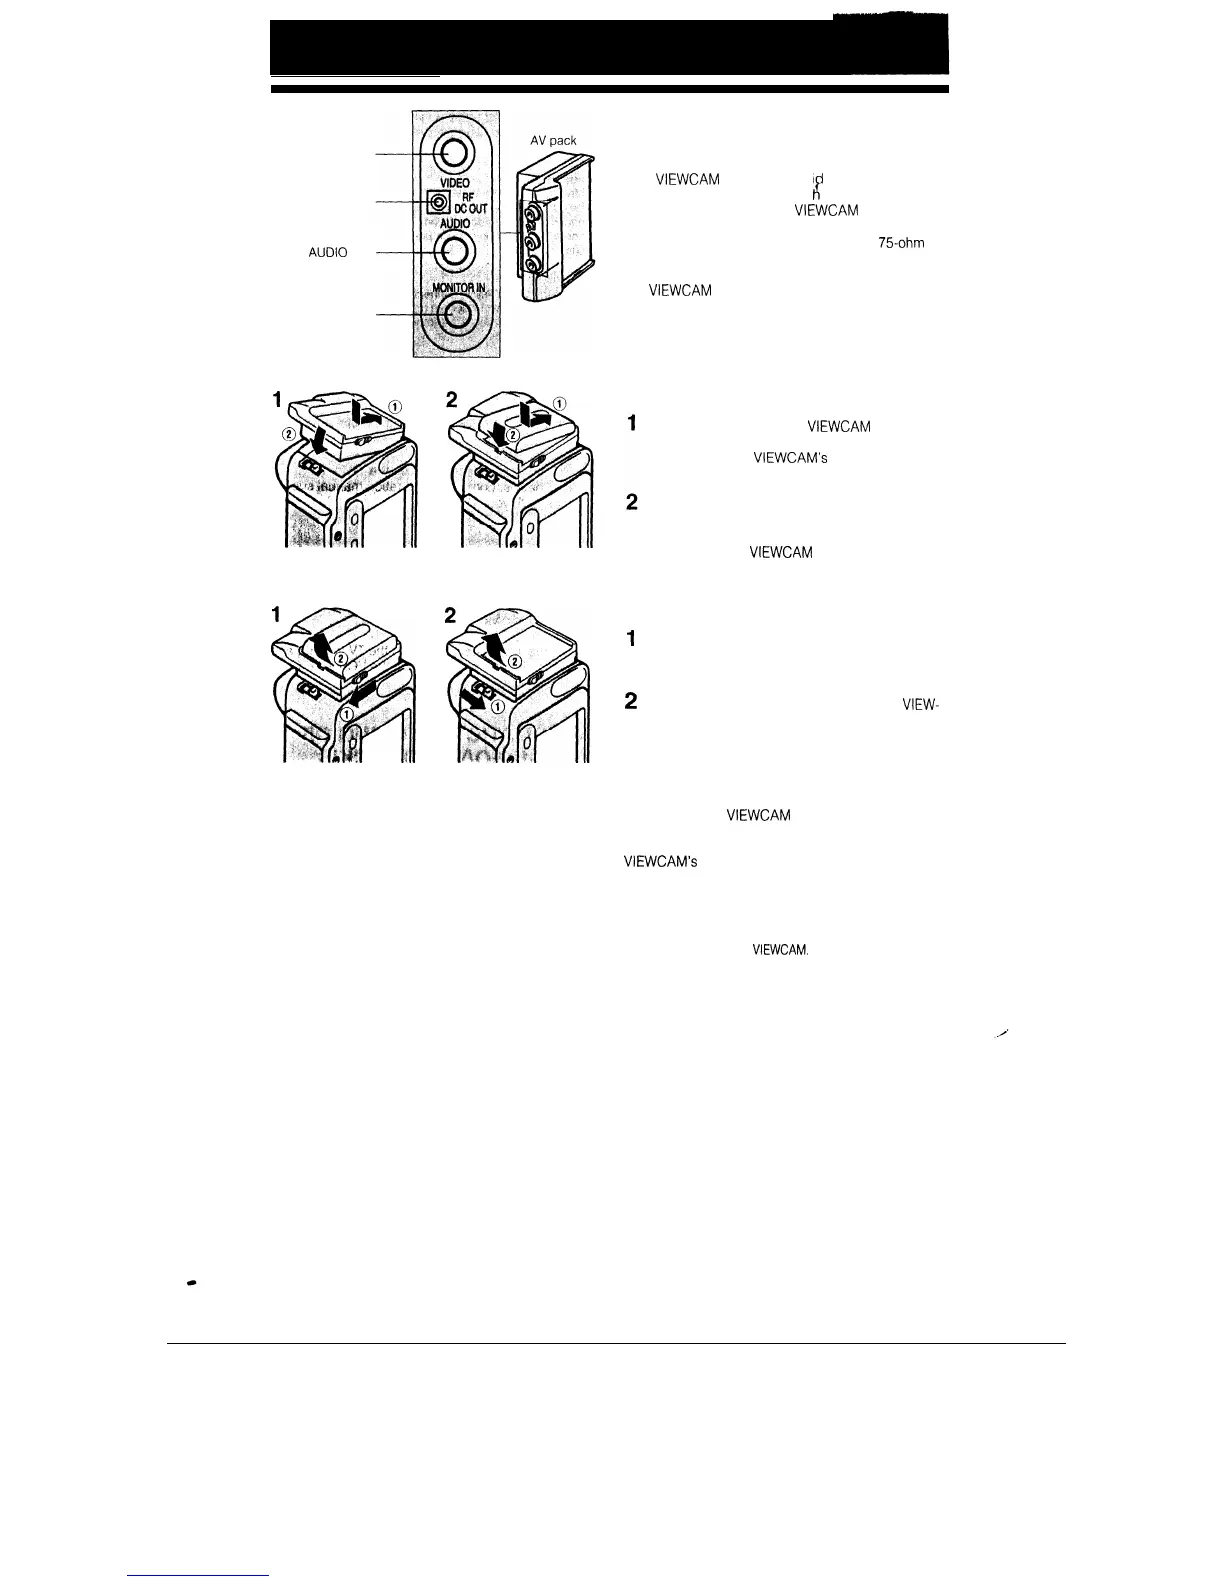
VIDEO jack
RF DC OUT jack
AUDIO
jack
MONITOR IN jack
USING THE AV PACK
(OPTIONAL ACCESSORY)
This
VIEWCAM
has an audio/vi
eo jack (AUDIO/
VIDEO jack) for connection wit
8
other audio/video
equipment. To connect the
VIEWCAM
to a TV which
does not have audio/video jacks, you must use the
AV pack as well as the RF converter and 75ohm co-
axial cable, available as optional accessories (see
page 38). The AV pack can also be used to connect
the
VIEWCAM
to a VCR for editing or to a TV with
audio/video jacks.
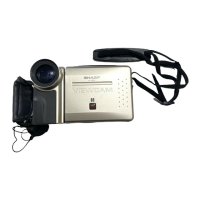
ATTACHING THE AV PACK
Install the AV pack on the
VIEWCAM
where the
battery pack normally mounts. Push the AV pack
firmly against the
VIEWCAM’s
battery mounting
plate until it clicks into place.
Mount a battery pack (or the connecting plate
from the adaptor/battery charger) on the AV
pack in the same way that you mounted the bat-
tery pack on the
VIEWCAM
(see page 13).
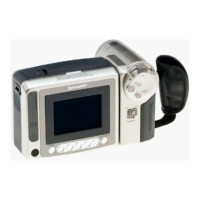
DETACHING THE AV PACK
1
Slide the BATT. EJECT release on the AV pack
and remove the battery pack (or the connecting
plate from the adaptor/battery charger).
2
Slide the BATTERY EJECT release on the
VIEW-
CAM and remove the AV pack.
About the MONITOR IN jack
The MONITOR IN jack on the AV pack is used to
input video pictures from an external source. When
you connect the
VIEWCAM
to other video equipment
(for example, a video printer for prints of screen
images, etc.), you can check the video image on the
VIEWCAM’s
LCD screen. There is no need to con-
nect a TV or other external monitor.
Caution:
l
Do not leave a cable plugged into the MONITOR IN jack
when you watch played-back tapes on a TV or other mon-
itor connected to the
VIEWCAM.
Notes:
l
It
is not
possible to record video images from an external
source by using the MONITOR IN jack.
l
The video input through the MONITOR IN jack takes pri-
ority over played-back video and images from the lens.
Therefore, unplug the cable from the MONITOR IN jack
when it is not being used.
37