297
RECORDING THE DATE AND
MENU
DATE/TIME
*DISPLAY
OFF
l
SBLECT
DATE
FSBTTING
2. 6.1995
lo:30
AM
v
I A
IsET
I
IPAGE)
*DISPLAY OFF
*SELECT
DATE
7
MENU
1181’::.!
I
LDATE+TIME+DATE-l
2.
6.1995
LO:30
an
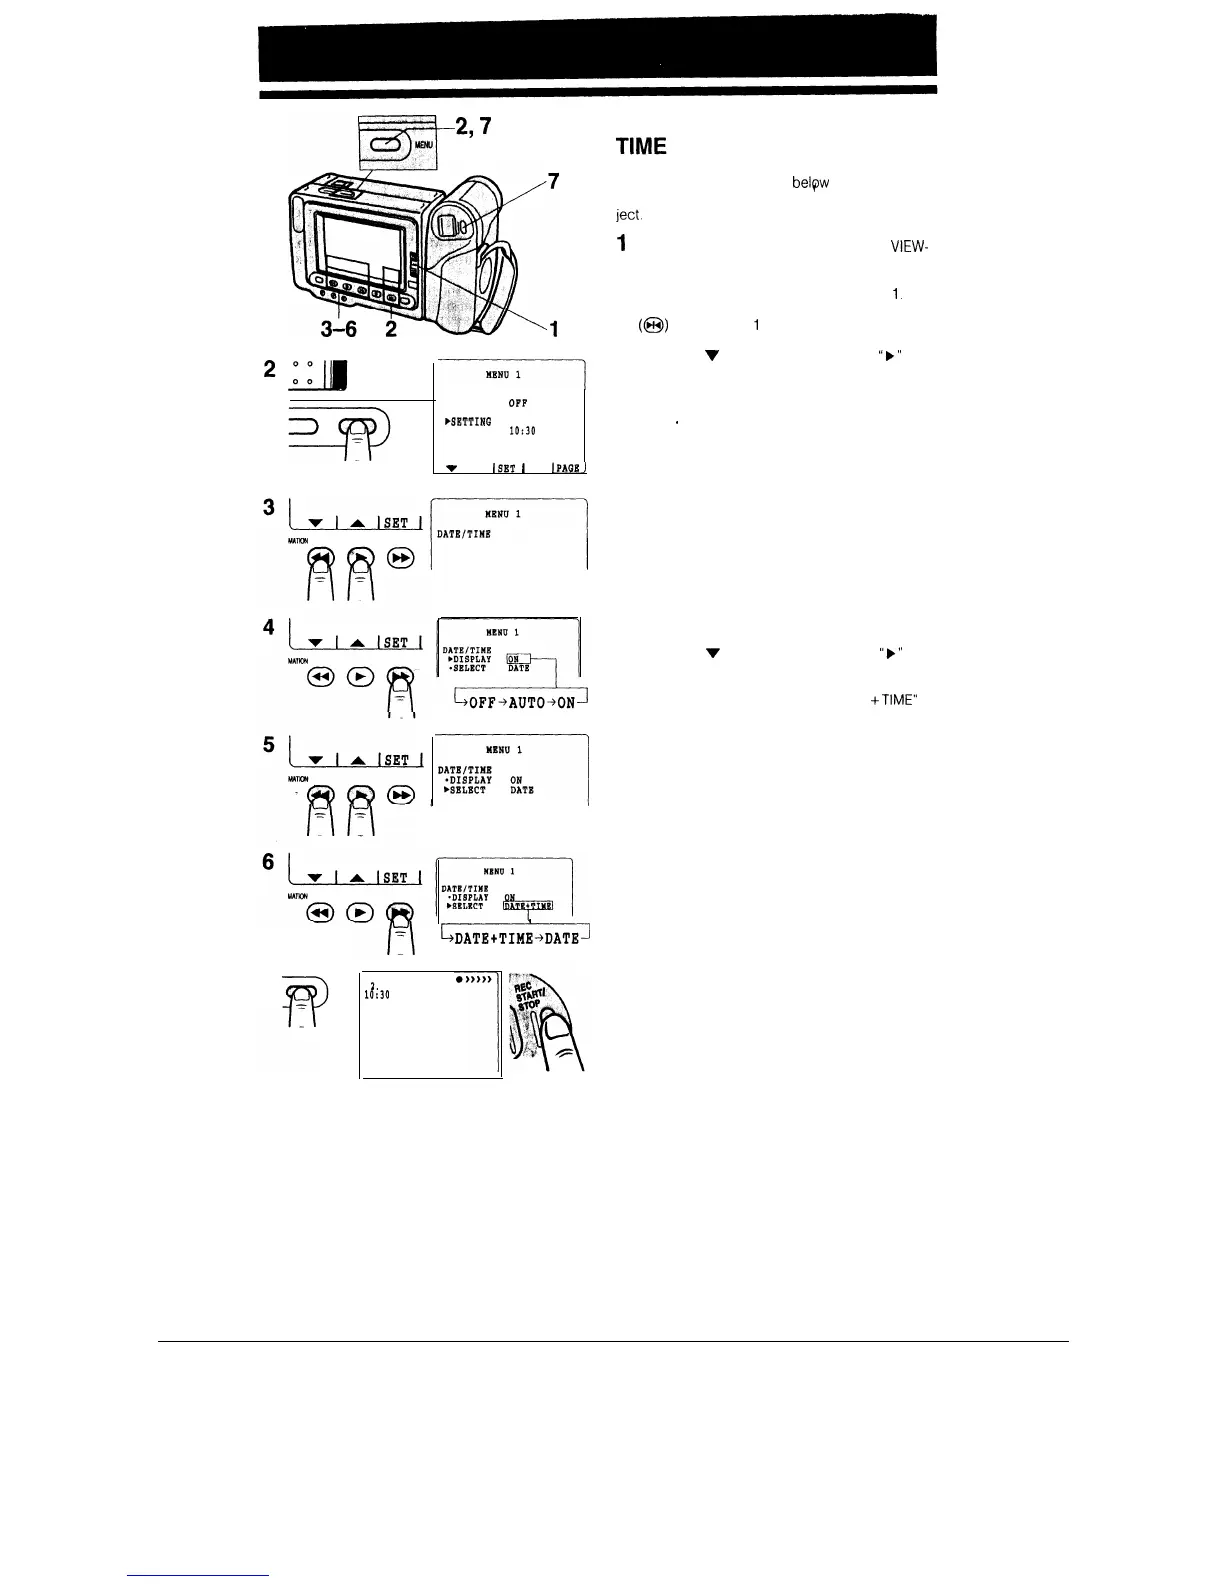
Follow the procedure shown
belpw
to record the
date and time, or the date only, along with the sub-
ject.
1
2
3
4
5
6
7
Set the Operate switch to CAMERA. The
VIEW-
CAM enters Recording Standby mode.
Press the MENU button to display MENU
1.
If MENU 2 is displayed, press the PAGE button
(@I) to get MENU
1
on the monitor.
Press the
v
or A button to move the
“k”
pointer to “DISPLAY”.
Press the SET button to select “AUTO”, “ON”, or
“OFF”
.
When “ON” is selected, the date/time is contin-
uously displayed and recorded along with the
subject.
When “AUTO” is selected, the date/time is dis-
played and recorded for 10 seconds at the be-
ginning of the first recording that day.
When “OFF” is selected, the date/time is nei-
ther displayed nor recorded.
Note:
l Select “AUTO” if continuous date/time display annoys
you during recording.
Press the
‘I
or A button to move the
“b”
pointer to “SELECT”.
Press the SET button to select “DATE +TIME” or
“DATE”. Both the date and the time are display-
ed and recorded when “DATE + TIME” is select-
ed; only the date is displayed and recorded
when “DATE” is selected.
Press the MENU button to turn off the menu dis-
play, and then press the REC START/STOP but-
ton to start recording.
23