TV
2
L
Yellow: To VIDEO IN jack
CI
White: To AUDIO IN (L) jack
I
1
Audio/video cable
(supplied accessory)
TV
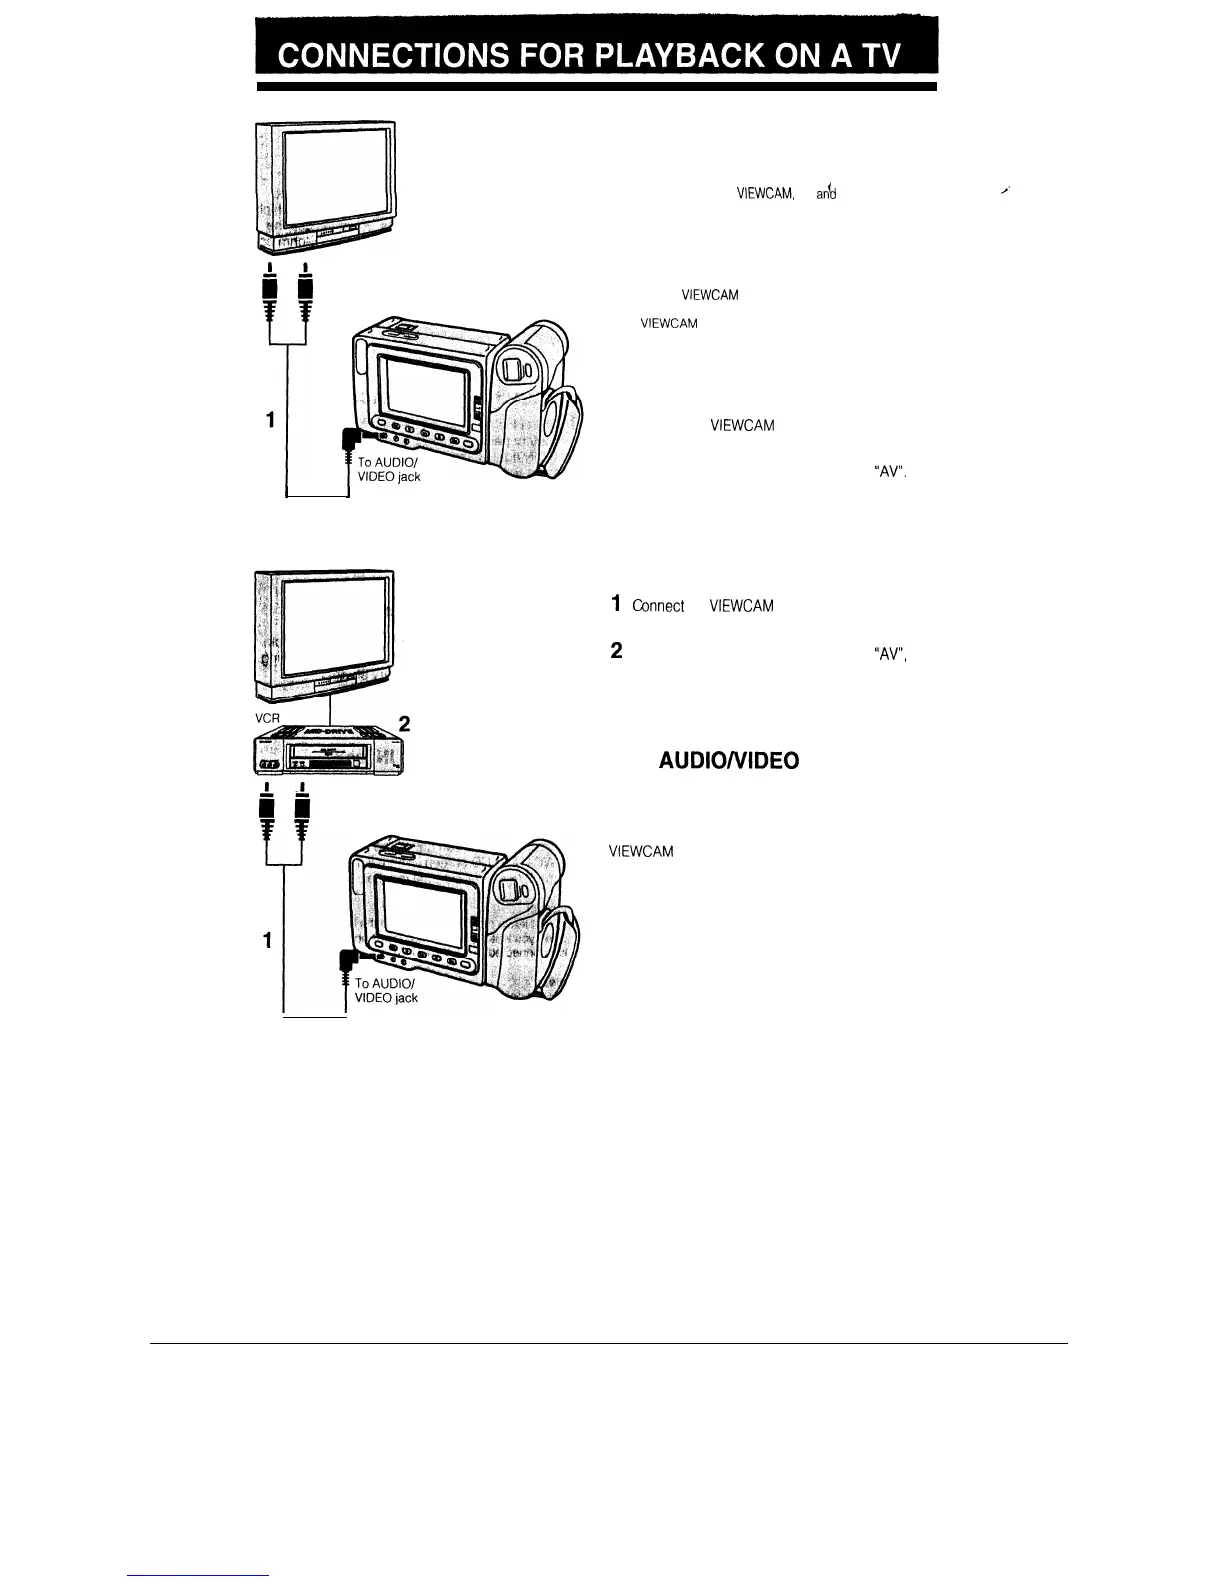
Although you can enjoy playback on the LCD moni-
tor, you can also watch played-back tapes on your
TV screen.
Caution:
l
Make sure that the
VIEWCAM,
TV
arfd
other equipment to
be connected have been turned off before you make con-
nections Making connections with any of the compo-
nents left turned on may cause picture noise or malfunc-
tion.
Note:
l When the
VIEWCAM
is connected to a TV for playback,
the picture on the TV screen may flicker if the volume on
the
VIEWCAM
is set to maximum. Should this occur, turn
the volume down.
CONNECTION TO TV
1
2
Connect the
VIEWCAM
to your TV with the sup-
plied audio/video cable, as shown.
Set the input select switch on the TV to
“AV”.
(For details, consult the operation manual sup-
plied with your TV.)
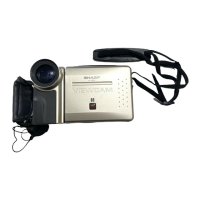
CONNECTION TO TV VIA VCR
1
c
onnect
the
VIEWCAM
to your VCR with the sup-
plied audio/video cable, as shown.
2
Set the input select switch on the TV to
“AV”,
and
set the input select switch on the VCR to “EX-
TERNAL SOURCE”.
.I
Yellow: To VIDEO IN jack
II
White: To AUDIO IN (L) jack
*
*
AUTOMATIC SWITCHING OF
THE
AUDIO/i/IDE0
JACK’S
INPUT/OUTPUT MODE
The AUDIO/VIDEO jack’s mode is normally set to
input. It automatically switches to output when the
VIEWCAM
is playing back.
Audio/video cable
(supplied accessory)
36