-21
Setting up the Projector Network Environment
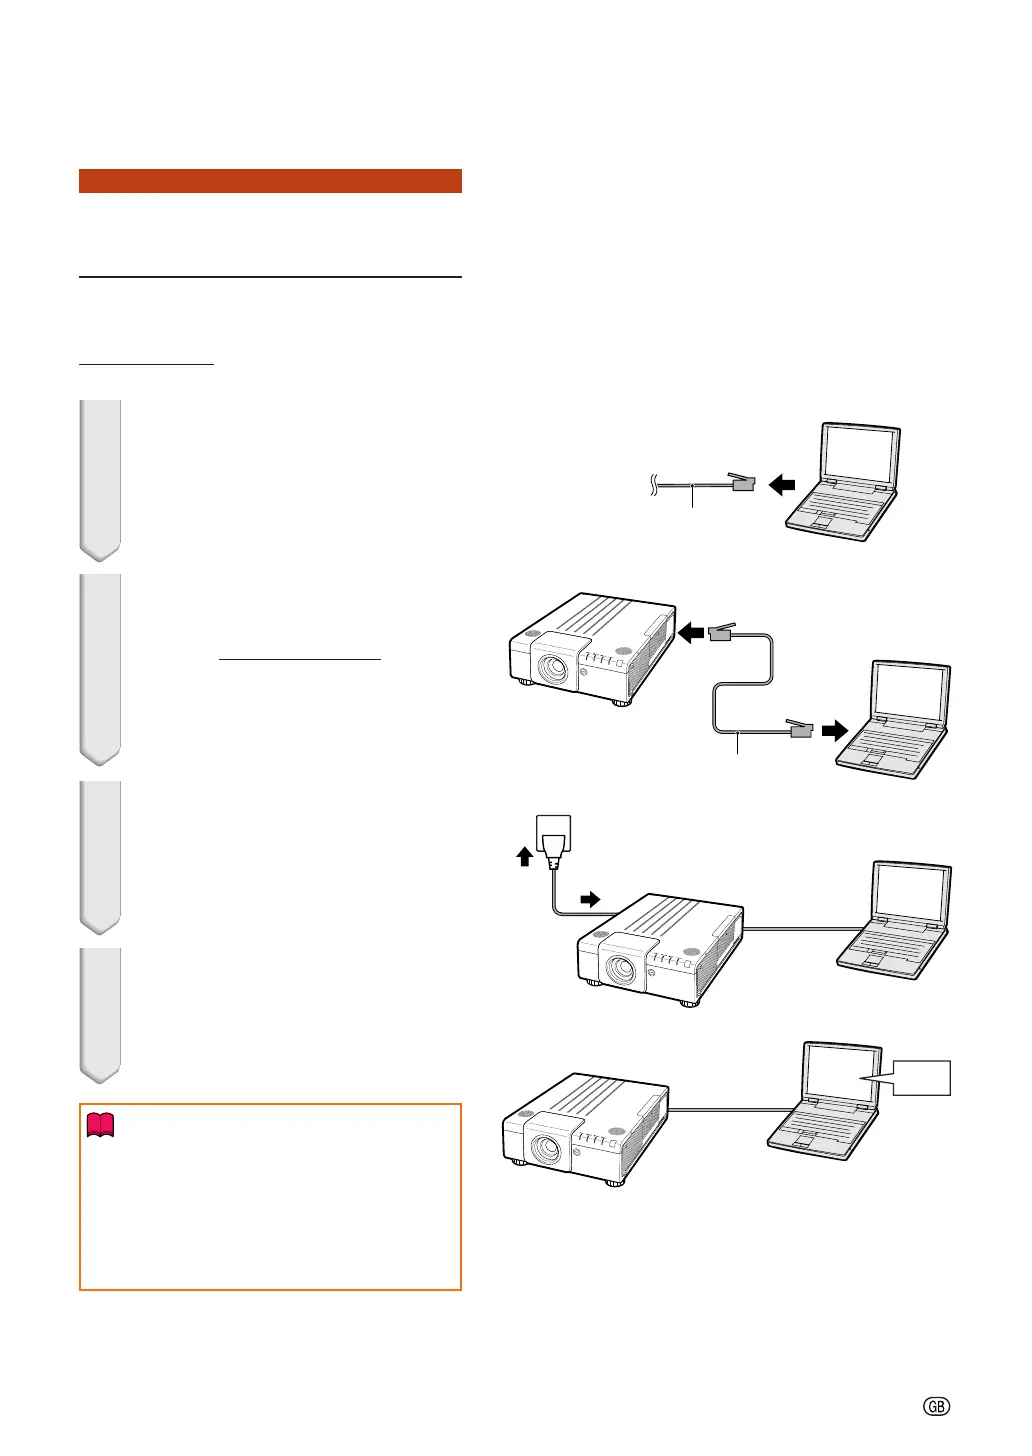
1. Connecting the Pro-
jector to a Computer
Establishing a one-to-one connection from the
projector to a computer. Using a commercially
available LAN cable (UTP cable, Category 5,
cross-over type) you can configure the pro-
jector via the computer.
1 Disconnect the computer’s LAN
cable from the existing network.
2 Connect a commercially avail-
able LAN cable (UTP cable, Cat-
egory 5,
cross-over type) to the
projector’s LAN terminal and
connect the other end of the
cable to the computer’s LAN ter-
minal.
3 Plug the power cord into the AC
socket of the projector.
4 Turn on the computer.
Info
Confirm that the LINK LED on the rear of the
projector illuminates. If the LINK LED does not
illuminate, check the following :
• The LAN cable is properly connected.
• The power switches of both the projector
and the computer are on.
LAN cable
ON
A LAN cable being
connected to the network
This completes the connection. Now proceed to “2. Setting an IP Address for the Com-
puter”.

 Loading...