9
5. The blue LED will be blinking in Mode 2 during the adding process.
6. The green LED will be blinking in Mode 1 if the Device is successfully added to a
Z-Wave® network.
*Learn mode - a state that allows the Device to receive network information from the gateway.
6.2 Removing the Device from a Z-Wave® network (exclusion)
Note! The Device will be removed from your Z-Wave® network, but any custom configuration
parameters will not be erased.
6.2.1. Removing (exclusion) with the S button
1. Connect the Device to a power supply.
2. Check if the green LED is blinking in Mode 1. If so, the Device is added to a Z-Wave®
network.
3. Enable add/remove mode on the gateway.
4. To enter the Setting mode, quickly press and hold the S button on the Device until the
LED turns solid blue.
5. Quickly release and then press and hold (> 2s) the S button on the Device until the blue
LED starts blinking in Mode 3. Releasing the S button will start the Learn mode.
6. The blue LED will be blinking in Mode 2 during the removing process.
7. The blue LED will be blinking in Mode 1 if the Device is successfully removed from a
Z-Wave® network.
Note! In Setting mode, the Device has a timeout of 10s before entering again into Normal mode.
6.2.2. Removing (exclusion) with switch/push-button
1. Connect the Device to a power supply.
2. Check if the green LED is blinking in Mode 1. If so, the Device is added to a Z-Wave®
network.
3. Enable add/remove mode on the gateway.
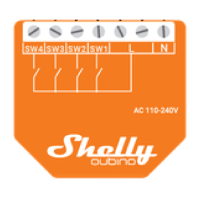
4. Toggle the switch/push-button connected to any of the SW terminals (SW, SW1, SW2,…)
3 times within 3 seconds (this procedure puts the Device in Learn mode). The Device
must receive on/off signal 3 times, which means pressing the momentary switch 3
times, or toggling the switch on and off 3 times.
5. The blue LED will be blinking in Mode 2 during the removing process.
6. The blue LED will be blinking in Mode 1 if the Device is successfully removed from a
Z-Wave® network.

 Loading...