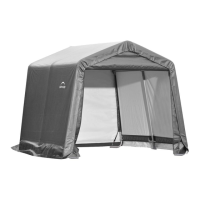
Do you have a question about the ShelterLogic 10' x 8' x 8' Peak Style Shelter and is the answer not in the manual?
| Dimensions | 10' x 8' x 8' |
|---|---|
| Style | Peak |
| Material | Polyethylene |
| Frame Material | Steel |
| Square Footage | 80 sq ft |
| Cover Material | Polyethylene |
| UV Protection | Yes |
| Wind Rating | 35 mph |
| Assembly Required | Yes |
| Assembled Exterior Dimensions Depth | 120 in |
| Assembled Exterior Dimensions Height | 96 in |
| Door Opening Height | 6 feet |
| Door Opening Width | 5 feet |
| Water Resistance | Water-resistant |
| Warranty | 1 year |
| Size | 10' x 8' |
Covers DANGER, WARNING, and CAUTION statements regarding hazards during installation and use.
Emphasizes consumer responsibility for secure anchoring and proper frame setup for stability.
Guidelines for care, cleaning, warranty, and obtaining replacement parts.
Lists all components and their corresponding part numbers for frame construction.
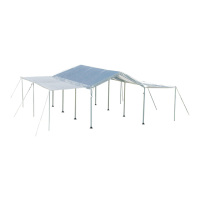
Diagrams showing the layout and connections for both 8' and 10' high model frames.
Instructions on selecting a location and ensuring the frame area is square for proper setup.
Detailed steps for connecting ribs to form the shelter's end and middle sections.
Guidance on attaching side rails and ShelterLock™ stabilizer blocks to the frame structure.
Instructions for securing wind braces between end ribs and middle ribs for structural support.
Steps for connecting the top rail to the end ribs and middle ribs, ensuring proper fitment.
Detailed instructions on using auger anchors and cables to securely fasten the shelter to the ground.
Procedure for attaching end panels, managing webbing, and tightening ratchets for a secure fit.
Steps for positioning the cover, securing it with webbing and ratchets, and installing cover rails.