2As the following dialog box on PC: You will see the IP address after more than 10 seconds, if camera
connect to the power supply just for a minute.
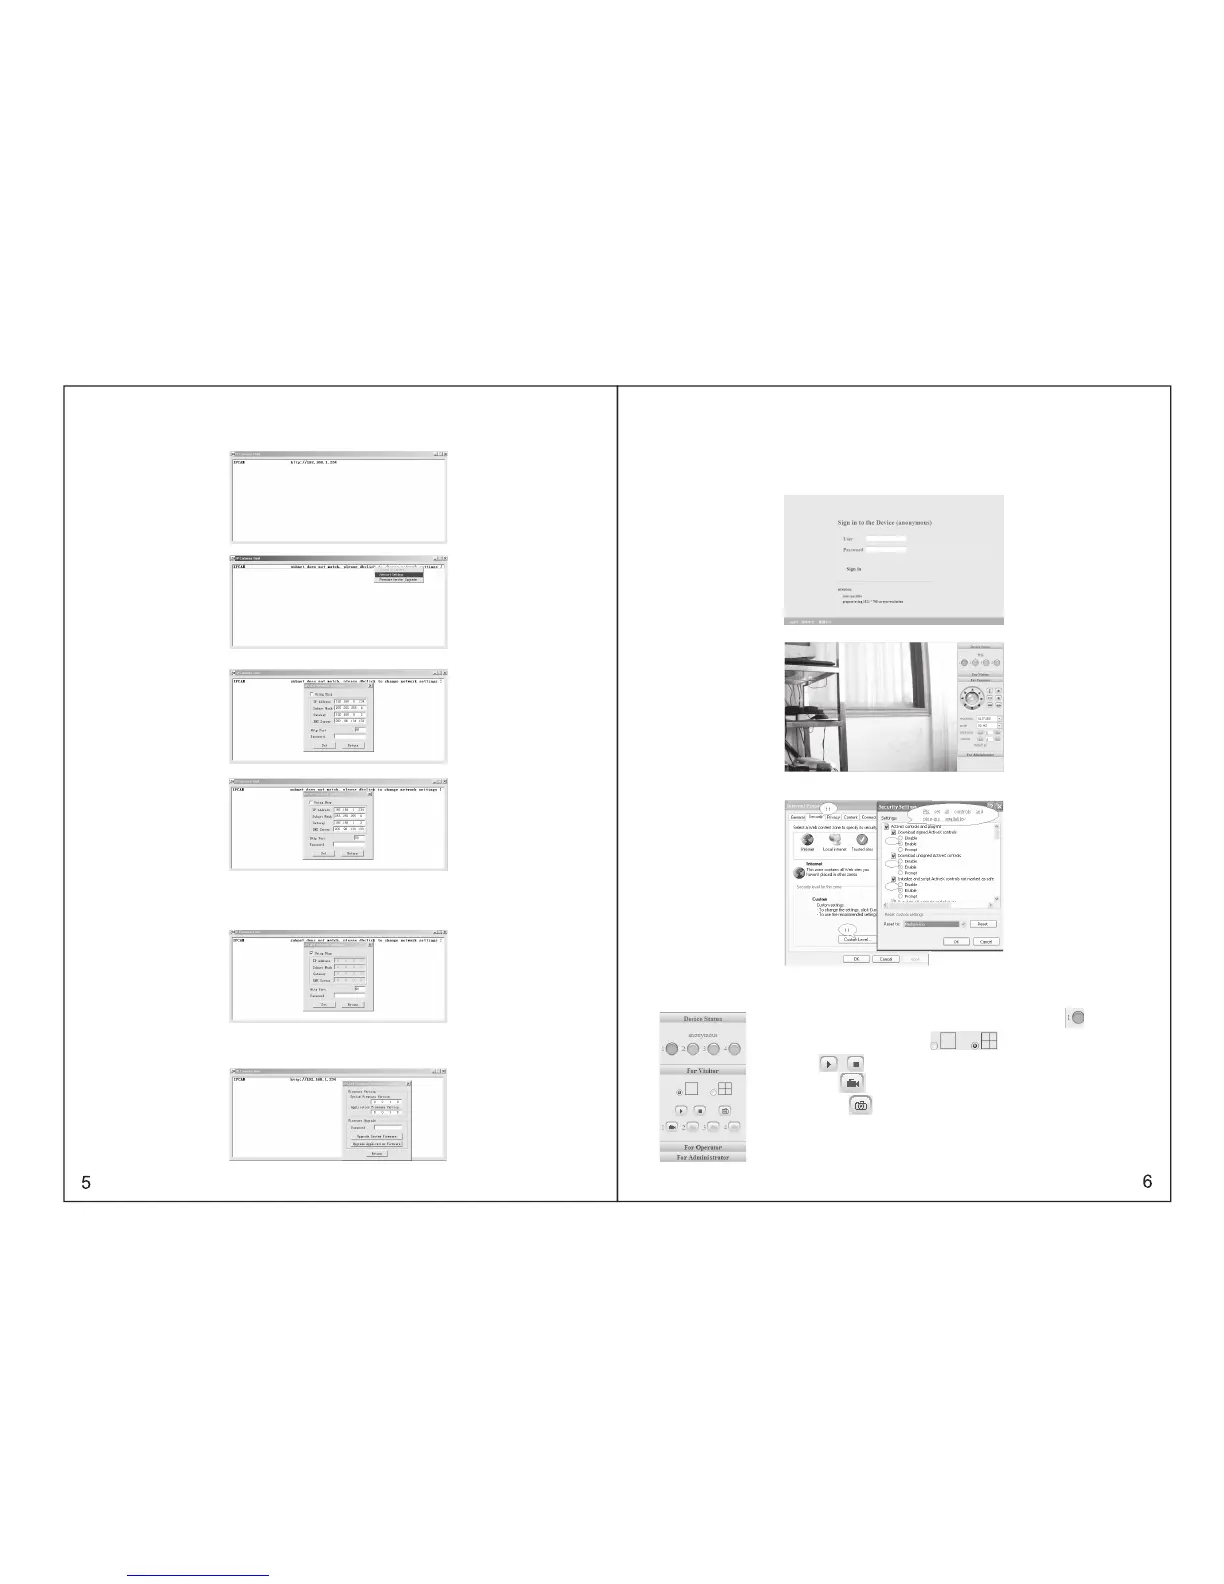
3If the camera is not in the same network space, please do as followed:
Click the left button of the mouse to choose the prompts and click right button to select the related items,
as shown below:
make a manual change as the picture shown :
Please do not choose “automatically get IP”, if your LAN or PC doesn’t support DHCP. You can set up
the camera IP address according to the network space of LAN or PC, but it should be different from that
of other devices or PC in the same network space( the first 3 items and subnet mask should be same) .
You can change the port setting on the page only.
Please choose “automatically get IP”, if your LAN or PC supports DHCP.
3.2 SOFTWARE EDITION UPDATE
IP607W supports the upgrade of system software and application software, application software
applicable for interface upgrade.
3.3. LOGIN THE CONFIGURATION PAGE OF IP607W
If input the IP address of IP607W into the IE browser address field and press “Enter”,or directly double
press the listed IP address in the dialog box of IP Camera Tool, IE browser will be start up automatically
and the administrator login window will also appear.
Input the user name, password (the defaulted user name: admin, l the defaulted password : leave it
blank), click “sign in” to view the monitoring page (supports synchronous view of maximum 8 users )DŽ
3.4 REAL-TIME MONITORING
(Control Area)
Notice: If no picture shown for the first-time use, you can set the user-defined security grade of option
“Internet” of IE browser: namely, unsigned control can be set up as the status of “ startup/prompt”
3.4.1 Visitor Operating
working status for each channel as followed:
For example: channel 1 is monitoring (motion detection status) if is flickering.
Click the right key for 4-picture view
Video on/ off
Recording: press to save the recording files through appointed path.
Take picture: press to capture and save pictures through appointed path.
Green button: normal connection & display
Gray button : connection unavailable
Red button: camera alarms (motion detection alarm)