-19-
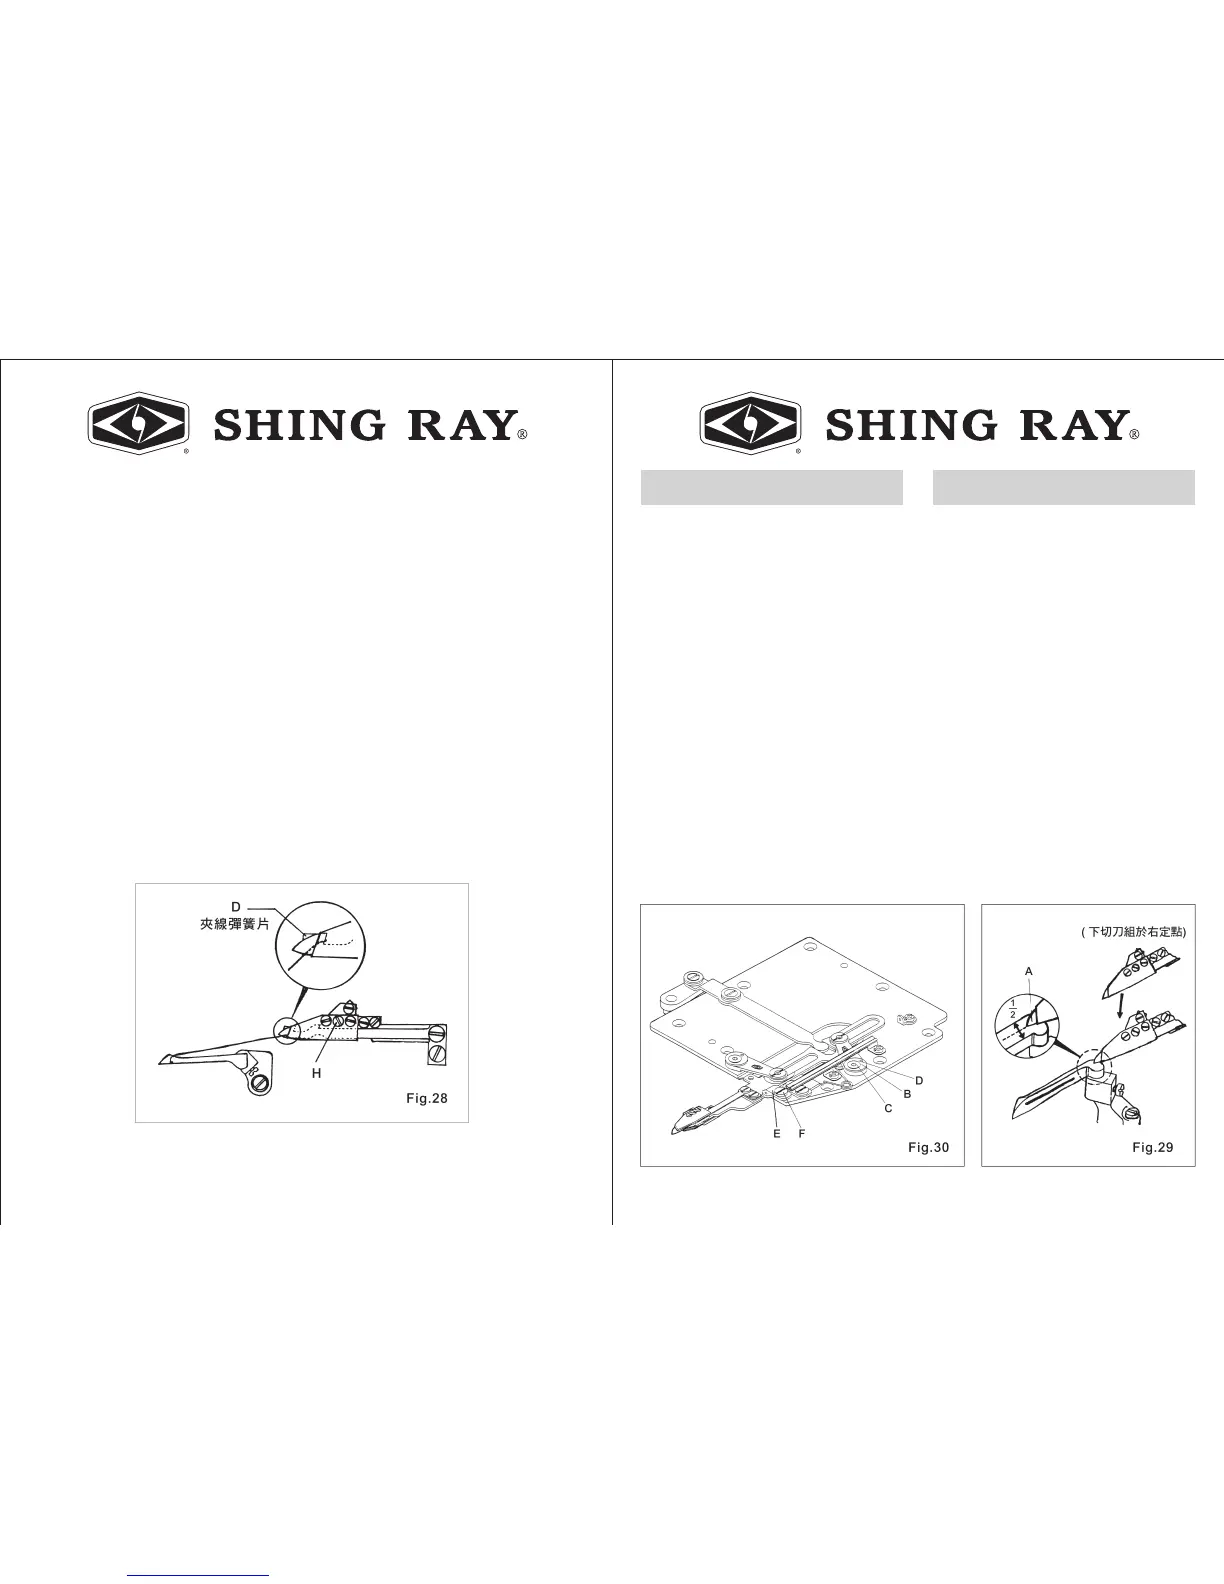
3. 夾線彈簧片的壓力調整:
當下勾針線被切斷後,下勾針這端之
線頭須被夾線彈簧片與活動刀片穩定
夾住。調節夾線彈簧之壓力,可由螺
絲(H)旋轉調整。(順時鐘方向壓力愈
強,反時鐘方向壓力變弱)。(圖28)
注意:
夾線彈簧片之壓力調整須適中,壓力太強會
減短活 刀片之壽命,壓力太弱則下勾針線頭
易脫落。壓力之強度以能輕易切斷線即可。
3. When the looper thread has been cut
off, the Clamp Spring and Moving Knife
will clip the thread in stable. To increase
the pressure of clipping thread turn the
screw (H) clockwise and decrease the
pressure turn the screw (H) counter-
clockwise. (Fig. 28)
Remark :
The pressure of Clamp Spring must be moderate﹒
If the pressure has been adjusted into too
strong, it will decrease the life of Moving
Knife﹒ If the pressure has been adjusted
into too weak, the looper thread will easy
to lose from the Clamp Spring﹒ What is moderate
pressure? It is meaning that the pressure
to
cut the thread easily﹒
-20-
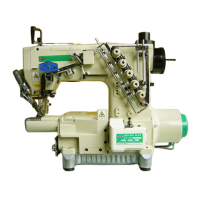
1. 下切刀組之前後位置—
當下切刀組由右定點移出至下勾針右
側 時 ( 第一段動作) 活動片之刀尖
(
A
)
,約位於下勾針寬度中心,前、
後1/2位置。(圖29)
調整時可放鬆搖臂之偏心輪
(
B
)
上之
螺絲
(
C
)
,再轉動偏心輪,使活 動 刀
片移到正確位置。
偏心輪上之記號
(
D
)
正常時,大約處
於3點鐘方向位置。(圖30)
注:
當要調整偏心輪(B)改變切刀角度位置時,必
須先放鬆下切刀托架導引片(E)上之螺絲
(F),等調整好切刀組角度後再將導引片
(E)輕輕靠在下切刀托架,鎖緊螺(F)。
(圖30)
B 下切刀組、切線之相關位置:
1. The Front and Rear position of
Bottom Trimmer
-
When the trimmer moves out from right
dead
point to the right hand side of looper, (1st
action) the tip of Moving Knife (A) aim to
the center of looper ridge. (Fig. 29)
Please loose the screw (C) of Knife
Guide
Lever Eccentric Ring (B) and turn the Eccentric
Ring for regulating the Moving Knife into
right position.
Please set up the mark (D) of Eccentric
Ring
to 3 o'clock position in ordinary. (Fig.30)
Remark :
When you would like to adjust the Eccentric
Ring for changing the angle of under trimmer,
please loose the screw (F) of Lower Knife Carrier
Guide﹒ (E) Please let the Lower Knife Carrier
Guide (E) touch Lower Knife Carrier in gently
and lock the screw (F) down after the angle of
trimmer have been adjusted﹒ (Fig﹒ 30)
B.
THE RELATIVE POSITION ADJUSTMENT
OF BOTTOM TRIMMER.