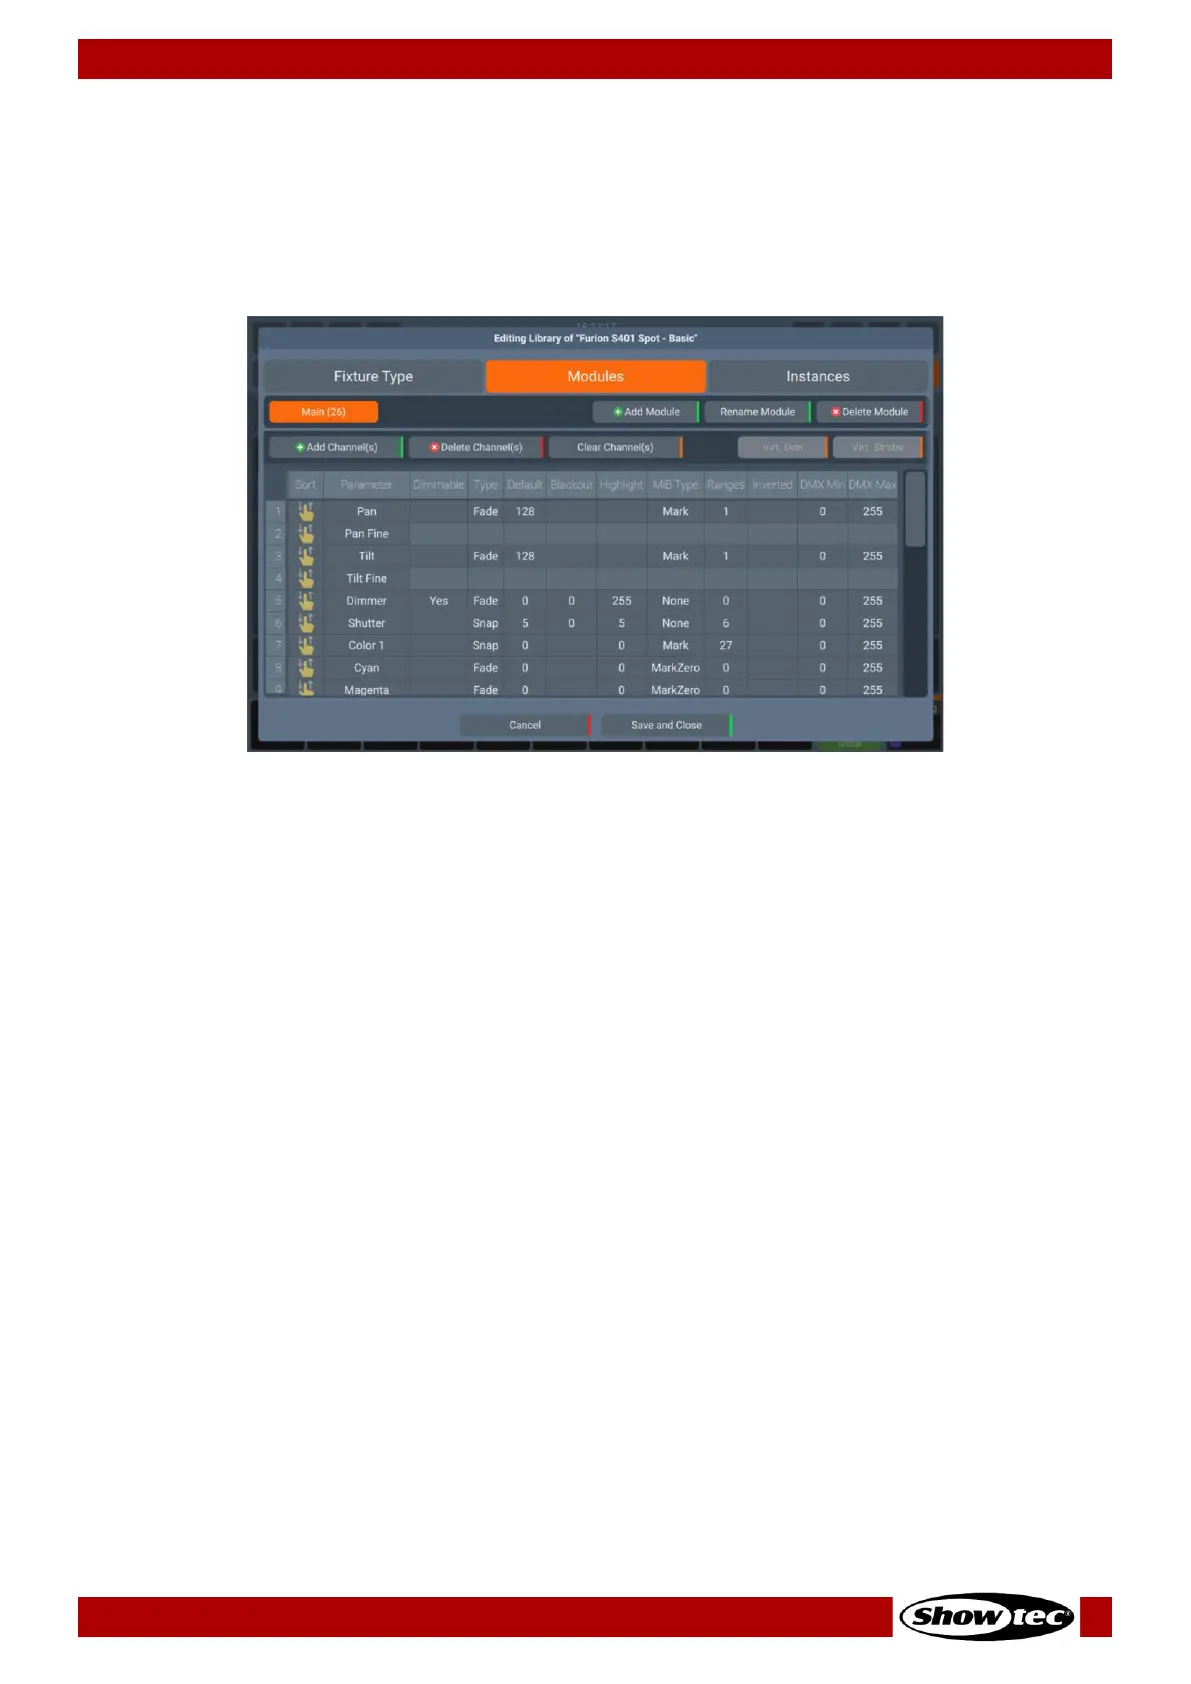
Modules Tab
The Modules Tab is the module editor, the first row of buttons contains the Add Module, Rename Module
and Delete Module option. The second row of buttons is used to append or insert new channels, clear a
channel’s mapping or to delete a channel completely. And if the attributes are present on the fixture,
you will be able to use the buttons for Color Mixing (RGBxxxx) or add a Virtual Dimmer or a Virtual Strobe
to the Fixture.
Adding a Module
You may add a new module by clicking on the Add Module button from within the Modules tab.
Specify the name and channel count (of the individual part of the fixture) in the dialog and add a
description if you like.
If for example you would like to create a module for RGB pixels, the channel count would most likely be 3
channels.
After you are done entering the details you can either click on Add and Add More to keep adding
modules to the fixture type, or you may click on Add and Edit Module to add the module and directly
start editing the channels of the module.
Renaming a Module
You may edit a module’s name by selecting it from the list and clicking on the Rename Module button
from within the Modules tab.
Deleting a Module
You may delete a module by selecting it from the list and clicking on the Delete Module button from
within the Modules tab.
Defining Color Space
The Color Mixing button will appear within the Modules Tab if the fixture has an additive color mixing
system. By clicking on it, the Edit Color Mixing System dialog will open, and you may define color spaces
or edit color spaces of existing fixtures. By double tapping on each cell, you can change the coordinates
 Loading...