Large ensembles (band, orchestra, choir)
Use a stereo microphone setup to most accurately
capture the sound of a large ensemble. Stereo
recording is not as complicated as it sounds. For
simplicity sake, we’ll use the most basic type of stereo
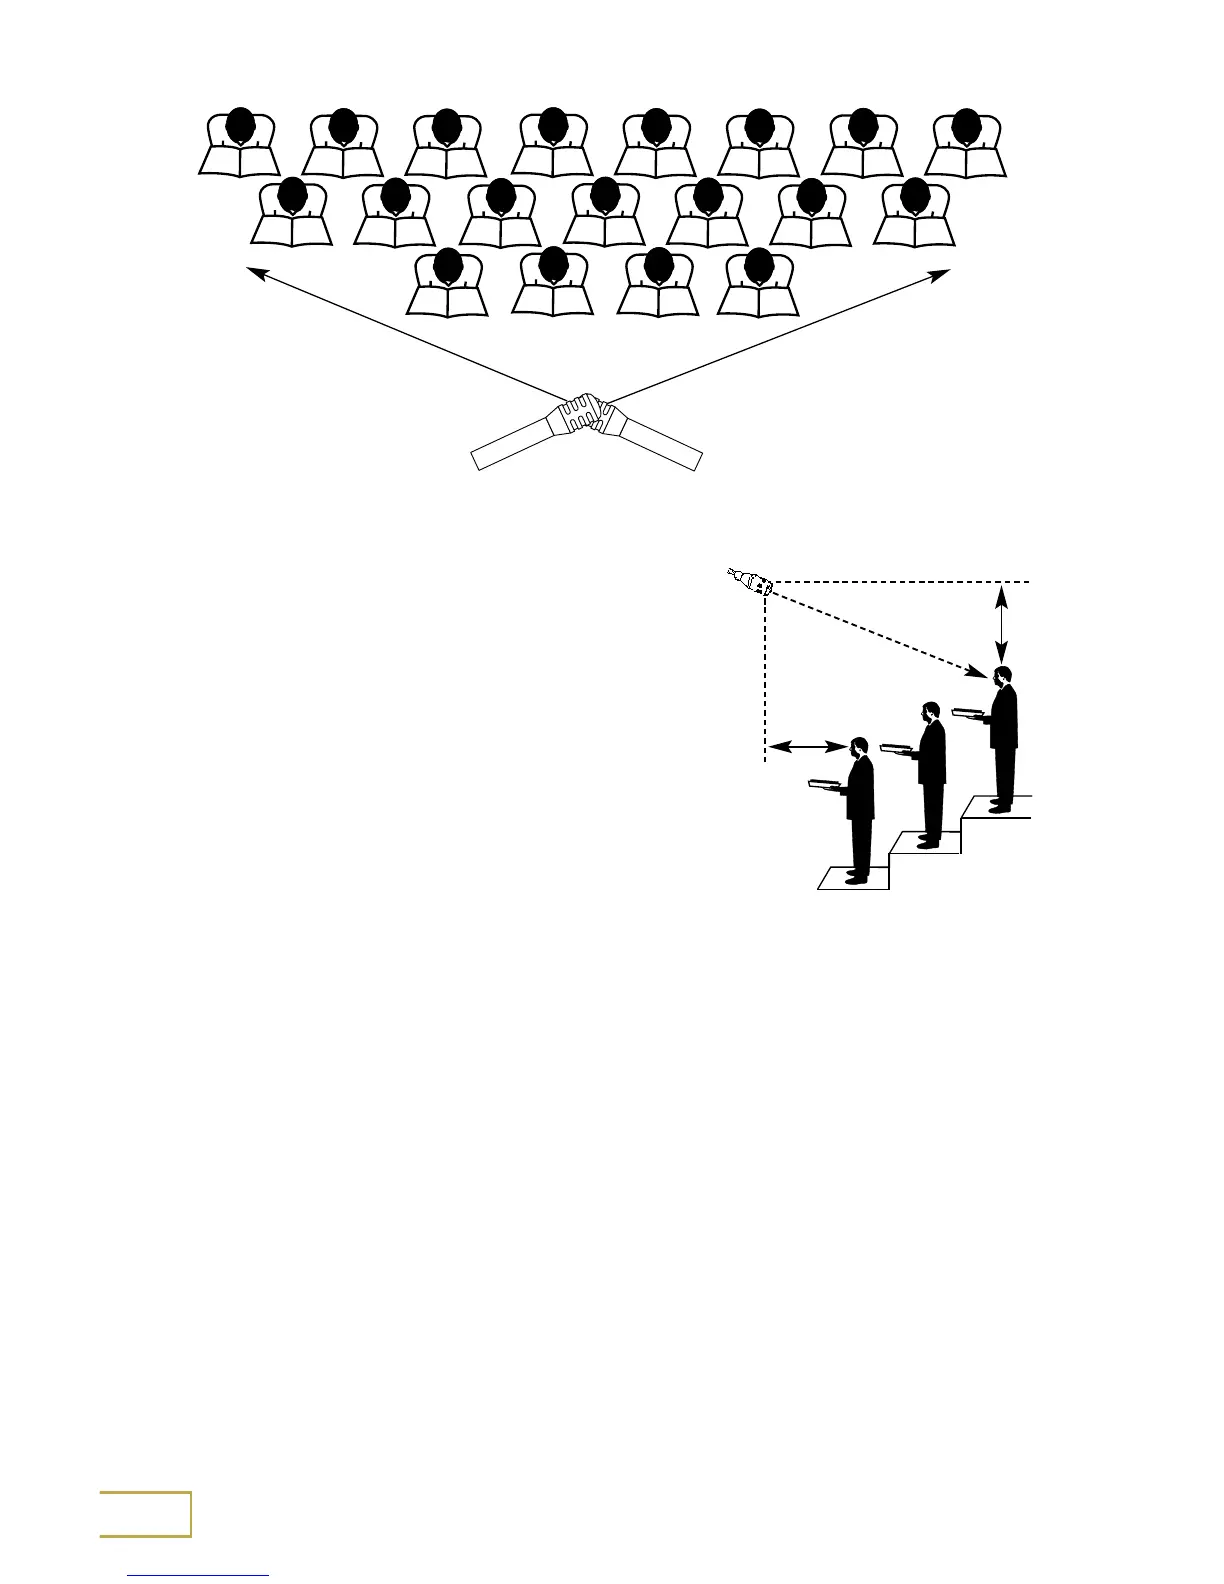
microphone techniques, the X-Y pattern. Use two
microphones of the same model with the two mic
capsules placed as close as possible, and facing each
other at an angle ranging from 90 – 135 degrees,
depending on the size of the sound source. (see
figure 1). For a wider coverage area, the larger angles
should be used. The X-Y pattern results in good stereo
separation and excellent mono compatibility.
A second, somewhat simpler way to record in stereo uses what is known as a
"single-point" stereo microphone, such as the VP88. The VP88 has a single micro-
phone housing that contains two microphone elements, electrically combined to
produce a stereo output. The advantage to this type of microphone is simplicity; put
the microphone on a stand and point it at what you want to record.
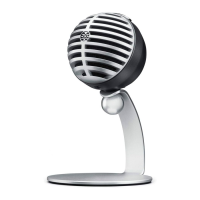
When recording a large ensemble, you may choose to use more than two microphones
to adequately cover each section. A technique known as "area" coverage uses multiple
microphones to cover small sections of the ensemble. Using a choir as an example,
use one microphone for each 6-9 foot wide section, and aim the microphone capsule
towards the last row. Microphones should be placed 2-3 feet in front of the first row of
the choir (see figure 2). The same technique can be applied to concert band or
orchestra, by using one microphone per section.
6
0.6 - 1m
(2 - 3 ft)
0.6 - 1m
(2 - 3 ft)
Figure 2: Area miking - side view
Figure 1: Choir microphone positions - stereo
top view