8
SR80/185T - SR100/185T 1.0.0 - 2009
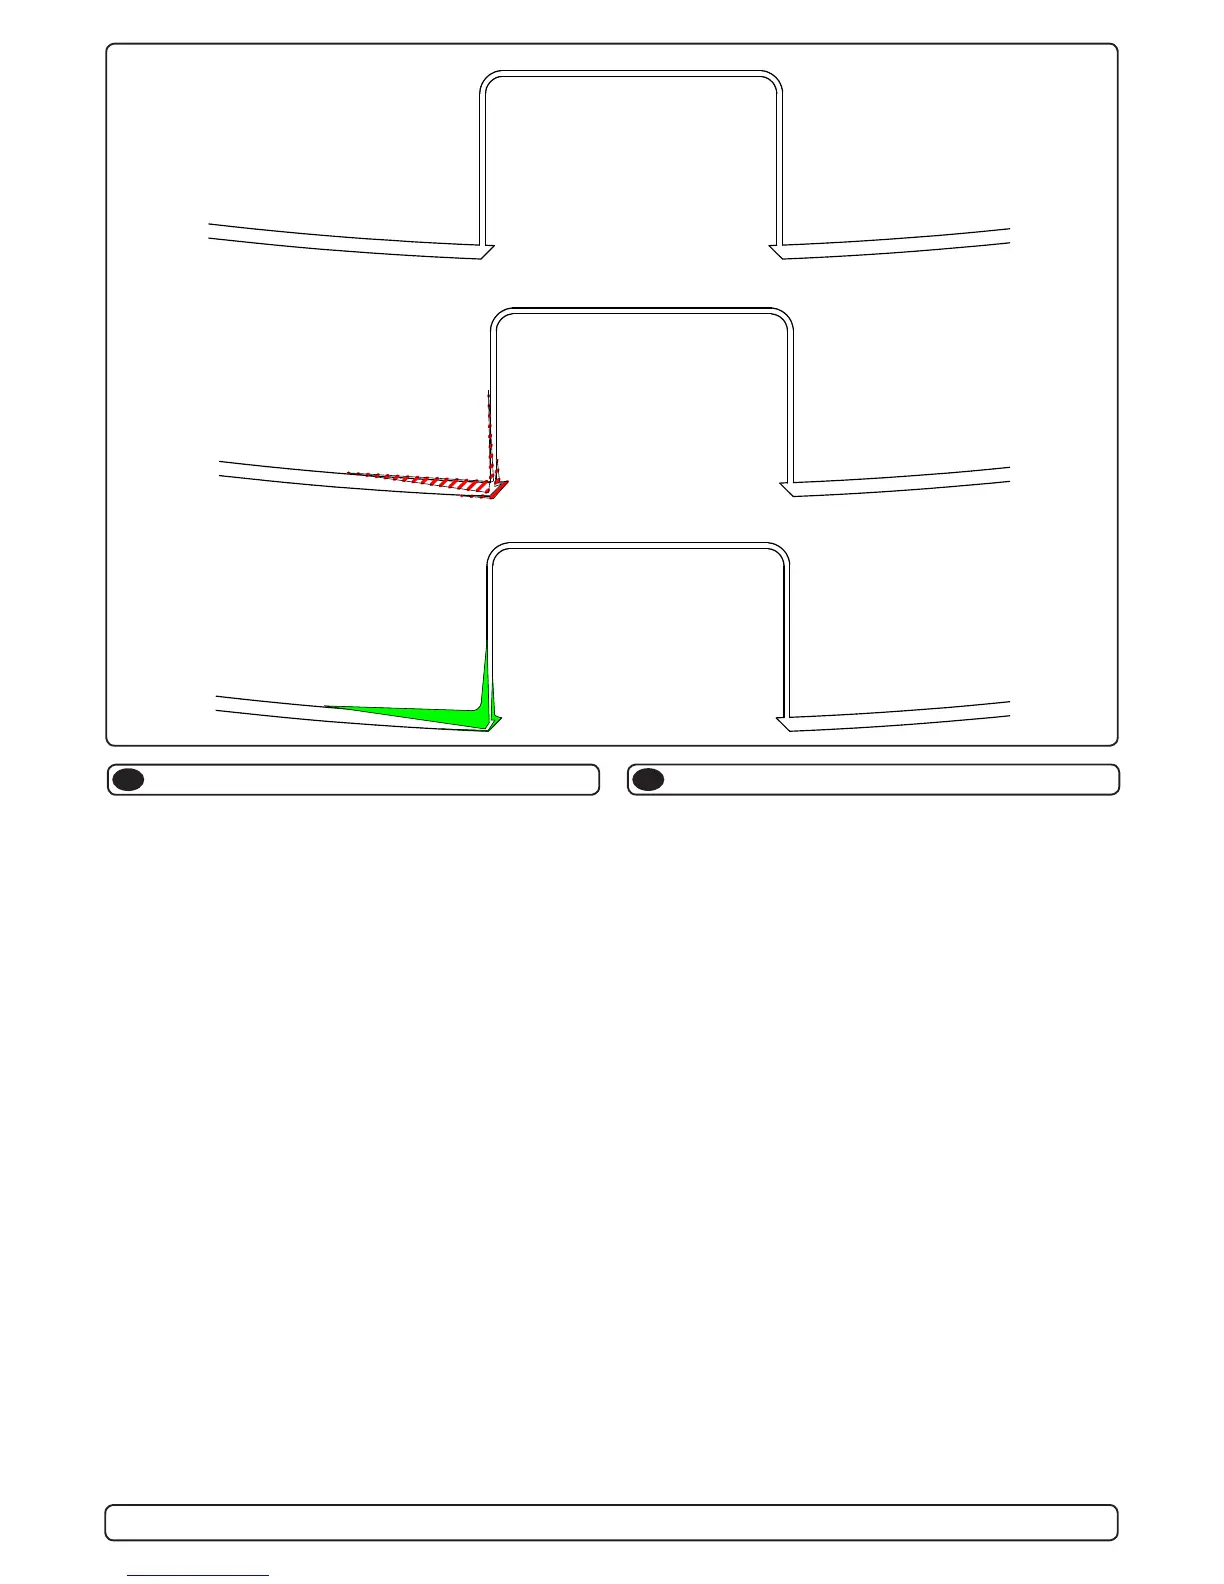
8. The unit is now almost ready to be moulded to the hull (Epoxy and
WR - woven rowing - recommended) Before starting to grind the hull
and thuster casing, please cover thuster unit and inside of boat careful-
ly. (Note, if the hull has a sandwich construction, all core material must
be removed, and be rebuilt with WR E\TXDOL¿HGSHUVRQHO
Begin grinding from inside of line drawn around thuster unit inside
hull, starting with a depth of 2/3 hull thickness moving outwards with
decreasing depth.
Grind thruster casing in similar manner, deepest on lower edge, de-
creasing upwards.
Grind with power tool or by hand on inside of casing and inside of
marking line on hull to accommodate 2-3 layers of WR
$IWHUJULQGLQJDQGFOHDQLQJSODFHXQLWLQ¿QDOORFDWLRQDQGSUHSDUH
for moulding. Mould the unit thoroughly to the inside of hull and from
outside into casing
5HILOOXVWUDWLRQ´3UR¿OHPROGLQJ´
3UR¿OHPRXOGLQJ
3UR¿OHPRXOGLQJ
3UR¿OHPRXOGLQJ
N
GB
Laminering
Moulding
8. Nå er enheten klar for laminering (Sleipner Motor AS anbefaler
HSR[\RJ:5YHYGPDWWHJODVV¿EHUPDWWH)¡UGXVWDUWHUPHGnVOLSH
LVNURJRJJODVV¿EHUNDVVHQSnHQKHWHQPnGXYUHQ¡\HPHGRJ
maskere alt i båten og på enheten. (NB; Er skroget av sandwich type,
PnDOWDYNMHUQHPDWHULDOHIMHUQHVKHOWXWWLOGHW\WUHVNLQQHWDYVNURJIRU
VnnE\JJHVRSSLJMHQPHG:5JODVV¿EHUPDWWH
Slipingen starter på innsiden av streken som ble trukket rundt enheten
SnLQQVLGHQDYVNURJHWRJLJMHQQRPDYVNURJHWRJPLQGUHRJ
mindre lengre ut til du er i null.
'HWVDPPHJM¡UHVSnJODVV¿EHUNDVVHQSnHQKHWHQVOLSPHVWSn
nedre kant og mindre oppover kasse.
6OLSRJVnPHGYHUNW¡\HOOHUIRUKnQGSnLQQVLGHQDYJODVV¿EHUNDVVHQ
på enheten og på innsiden av streken på skrog, dette for og få heft til
WRWUHODJPHGJODVV¿EHUPDWWHKHURJVn
(WWHUVOLSLQJRJJUXQGLJUHQJM¡ULQJSODVVHUHVHQKHWHQSnSODVV
og du er nå klar for laminering. Enheten lamineres fast grundig på
innsiden av skroget, og på utsiden av skroget og inn i kassen.
6HLOOXVWUDVMRQ´3UR¿OODPLQHULQJ´

 Loading...