EasyManua.ls Logo

Siemens CB734G1 1 Series User Manual

Siemens CB734G1 1 Series
36 pages
To Next Page IconTo Next Page
Page #1 background imageLoading...
Page #1 background image
Oven
CB734G1.1
en
User manual and installation instructions
Register your product on My Siemens and discover exclusive ser-
vices and offers.
siemens-home.bsh-group.com/welcome
The future moving in.
Siemens Home Appliances
Question and Answer IconNeed help?

Do you have a question about the Siemens CB734G1 1 Series and is the answer not in the manual?

Siemens CB734G1 1 Series Specifications

General IconGeneral
TypeBuilt-in oven
Energy Efficiency ClassA
Control TypeElectronic
ColorStainless steel
Dimensions (H x W x D)595 x 594 x 548 mm
Number of Cavities1
Voltage220-240 V
Frequency50/60 Hz
Installation Width560 mm
Installation Depth550 mm
Door MaterialGlass
TimerYes
Cooling FanYes
LightingYes
Child LockYes
Self-CleaningNo
Pyrolytic CleaningNo
Catalytic CleaningNo
Oven Capacity71 L

Summary

1 Safety

1.1 General information

General safety guidelines and precautions for using the appliance.

1.2 Intended use

Information on the appliance's proper and intended usage.

1.3 Restriction on user group

Guidelines for use by children and individuals with reduced capabilities.

1.4 Safe use

2 Preventing material damage

2.1 General

General advice on preventing material damage to the appliance.

3 Environmental protection and saving energy

3.1 Disposing of packaging

Instructions for environmentally friendly disposal of packaging materials.

3.2 Saving energy

Tips and recommendations for reducing energy consumption during use.

4 Familiarising yourself with your appliance

4.1 Control panel

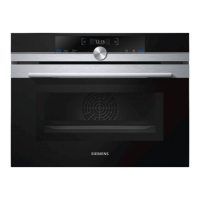
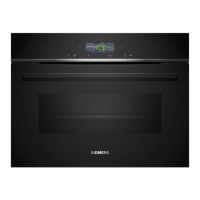
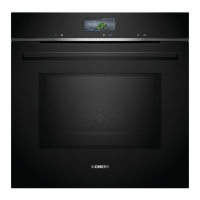
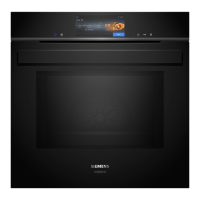
Overview and explanation of the appliance's control panel and its functions.

4.2 Display

Explanation of the different areas and symbols shown on the appliance display.

4.3 Buttons

Description of the function of each button on the control panel.

5 Operating modes

5.1 Types of heating

Explanation of different heating types and their applications.

5.2 Temperature

Information on reading and setting temperatures.

6 Accessories

6.1 Locking function

How the accessory locking function works.

6.2 Sliding accessories into the cooking compartment

Proper method for inserting accessories.

6.3 Other accessories

Information on purchasing additional accessories.

7 Before using for the first time

7.1 Performing initial start-up

Steps for initial configuration after connecting the appliance.

7.2 Cleaning the appliance before using it for the first time

Instructions for cleaning the appliance before first use.

8 Basic operation

8.1 Switching on the appliance

How to turn the appliance on and navigate the display.

8.2 Switching off the appliance

Procedures for safely switching off the appliance.

8.6 Setting the type of heating and the temperature

8.7 Displaying information

9 Time-setting options

9.1 Setting the cooking time

How to set and adjust the duration for cooking operations.

9.2 Setting the end time

How to set a delayed start or end time for operations.

9.3 Setting the timer

How to use the independent timer function.

10 Dishes

10.1 Cookware for dishes

Recommendations for suitable cookware for various dishes.

10.2 Setting options for the dishes

How to adjust settings for specific dishes.

10.3 Overview of the dishes

List of available dishes and their categories.

10.4 Setting a dish

Step-by-step guide to selecting and starting a dish.

11 Favourites

11.1 Saving favourites

How to save up to 10 custom operating modes.

11.2 Selecting favourites

How to use saved favourite settings.

12 Childproof lock

12.1 Activate the childproof lock

Steps to activate the child safety lock.

13.2 Changing the basic settings

14 Home Connect

14.1 Setting up Home Connect

Guide to connecting the appliance to the Home Connect app.

14.2 Home Connect settings

14.3 Operating the appliance with the Home Connect app

14.4 Software update

14.5 Remote diagnostics

14.6 Data protection

15 Cleaning and servicing

15.1 Cleaning products

Information on suitable and unsuitable cleaning agents.

16 Cleaning aid "humidClean"

16.1 Setting the cleaning aid

Steps for activating and using the humidClean function.

16.2 Cleaning the cooking compartment after using the cleaning aid

17 Drying

17.1 Drying the cooking compartment

Methods for drying the cooking compartment.

18 Appliance door

18.1 Detaching the appliance door

Instructions for removing the appliance door.

18.2 Attaching the appliance door

Instructions for reattaching the appliance door.

18.3 Removing the door panes

Steps to remove the glass panes from the appliance door.

18.4 Fitting the door panes

19 Rails

19.1 Detaching the rails

Steps for removing the oven rails.

19.2 Attaching the rails

Instructions for re-attaching the oven rails.

20 Troubleshooting

20.1 Malfunctions

Common faults and their troubleshooting steps.

20.2 Replacing the oven light bulb

21 Disposal

21.1 Disposing of old appliance

Guidelines for environmentally friendly disposal of the appliance.

22 Customer Service

23 Information regarding Free and Open Source Software

24 Declaration of Conformity

25 How it works

25.1 General cooking tips

General advice for cooking all types of food.

25.2 Baking tips

Specific tips and recommendations for baking.

25.3 Roasting, braising and grilling tips

Tips for roasting, braising, and grilling food.

25.4 Cooking instructions for ready meals

25.5 List of foods

25.6 Special cooking methods and other applications

25.7 Test dishes

26 Installation instructions

26.1 General installation instructions

Essential guidelines before starting appliance installation.

26.2 Appliance dimensions

26.3 Installation below a worktop

26.4 Installation underneath a hob

26.5 Installation in a tall unit

26.6 Installing two appliances on top of each other

26.7 Corner installation

26.8 Electrical connection

26.9 Installing the appliance

26.10 Removing the appliance

Related product manuals