This document provides a comprehensive guide for the Siemens HB213AB.0 Oven, covering its functions, usage, and maintenance.
Function Description
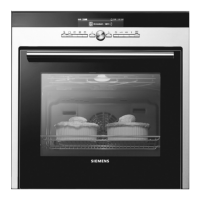
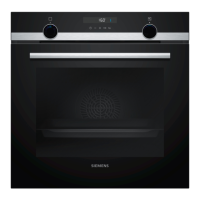
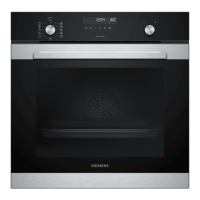
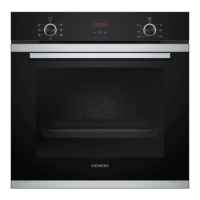
The Siemens HB213AB.0 Oven is designed for preparing meals and drinks in private households and enclosed domestic environments, up to an altitude of 4000 meters above sea level. It is intended for built-in installation into kitchen units. The appliance features a control panel with touch-sensitive buttons and a display that shows active functions and time-setting options.
The oven offers various types of heating and functions to cater to different cooking needs:
- 3D hot air: Ideal for baking and roasting on one or more levels, distributing heat evenly from the ring-shaped heating element in the back wall.
- Hot air gentle: Cooks selected dishes gently on one level without preheating, utilizing residual heat for energy efficiency. This mode is used to determine energy consumption in air recirculation mode.
- Full-surface grill: Perfect for grilling flat items like steak, sausages, or toast, and for gratinating food, with the entire area under the grill element becoming hot.
- Hot air grilling: Suitable for roasting poultry, whole fish, and larger pieces of meat, where the grill element and fan switch on and off alternately to circulate hot air.
- Top/bottom heating: Traditional baking and roasting on one level, ideal for cakes with moist toppings, providing even heat from above and below. This mode is used to measure energy consumption in conventional mode.
- Rapid heating: Quickly preheats the cooking compartment, recommended for temperatures over 100 °C.
- Oven light: Illuminates the cooking compartment without heating.
The oven also includes time-setting options:
- Timer: Operates independently of the appliance's cooking functions, with its own audible signal.
- Cooking time: Automatically stops the appliance's operation after a set duration.
- End time: Allows delaying the start of cooking so that it finishes at a required time.
- Time: Sets the current time on the clock.
For safety, the appliance features a childproof lock to prevent accidental activation or setting changes. A cooling fan automatically switches on during operation to dissipate hot air and continues to run for a period after use to cool down the appliance more quickly.
Usage Features
To ensure optimal performance and safety, users should follow specific guidelines. Before first use, the appliance needs initial setup, including setting the time on the clock and cleaning the cooking compartment and accessories.
General Use:
- Always place accessories correctly in the cooking compartment to ensure proper tilt protection.
- When using rapid heating, do not place food in the cooking compartment until the rapid heating process has ended and an audible signal sounds.
- For baking, use dark-coloured, black-coated, or enamelled baking tins as they absorb heat well.
- Open the appliance door as little as possible during operation to maintain temperature and reduce reheating needs.
- When baking multiple dishes, do so in succession or parallel to utilize residual heat.
- Allow frozen food to defrost before cooking to save energy.
- If the cooking time is long, the appliance can be switched off 10 minutes before the end to use residual heat for finishing.
- Remove unused accessories from the cooking compartment to avoid unnecessary heating.
Temperature and Setting Levels:
- Temperature settings range from 50-275 °C. For settings above 250 °C, the appliance reduces the temperature to approximately 240 °C after 10 minutes, except for top/bottom heating or bottom heating types.
- Grill settings include low, medium, and high for full-surface grill and small area grill.
- A heat-up indicator symbol lights up when the appliance is heating and goes out when heating is paused, indicating the optimal time to place food in the compartment.
Accessories:
- Original accessories are designed specifically for the appliance. Deformation due to heat does not affect function and accessories regain shape upon cooling.
- The wire rack is used for cake tins, ovenproof dishes, cookware, meat, and frozen meals.
- The universal pan is suitable for moist cakes, baked items, bread, large roasts, frozen meals, and catching dripping liquids.
- Accessories have a locking function to prevent tilting when pulled out halfway.
- When combining the wire rack with the universal pan, place the wire rack on the universal pan so that spacers are on the rear edge of the pan.
Cooking Tips:
- Temperature and cooking time depend on food quantity and recipe; it's recommended to start with lower values within the specified ranges.
- Place food in a cold cooking compartment unless preheating is specified.
- For roasting and grilling, unstuffed, chilled, ready-to-roast poultry, meat, or fish should be placed in a cold cooking compartment.
- Acidic food should not be placed directly on the pan support as it may damage the grid.
- Larger poultry, meat, or fish require lower cooking temperatures and longer cooking times.
- Turn poultry, meat, or fish after approximately 1/2 to 2/3 of the listed time.
- Add 1-2 cm of liquid to poultry in cookware.
- When grilling on the wire rack, place the universal pan one shelf position lower to catch dripping fat.
- When roasting in cookware with a lid, glass cookware is recommended.
Maintenance Features
Regular cleaning and servicing are crucial for maintaining the appliance's efficiency and longevity.
Cleaning Products:
- Only use cleaning products suitable for the specific surfaces of the appliance.
- Avoid harsh, abrasive cleaners, sharp metal scrapers, steam, or high-pressure cleaners.
- Do not use cleaning products with high alcohol content or hard scouring pads.
- Never use oven cleaner in a hot cooking compartment.
- Remove all food remnants from the cooking compartment and door before heating the appliance.
- New sponge cloths should be thoroughly washed before use.
Specific Cleaning Instructions:
- Stainless steel surfaces: Remove limescale, grease, starch, or albumin immediately to prevent corrosion. Apply a thin layer of special stainless steel cleaning product with a soft cloth.
- Plastic or painted surfaces (e.g., control panel): Use hot soapy water. Do not use glass cleaner or a glass scraper.
- Door panels and door cover: Use hot soapy water. Avoid glass cleaner or a glass scraper. For thorough cleaning, the door panels and cover can be removed.
- Door handle: Remove descaling agents immediately to avoid permanent stains.
- Door seal: Do not remove or scrub.
- Enamel surfaces: Soak heavily soiled areas and use a brush or steel wool. Leave the door open to dry the compartment after cleaning. Food residues may leave a white coating, which can be removed with lemon juice.
- Glass cover for oven light: Use oven cleaner for heavy soiling.
- Rails: Soak heavily soiled areas and use a brush or steel wool. Remove shelf supports for cleaning.
- Pull-out system: Use a brush for heavy soiling. Clean pull-out rails while pushed in to avoid removing lubricant. Do not clean in the dishwasher. Detach the pull-out system for cleaning.
- Accessories: Soak heavily soiled areas and use a brush or steel wool. Enamelled accessories are dishwasher-safe.
Removing Components for Cleaning:
- Shelf supports: Can be removed for cleaning. Allow them to cool down before touching.
- Pull-out rails: Can be removed for cleaning.
- Appliance door: Can be detached for thorough cleaning. This involves opening locking levers on the hinges, closing the door, and pulling it upwards and out.
- Door panes: Inner and intermediate door panes can be removed for cleaning. This requires pushing on the door cover to release it, then lifting out the panes. Exercise caution due to sharp edges and potential for glass breakage. Clean with glass cleaner and a soft cloth.
- Condensate trough: Can be removed for cleaning by tilting it upwards.
Replacing the Oven Light Bulb:
- If the oven light fails, replace it with a heat-resistant, 25-watt, 230 V halogen bulb.
- Ensure the appliance is disconnected from the power supply and cooled down before replacement.
- Place a tea towel in the cooking compartment to prevent damage.
- Turn the glass cover anti-clockwise, pull out the old bulb, insert the new one, and screw the cover back in.
Troubleshooting:
- The manual provides guidance for rectifying minor faults, such as the appliance not working (check circuit breaker, power cut, electronics fault), or error messages.
- If the childproof lock is activated, deactivate it using the designated button.
- For issues not covered, contact customer service, providing the exact error message and the appliance's product number (E-Nr.) and production number (FD).