Disassembly instructions
Recycler Guide for LOGO!
Product Information, 09/2024, A5E54068028-AA
13
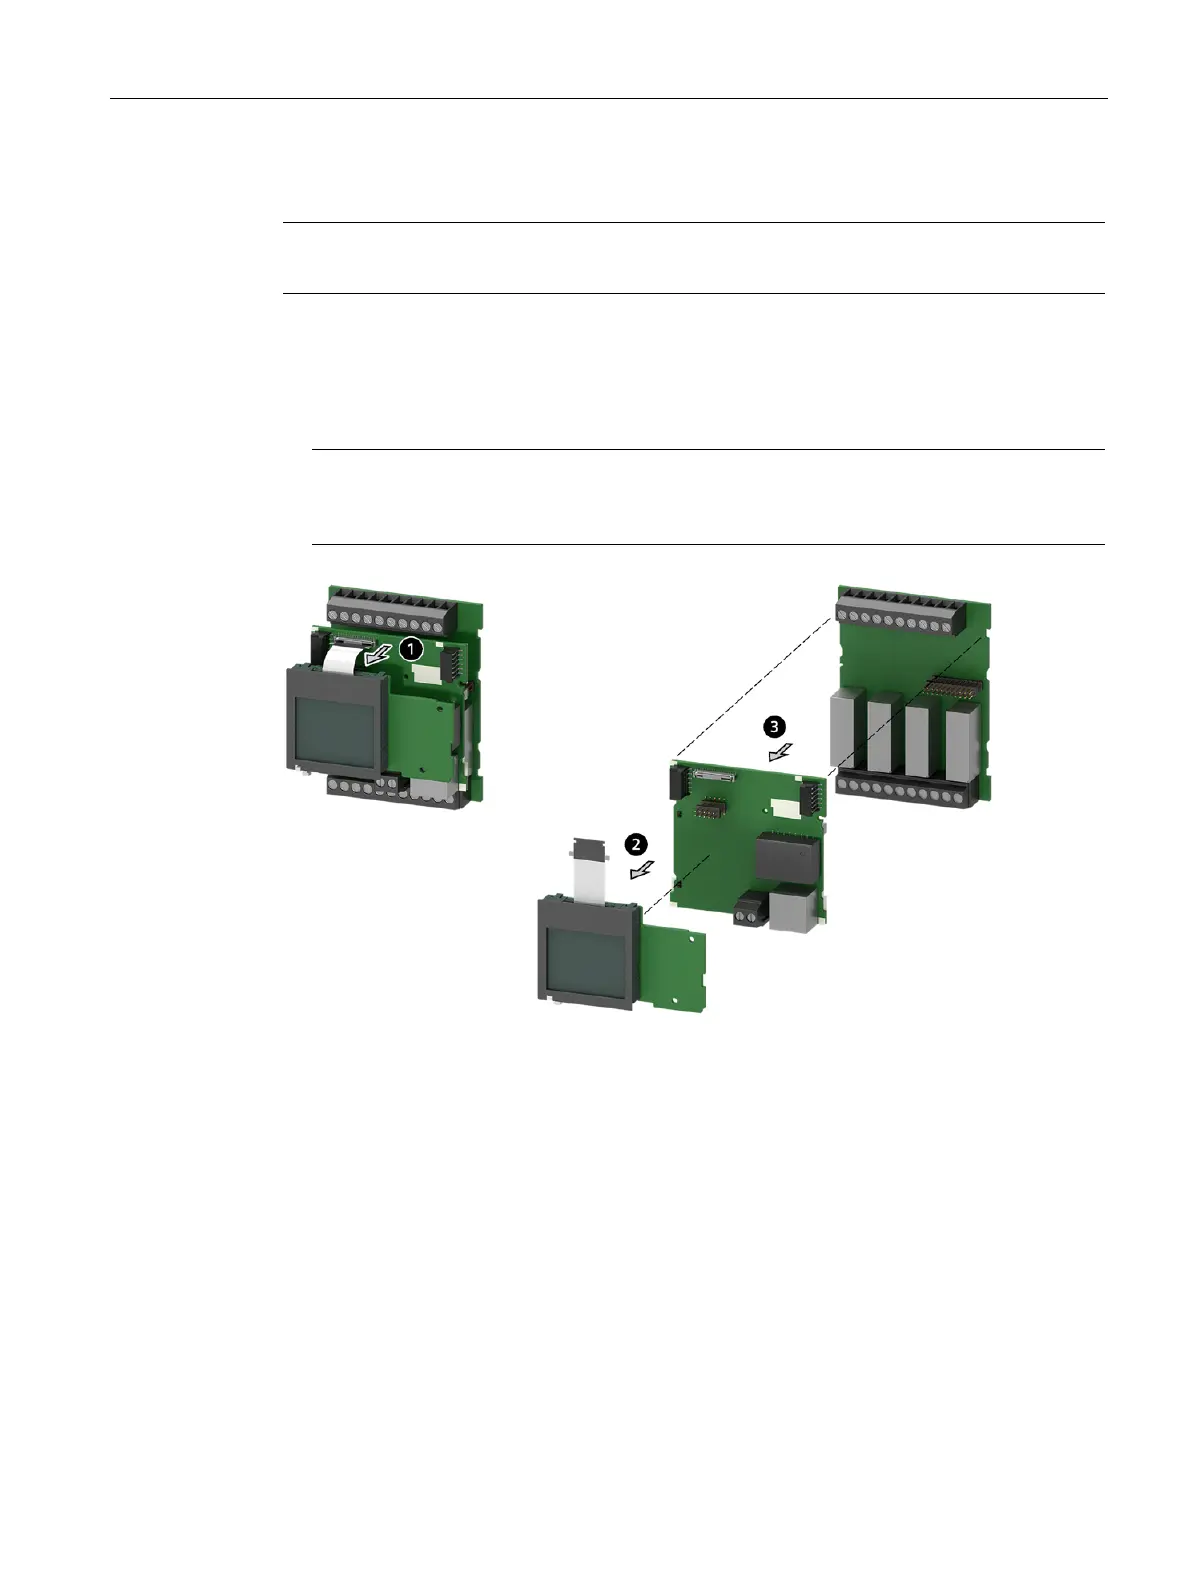
8. Disassembly of the assembled PCBs
Note
For product groups 2 and 3, continue with point 3 of this step.
1. Unlock the plug-in connector by pressing the button. Pull out the FPC cable.
2. Remove the assembled PCB of the LCD.
3. Separate the 2 rear assembled PCBs from one another.
Note
In product group 3, there is a slide present on the middle assembled PCB (position 4). To
remove the slide, push it to the left.