RUGGEDCOM WIN5214
Installation Guide
Chapter 2
Installing the Subscriber Unit
Assembling the PoE Connector 19
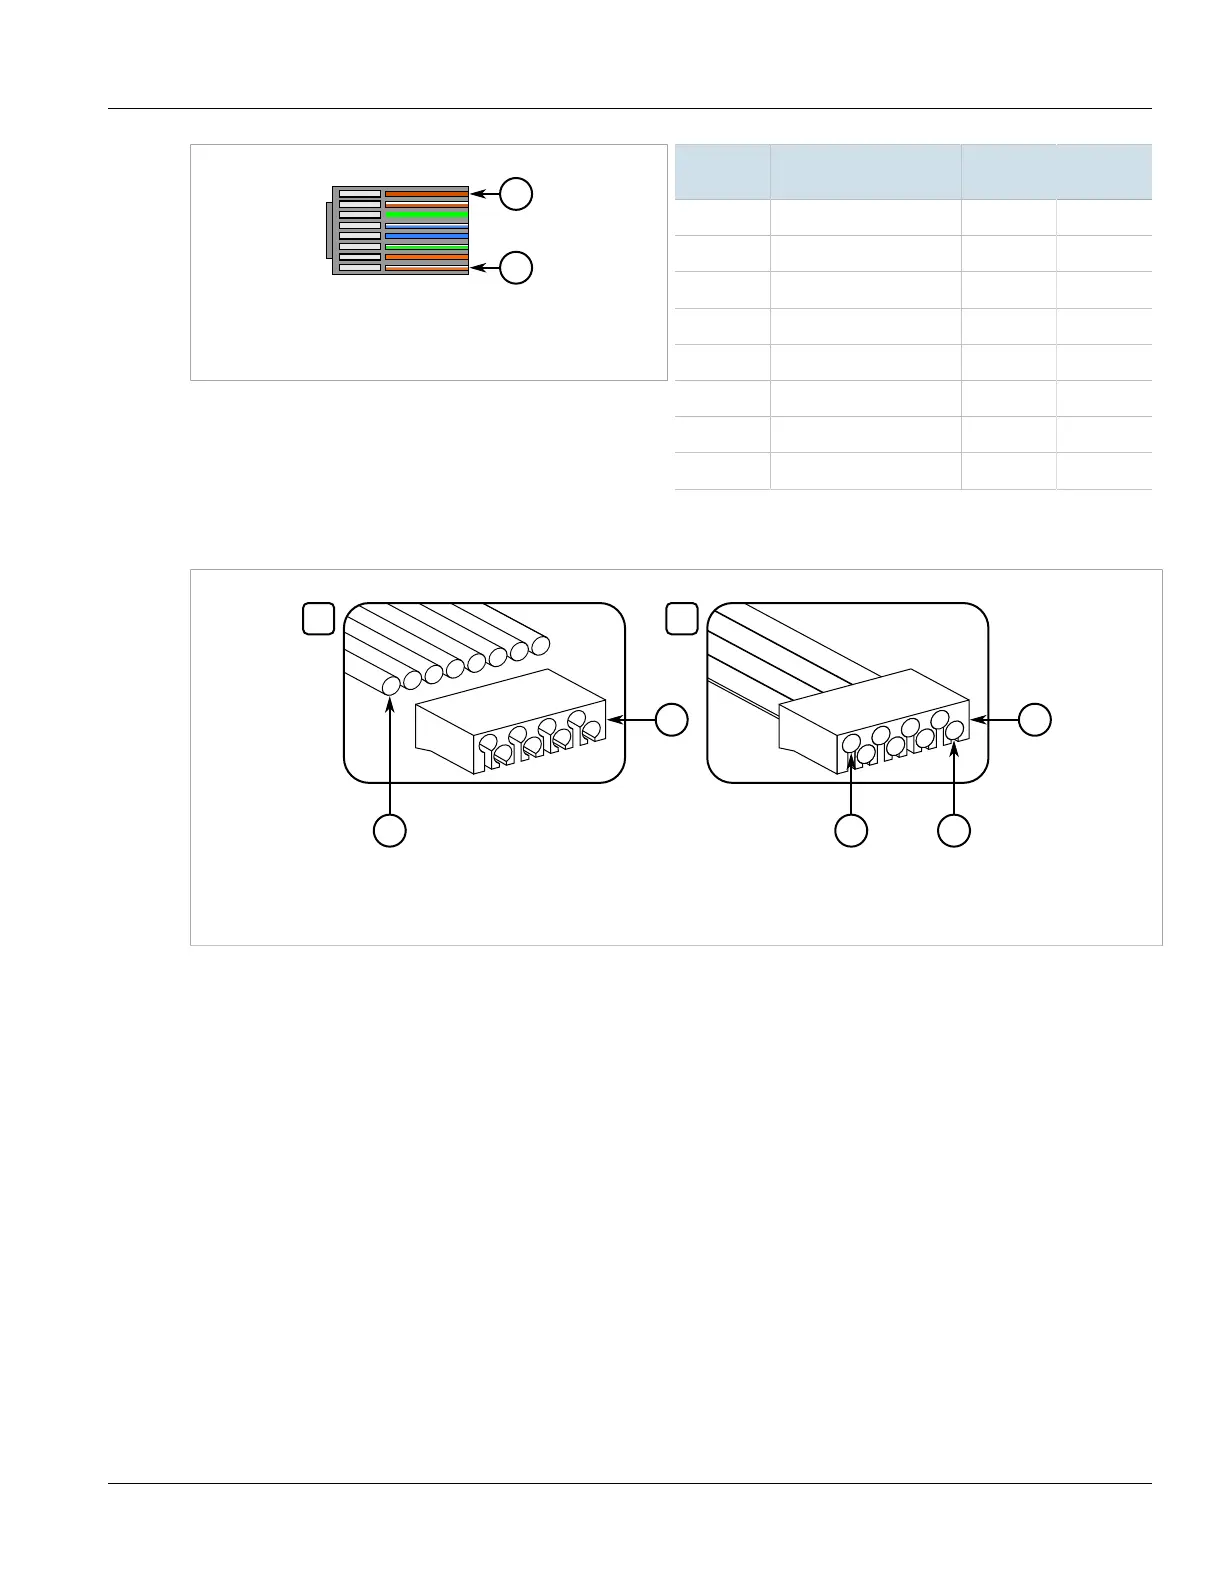
Figure13:CAT-5e PoE Cable Pin-Out
1.Pin 1 2.Pin 8
Pin
Number
Color Description
1 White/Orange ETH Data TP0+
2 Orange ETH Data TP0-
3 White/Green ETH Data TP1+
4 Blue 48 V TP2+
5 White/Blue 48 V TP2-
6 Green ETH Data TP1-
7 White/Brown RTN (-) TP3+
8 Brown RTN (-) TP3-
7. Slide the wires into the loading bar and then pull the loading bar down until its face is 16 mm (0.63 in) from
the wire jacket. If necessary, use pliers to hold the wires while pulling the loading bar.
Figure14:
1.Loading Bar 2.Wires 3.Pin 1 4.Pin 8
8. Trim the wires until they are flush with the face of the loading bar.
9. Insert the wires and loading bar into the plug body. Make sure:
• the cable is pushed to the front of the plug body
• the spine of the strain relief on the plug body covers the drain wire
10. Bend the strain relief until it is flat against the jacket and foil.
11. Crimp the plug and strain relief using a standard crimping tool.
12. Trim away any excess foil or drain wire extruding from the strain relief.
13. Slide the connector components up to the plug body.
14. Insert the modular plug into the plug housing.
 Loading...