107/126
Siemens Building Technologies Basic documentation RVD240 CE1P2384en
HVAC Products 31 Handling 27.05.2004
31.2 Commissioning
31.2.1 Installation instructions
The RVD240 is supplied with Installation Instructions which contain detailed descrip-
tions of mounting and wiring and commissioning with functional checks and settings.
They have been written for trained specialists. Each operating line has an empty field in
which the selected value can be entered.
The installation instructions should not be thrown away after use but kept in a safe
place together with the plant documentation.
31.2.2 Operating lines
• The most important work to be performed when commissioning the plant is entry of
the required type of plant. This entry activates all functions and settings required for
the selected plant type.
• In addition, other plant-specific variables are to be configured, such as the presence
of a flow switch, return from the circulating pump fed into the storage tank (if used),
or the speed-controlled pump
All operating lines use proven and practice-oriented values. Coding, guide values, expla-
nations, etc., are given in the Installation Instructions where required.
The "Test and display" block contains three operating lines that are especially suited for
making functional checks:
• On operating line 161, all actual sensor values can be called up
• The relevant setpoints can be displayed on operating line 162
• On operating line 163, all output relays can be individually energized
If the display shows Er
, the fault can be pinpointed via the error code on operating
line 50.
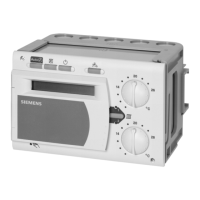
31.3 Installation
31.3.1 Mounting location
Suitable mounting locations are compact stations, control panels, control desks or the
heating room. Not permitted are damp or wet spaces.
At the selected location, the RVD240 can be fitted as follows:
• In a control panel, on an inner wall or on a DIN mounting rail
• On a panel front
• In the control panel front
• In the sloping front of a control desk
All terminals for extra low voltage (sensors and room units) are located at the top of the
controller; those for mains voltage (actuators and pumps) at the bottom.
31.3.2 Mounting choices
The RVD240 can be mounted in one of 3 different ways:
• Wall mounting: The base is secured to a flat wall with two screws
• Rail mounting: The base is snapped on a DIN mounting rail
• Flush panel mounting: The base is fitted in a panel cut-out measuring 138 × 92 mm;
the front panel may have a maximum thickness of 3 mm
Setting the operating
line "Plant type"
Setting the other
operating lines
Operating lines for
functional checks
 Loading...