Do you have a question about the Siemens LOGO! 230 RC and is the answer not in the manual?
Procedures for mounting and removing the LOGO! unit on a DIN rail.
Instructions for connecting power supply, inputs, and outputs to the LOGO! unit.
Explains LOGO!'s startup behavior based on program and memory card status.
How electrical circuit diagrams are represented using LOGO! blocks.
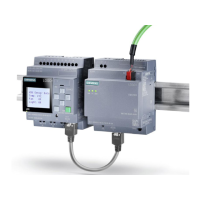
Overview of LOGO! connectors, block types, and their functions for programming.
Details on identifying and using LOGO! inputs and outputs for programming.
Introduces fundamental logic gates (AND, OR, NOT, XOR, NAND, NOR) used in LOGO! programming.
Covers timers, counters, relays, and clock functions for advanced LOGO! programming.
Explains the use of block numbers for referencing and connecting logic blocks in LOGO!.
Details on memory usage and limitations for LOGO! program complexity.
Key principles and best practices for operating and programming LOGO! units.
Navigation guide for LOGO! programming and parameterization menus.
Step-by-step process for translating electrical schematics into LOGO! blocks.
Guides on how to create, edit, and delete programs directly on the LOGO! unit.
Instructions on saving, copying, and transferring programs using LOGO! memory modules.
Procedures for establishing communication between LOGO! and a computer.
How to enter parameterization mode to adjust settings without altering the program.
Specific steps for setting the internal clock and day of the week on LOGO!.
Example of implementing lighting control solutions using LOGO!.
Demonstrates LOGO! application for controlling automatic doors and related functions.
Shows how LOGO! can manage ventilation systems and monitoring.
Application example for controlling industrial gates with LOGO!.
Illustrates LOGO! usage for managing fluorescent lighting systems.
Example of controlling a rainwater pump system with LOGO!.
Discusses various other uses and enhancements for LOGO! applications.
Application of LOGO! for controlling a metal strip dereeler mechanism.
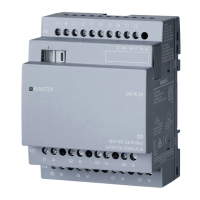
| Inputs | 8 digital inputs |
|---|---|
| Outputs | 4 relay outputs |
| Input voltage type | AC |
| Width | 72 mm |
| Height | 90 mm |
| Depth | 55 mm |
| Number of analog inputs | 0 |
| Number of analog outputs | 0 |
| Operating temperature | 0 °C to 55 °C |
| Storage temperature | -40 °C to 70 °C |
| Protection class | IP20 |
| Digital inputs according to EN 61131-2 | Type 1 |
| Weight | approx. 210 g |
| Program Memory | 400 function blocks |
| Dimensions | 72 mm x 90 mm x 55 mm |





 Loading...