Do you have a question about the Siemens RWF55.5 and is the answer not in the manual?
Describes the controller's purpose and optimization for temperature/pressure control.
Provides general guidance for using the manual.
Explains symbols and formatting used in the document.
Explains safety notes and warnings presentation.
Details the meaning of warning symbols used in the manual.
Explains symbols for notes and references.
Describes how buttons and commands are presented.
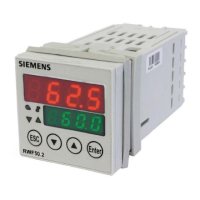
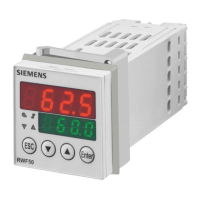
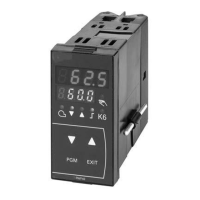
Details the controller's features and capabilities.
Illustrates the controller's internal architecture and connections.
Explains the product identification label on the unit.
Lists items included with the controller and user manual.
Specifies environmental requirements for installation site selection.
Provides physical dimensions and panel cutout specifications.
Guidance on mounting multiple controllers adjacently.
Step-by-step guide for securely mounting the controller in a panel.
Instructions for safely removing the controller from a panel cutout.
Guidance on cleaning the controller's front panel safely.
Critical notes and safety regulations for electrical connections.
Illustrates electrical isolation levels between circuits for safety.
Details terminal assignments and connection diagrams for outputs.
Wiring specifications for Analog Input 1.
Wiring for binary inputs.
Wiring for power supply connections.
Wiring for interface connections (RS-485, Profibus).
Describes low-fire operation and thermostat function.
Explains high-fire operation and mode changeover.
Explains control sequence for modulating burners with 3-position output.
Details control sequence for modulating burners using analog output.
Control sequence for 2-stage burners with 3-position output.
Control sequence for 2-stage burners using analog output.
Procedures for automatic burner shutdown due to sensor failure or overheating.
Methods for predefining and shifting setpoints via buttons or software.
Details setpoint changeover/shift using analog input InP2.
How to change setpoint SP1 using an external setpoint via InP2.
Setpoint shifting using analog input InP2 or binary input dSP.
External setpoint and binary shifting via dSP.
Using outside temperature for weather-compensated setpoint adjustment.
Defines the threshold for switching to high-fire operation.
Manages plant startup after extended periods of inactivity.
Protects system from rapid temperature changes using a ramp function.
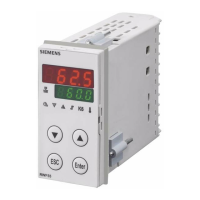
Explains the meaning of controller displays and operational buttons.
Describes the controller's normal display state and access to levels.
Details how to access and modify user-level settings like setpoints.
Guide for manually controlling a modulating burner.
Guide for manually controlling a 2-stage burner.
Steps to initiate the automatic controller tuning process.
Method to view the controller's current software version.
Describes how to access the parameterization level for system adaptation.
Configuration of analog input 1 for actual value acquisition.
Configuration for external setpoint or setpoint shifting.
Configuration for acquiring outside temperature.
Selects controller type, operating action, and sets limits.
Configures thermal shock protection and ramp slope settings.
Sets up alarm functions for monitoring analog inputs.
Configures output signals for binary and analog outputs.
Configures the function of binary inputs.
Configures display settings, decimal points, and level locking.
Configures communication interfaces like RS-485 and Profibus.
Details the self-setting process for PID/PI controllers in high-fire mode.
Methods to verify and adjust controller parameters for optimal performance.
Essential safety precautions when using the ACS411 PC software.
Emphasizes the importance of correct system parameter settings for controller function.
Procedures for altering parameters and plant configuration via the unit.
Requirement for software installation location relative to the plant.
Legal terms regarding software licensing and liability.
Information on ordering the ACS411 software and updates.
Available languages for the ACS411 software.
List of operating systems compatible with ACS411.
Minimum hardware requirements for ACS411 installation.
Step-by-step guide for installing the ACS411 PC software.
Additional information related to the software.
Explains the purpose and usage of the USB port for configuration.
Details powering the controller using the USB port and required accessories.
Modbus addresses for user-level parameters and data.
Modbus addresses for parameter-level settings.
Modbus addresses for configuration settings.
Modbus addresses for remote operation control.
Modbus addresses for device data like software version.
Modbus addresses for device status bits and signals.
Technical specifications and principles of RS-485 technology for Profibus DP.
Wiring diagrams and bus termination requirements for Profibus DP.
Lists parameters accessible via the Profibus DP interface.
Guide to identifying and resolving alarm conditions on the controller.
Addresses other troubleshooting issues like USB connection problems.
Detailed technical data for all analog and binary inputs.
Technical specs for Analog Input 1.
Technical specs for Analog Input 2.
Technical specs for Analog Input 3.
Technical specs for Binary Input D1.
Technical specs for Binary Input D2.
Technical details on how the measuring circuit is monitored for faults.
Technical specifications for controller outputs like relays and analog.
General controller specifications like structure and sampling time.
Electrical parameters including power supply and consumption.
Information on the controller's housing material, mounting, and protection.
Specifies operating, storage, and transport environmental limits.
Technical details of the controller's segment display characteristics.
Lists relevant industry standards and certifications the product complies with.
| Brand | Siemens |
|---|---|
| Model | RWF55.5 |
| Category | Controller |
| Language | English |