Service and maintenance
7.4 Performing a firmware and project update
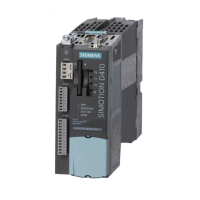
SIMOTION D4x5-2
334 Commissioning and Hardware Installation Manual, 02/2012
● The process of importing the data to an upgrade medium can be performed at the
machine manufacturer's premises; alternatively, if the upgrade archive has been
transferred to the machine operator, the service engineer can do this on site.
● The service engineer imports the upgrade data on an operator-guided basis (without any
involvement by the application engineer) to the SIMOTION device(s), and upgrades the
SIMOTION devices in the process (SIMOTION SCOUT is not required on-site).
The following describes how to upgrade a SIMOTION D with a USB stick. This assumes you
have a USB stick containing the appropriate upgrade data.
Requirement
You have a USB stick containing the upgrade data.
Procedure
When using a USB stick to perform an upgrade, proceed as follows:
1. Check the position of the Service selector switch (upper rotary switch SVC/NCK). The
switch position must be at "0".
2. Insert the USB stick in one of the two USB interfaces of the activated D4x5-2 (only one
USB stick may be inserted).
3. Switch the device OFF/ON or reset it using the RESET button.
4. SIMOTION D4x5-2 will now begin copying the data from the USB stick to the
CompactFlash card. The copying procedure begins with some LED status changes until
finally a yellow/green flashing RDY LED is displayed (0.5 Hz). In the end phase of the
upgrade, the RDY LED has longer steady green or yellow phases (< 10 s).
Once copying is complete, the RDY LED will change to:
– "Steady green" if the procedure has been completed successfully (the copying
procedure has been completed successfully when the RDY LED is constantly green
> 10 s)
– "Steady red" if copying was not successful
5. Switch the D4x5-2 off and remove the USB stick.
6. Switch the D4x5-2 on again. The D4x5-2 now begins with the actual upgrade. The SF
LED flashes green (0.5 Hz) during the upgrade. The procedure can take several minutes.
7. Observe the green flashing of the SF LED.
– As soon as the upgrade procedure has been completed successfully, the SF LED
goes out. The device then boots up automatically in the upgraded configuration (SF
LED display then depends on the operating state of the device).
– If the upgrade procedure was not successful, the SF LED flickers red (10 Hz).
If the upgrade has not been successful "from the point of view of the application" (for
example, the machine is not behaving as desired), it can be undone as follows:
1. Switch the D4x5-2 off.
2. Turn the upper rotary switch (SVC/NCK) to position "B".
 Loading...