EasyManua.ls Logo

Signature Hardware DOLWICK 939624 User Manual

Signature Hardware DOLWICK 939624
8 pages
To Next Page IconTo Next Page
Page #1 background imageLoading...
Page #1 background image
1
1.855.715.1800
DOLWICK
EXPOSED PIPE SHOWER
DUCHA CON TUBO EXPUESTO
COLONNE DE DOUCHE EXPOSÉE
SKU: 939624
REVISED 09/07/2021
CODES: 517039, 517040, 517041, 517042
GETTING STARTED
BEFORE YOU BEGIN
We recommend consulting a professional if you are

Hardware accepts no liability for any damage to the
faucet, plumbing, sink, counter top, or for personal
injury during installation.
Observe all local plumbing and building codes.
Unpack and inspect the product for shipping damage.
If any damage is found, contact our Customer
Relations team via live chat at www.signaturehard-
ware.com or by emailing support@siganturehard-
ware.com.
Ensure that you have gathered all the required
materials that are needed for the installation.
For the following instructions, it is assumed that the
in-wall plumbing has been prepared and the

ANTES DE COMENZAR
Le recomendamos que consulte a un profesional si no
sabe cómo instalar accesorios de plomería. Signature
Hardware no asume ninguna responsabilidad con
respecto a los daños causados al inodoro, sistema de
plomería, suelo o daños personales durante
la instalación.
Cumpla con todas las normas locales de plomería y
construcción.
Desempaque e inspeccione el producto para determinar
si tiene daños por el envío. Si tiene daños, comuníquese
con nuestro equipo de Relaciones con el Cliente por chat
en directo en www.signaturehardware.com o por correo
electrónico a support@siganturehardware.com.
AVANT DE COMMENCER
Nous vous recommandons de consulter un professionnel
si vous n’avez pas d’expérience dans l’installation
d’appareils de plomberie. Signature Hardware décline
toute responsabilité en cas de dommage au robinet, à la
plomberie, à l’évier, au comptoir ou de blessure corporelle
lors de l’installation.
Respectez tous les codes locaux de plomberie et de
construction.
Déballez et inspectez le produit pour vérifier qu’il n’a pas
été endommagé pendant le transport. Si un dommage
est constaté, communiquez avec notre équipe des
relations avec la clientèle au www.signaturehardware.com
ou par mailsupport@siganturehardware.com.
CÓMO COMENZAR
Asegúrese de haber reunido todos los materiales
necesarios para la instalación.
Para las siguientes instrucciones, se supone que la
fontanería interior ya está preparada y que la pared
terminada está en su lugar.
PREMIERS PAS
Assurez-vous d’avoir réuni tout le matériel nécessaire
à l’installation.
Suivre les instructions suivantes uniquement si la
plomberie murale a été préalablement préparée et
que le mur fini est en place.
Question and Answer IconNeed help?

Do you have a question about the Signature Hardware DOLWICK 939624 and is the answer not in the manual?

Signature Hardware DOLWICK 939624 Specifications

General IconGeneral
BrandSignature Hardware
Model Number939624
Product TypeBathroom Faucet
Spout Reach5.5 inches
Handle StyleLever
Number of Handles2
MaterialBrass
Flow Rate1.2 GPM
StyleTraditional
Installation TypeDeck Mounted
ADA CompliantYes
WarrantyLimited Lifetime
Faucet Centers8 inches
FinishPolished Nickel

Summary

BEFORE YOU BEGIN

Consult a professional if unfamiliar with plumbing

Recommendation to consult a professional for plumbing installation if inexperienced.

Observe local plumbing and building codes

Adherence to all local plumbing and building codes is required during installation.

Unpack and inspect for shipping damage

Inspect the product for any shipping damage upon unpacking.

GETTING STARTED

Gather all required materials for installation

Ensure all necessary materials for the installation are gathered before beginning.

Assume in-wall plumbing is prepared and wall is finished

Installation assumes in-wall plumbing is prepared and finished wall is in place.

ADDITIONAL QUESTIONS?

Consult Help Center for product and warranty information

Check the Help Center at signaturehardware.com for product and warranty details.

Contact via live chat or email for assistance

Reach out via live chat or email for further assistance and support.

INSTALLATION

Prepare female NPT fittings recessed behind finished wall

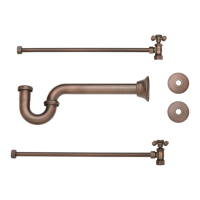
Prepare two female 1/2" NPT fittings recessed 3/8" behind the finished wall, 6" apart.

Apply thread sealant/tape to pipe nipples

Apply thread sealant or plumber's tape to the 1/2" end of provided pipe nipples.

Screw nipples into fittings, extending 1-3/8" beyond wall

Screw nipples into prepared female fittings, tightening until they extend 1-3/8" beyond the wall.

Screw decorative escutcheons onto pipe nipples

Screw the provided decorative escutcheons onto the installed pipe nipples.

Attach faucet using rubber washers, sealant/tape, and wrench

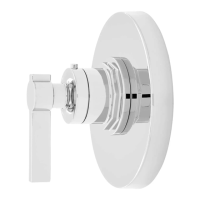
Insert washers, apply sealant/tape, attach faucet, and tighten with an adjustable wrench.

Attach shower arm elbow to riser pipe

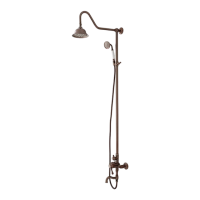
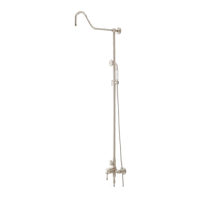
Attach the shower arm elbow to the top of the shower riser pipe.

Temporarily install riser pipe onto valve assembly without sealant

Temporarily install riser pipe onto valve assembly; do not apply sealant yet.

Position and mark mounting plate on wall

Slide mounting plate onto riser pipe support arm and mark wall for mounting holes.

Drill holes, insert anchors, attach mounting bracket to wall

Drill pilot holes, insert anchors, and attach mounting bracket to wall using provided screws.

Slide decorative flange to conceal mounting hardware

Slide the decorative flange onto the mounting plate to conceal hardware.

Reattach riser pipe, ensure support arm slides into plate, tighten securely

Reattach riser pipe to valve, ensuring support arm slides into plate and tightening securely.

Attach shower arm, shower head, and handheld shower

Attach shower arm to elbow, head to arm, and handheld shower using the flexible hose.

Test system for leaks and proper function of all outlets

Test the system by turning on water, diverting to all functions, and checking for leaks.

Related product manuals