INSTALLATION INSTRUCTIONS
Connecting Rain/Moisture Sensor
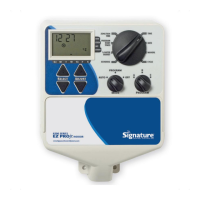
The EZ Pro
™
Jr. Indoor is equipped to operate a sensor with normally-closed
leads. To install a sensor, remove the factory-installed jumper wire from the
sensor connector on the terminal strip and insert the sensor wires. Refer to the
sensor manufacturer’s instructions for specific installation details. (See figure 1)
If a sensor has suspended watering, the sensor indicator segment will appear
on the LCD. The symbol will go off when the sensor has dried out. The
EZ Pro
™
Jr. Indoor will resume operation based on the selected program.
NOTE: Manual operations will ignore the rain sensor
Connecting the Batteries and Starting the Controller
Remove the wiring skirt. Insert two new AA Alkaline (LR6 in Europe) batteries
into the battery clips in the pocket directly above the terminal strip. The AA
batteries enable the EZ Pro
™
Jr. Indoor to be programmed without AC power
and maintain the programs and real time clock in the event of a power outage.
If the batteries are not installed, the controller will lose real time and programs
in the event of a power outage. The batteries should be replaced every five years,
or when low battery symbol appears. Replace the batteries while the unit is AC
Powered to prevent loss of clock and settings. (See figure 1)
4
 Loading...