- 7 -
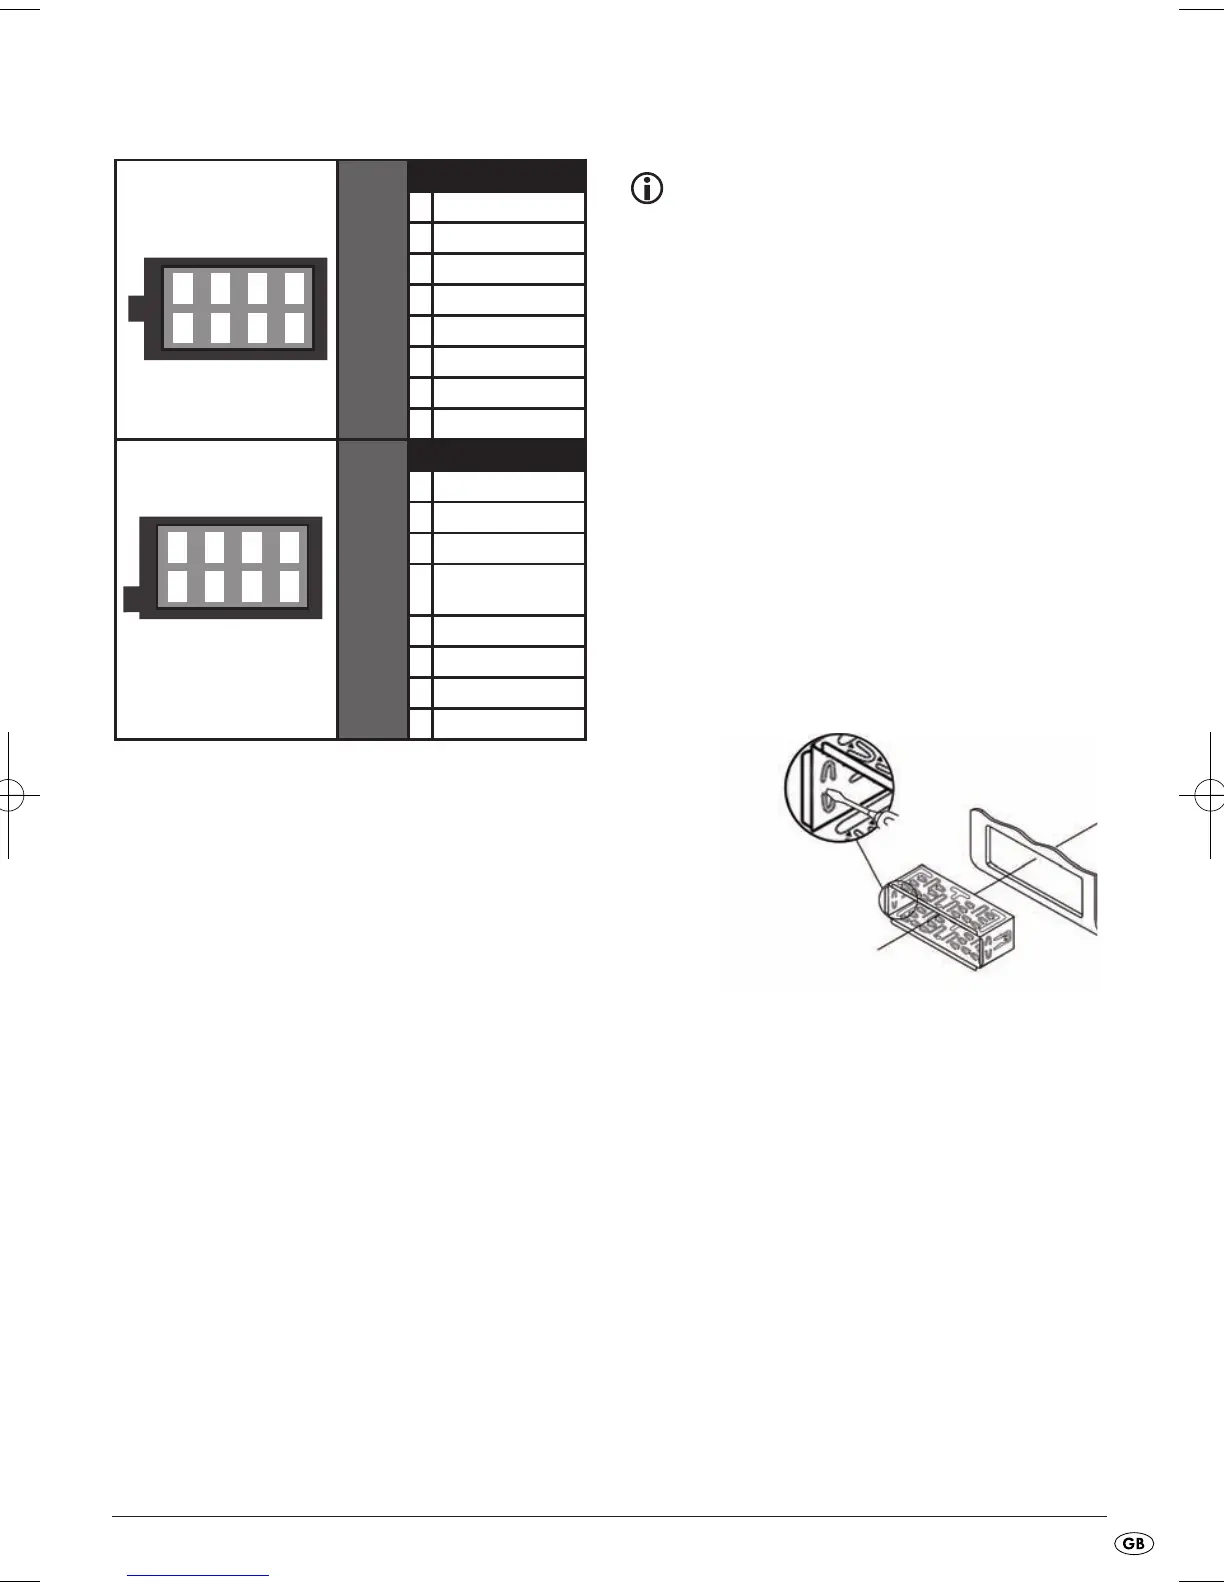
Configuration of the ISO connections
Of course you can also only connect the car radio
to two speakers. Then you only use the cable for the
front speakers.
Problems because of cable interchanging
In a few vehicle models, the standard configu-
ration of the connections [4] and [7] in the
ISO Block A (see above "Configuration of the
ISO Blocks") is interchanged at the factory. If
this is the case the station memory can be lost.
To correct this, the connections 4 (Ignition positive)
and 7 (Permanent positive) in the ISO Block A must
be swapped.
ISO A
Configuration
1 unconfigured
2 unconfigured
3 unconfigured
4 12 V
(Ignition positive)
5 Antenna power
6 unconfigured
7 Permanent positive
8 Negative (-) GND
Installing the radio into the ISO duct
Note
Before installation remove, without fail, the two
transport securing screws on the top of the
radio housing (marked with a red sticker)!
The car radio can be installed into any standard
ISO mounting duct. In the event that your vehicle
does not have an ISO mounting duct contact your
local specialist establishment, local dealer or the
technical department of the store.
• Pull the installation bracket and the bezel frame
off of the car radio's housing.
• Place the installation bracket into the ISO mounting
duct.
• Bend the tabs on the installation bracket with
a screw driver so that the bracket is fixed firmly
into the mounting duct (see diagram).
• Check to make sure that the bracket is securely
fixed.
• Connect the ISO socket block of the car radio with
the two ISO plugs on your vehicle.
• Connect the antenna cable from the vehicle an-
tenna to the antenna socket on the car radio.
• If desired, connect an audio cinch cable of an
external amplifier to the
LINE OUT socket on the
car radio.
• If desired, connect an audio cinch cable of an
external sound source to the
LINE IN socket on the
car radio.
• If necessary, secure your device against theft with
additional measures. Attach the securing screw
with the anchoring plate and the securing material
to the engine firewall of the vehicle.