11
GB
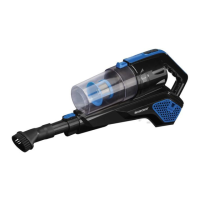
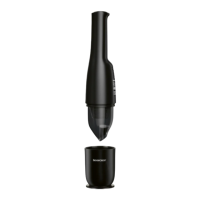
9.1 Dust container
• Hook the dust con-
tainer|11 on at the
bottom of the suction
device|5. Then press
it down at the top un-
til it engages.
• Remove by pressing the unlocking
mechanism|14 at the suction device
and remove the dust container|11.
9.2 Paper filter (HEPA)
The paper filter|7 is located at the upper end
of the filter carrier|8.
• Release the paper filter|7 with a slight
twist before pulling it off.
• When inserting the
filter, ensure the posi-
tion of the small later-
al pins at the paper
filter|7. They must fit
into the openings of
the filter carrier|8.
Then, lock the paper
filter|7 again.
9.3 Metal filter
The metal filter|12 is lo-
cated at the end of the
filter carrier|8. With a
slight twist, the metal fil-
ter|12 can be released
and put on again.
• To release, rotate the metal filter|12 in
the direction of the open lock symbol .
• When assembling, rotate the metal fil-
ter|12 in the direction of the closed lock
symbol . Ensure that the metal filter|12
clicks firmly into place.
9.4 Motor protection filter
Between dust contain-
er|11 and suction de-
vice|5 the motor
protection filter|13 is lo-
cated.
• Remove the dust con-
tainer|11 from the
suction device|5.
Then, you can re-
move the motor pro-
tection filter|13 from
the inside of the suc-
tion device|5.
9.5 Exhaust air filter
There are two exhaust
air filters|2 at the sides
of the suction device|5.
• To remove the filters,
press the unlocking
mechanism|3 at the
filter cover|4. Then,
you can remove the
exhaust air filter|2
from the filter cov-
er|4.
 Loading...