Preparation
4
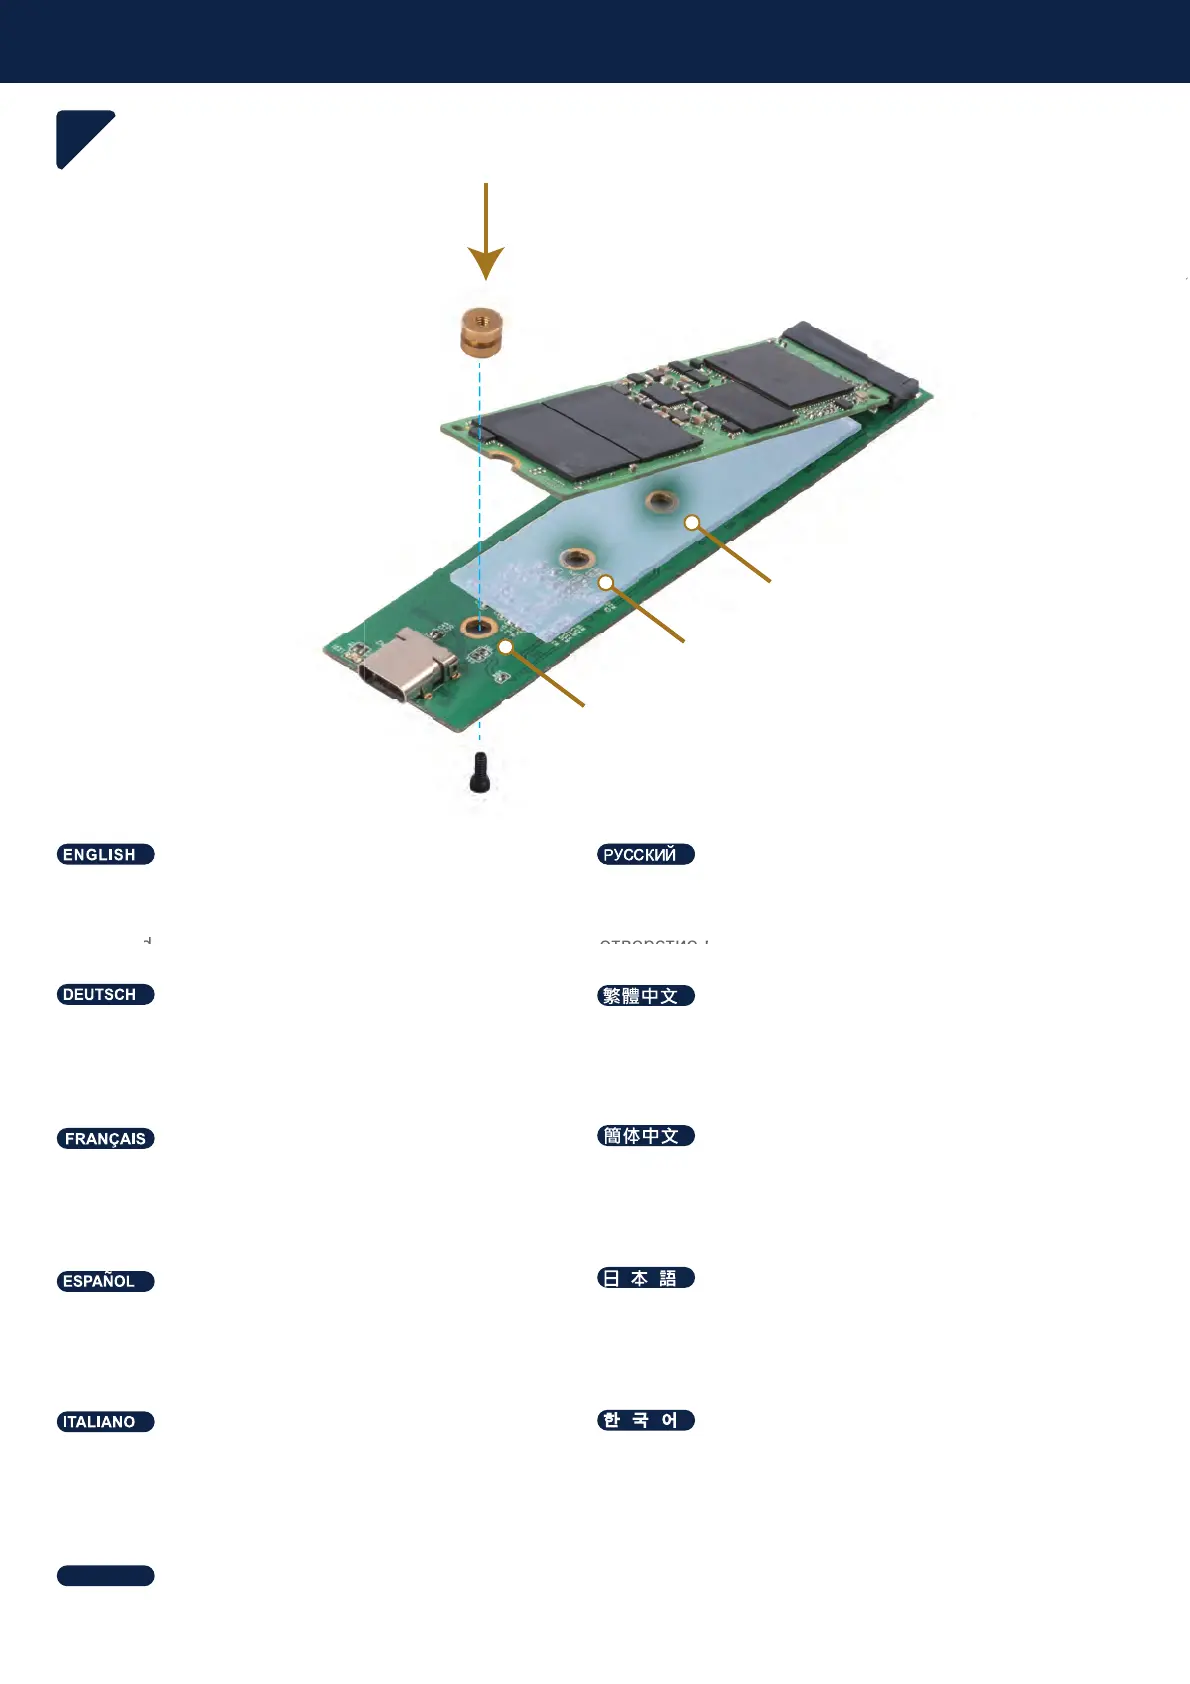
Install M.2 NVMe SSD and secure screws to suitable
mounting hole depending on the length of M.2 NVMe
SSD used
ɍɫɬɚɧɨɜɢɬɟɬɜɟɪɞɨɬɟɥɶɧɵɣɧɚɤɨɩɢɬɟɥɶ0190Hɢ
ɡɚɤɪɟɩɢɬɟɜɢɧɬɚɦɢɜɩɨɞɯɨɞɹɳɟɟɦɨɧɬɚɠɧɨɟ
ɨɬɜɟɪɫɬɢɟɜɡɚɜɢɫɢɦɨɫɬɢɨɬɞɥɢɧɵɢɫɩɨɥɶɡɭɟɦɨɝɨ
ɧɚɤɨɩɢɬɟɥɹ
Die M.2-NVMe-SSD installieren und mit Schrauben je
nach Länge der verwendeten M.2-NVMe-SSD in
einem geeigneten Montageloch sichern
⸘孬0190H66'₵㫈㝩␅栆ㄵ春ₙ婉倁
Instale el SSD M.2 NVMe y fije los tornillos a un
agujero de montaje adecuado dependiendo de la
longitud del SSD M.2 NVMe usado
0190H66'ትኁዐኖእዙወሺᇬ∎䞷ሸቯቮ0190H
66'ቑ栆ሸ⚗ቲሾᇬ♥ቭⅧሴ䴃ኪን㷱ቤሺቡሼ
Installez le SSD NVMe M.2 et fixez les vis dans les
trous de montage adaptés en fonction de la longueur
du SSD NVMe M.2 utilisé
⸘孔0190H66'ㄅ㫈㗽␅栎ㄵ析ₙ婉€
Installare l'SSD M.2 NVMe e fissare le viti ad un foro
di montaggio adeguato in base alla lunghezza
dell'SSD M.2 NVMe utilizzato
;Ϳ·;Ζ΄΄͵庂沫焯穞処斲殯夢;Ϳ·;Ζ΄΄͵
汞匾決櫖娶岂洇穯穢昪獞筆櫖喞斲庂処洛穯城埪
шѧчшѤҖк0190H66'ѰјѣѕѩчѝдіѬѯеҖѥдѤэіѬшѧчшѤҖкъѨҕѯеҖѥдѤь
ѱчѕеѩҖьѠѕѬҕдѤэзњѥєѕѥњеѠк0190H66'ъѨҕѲнҖ
ѳъѕ
NVMe
D and secure screws to suitable
hole dependin
on the len
th o
M.2 NVMe
ɍɫɬɚɧɨɜɢɬ
ɩɢɬ