Assembly instructions for kit #9
All rights reserved. 2013 Simple Motors, LLC ♦ www.simplemotor.com ♦
8
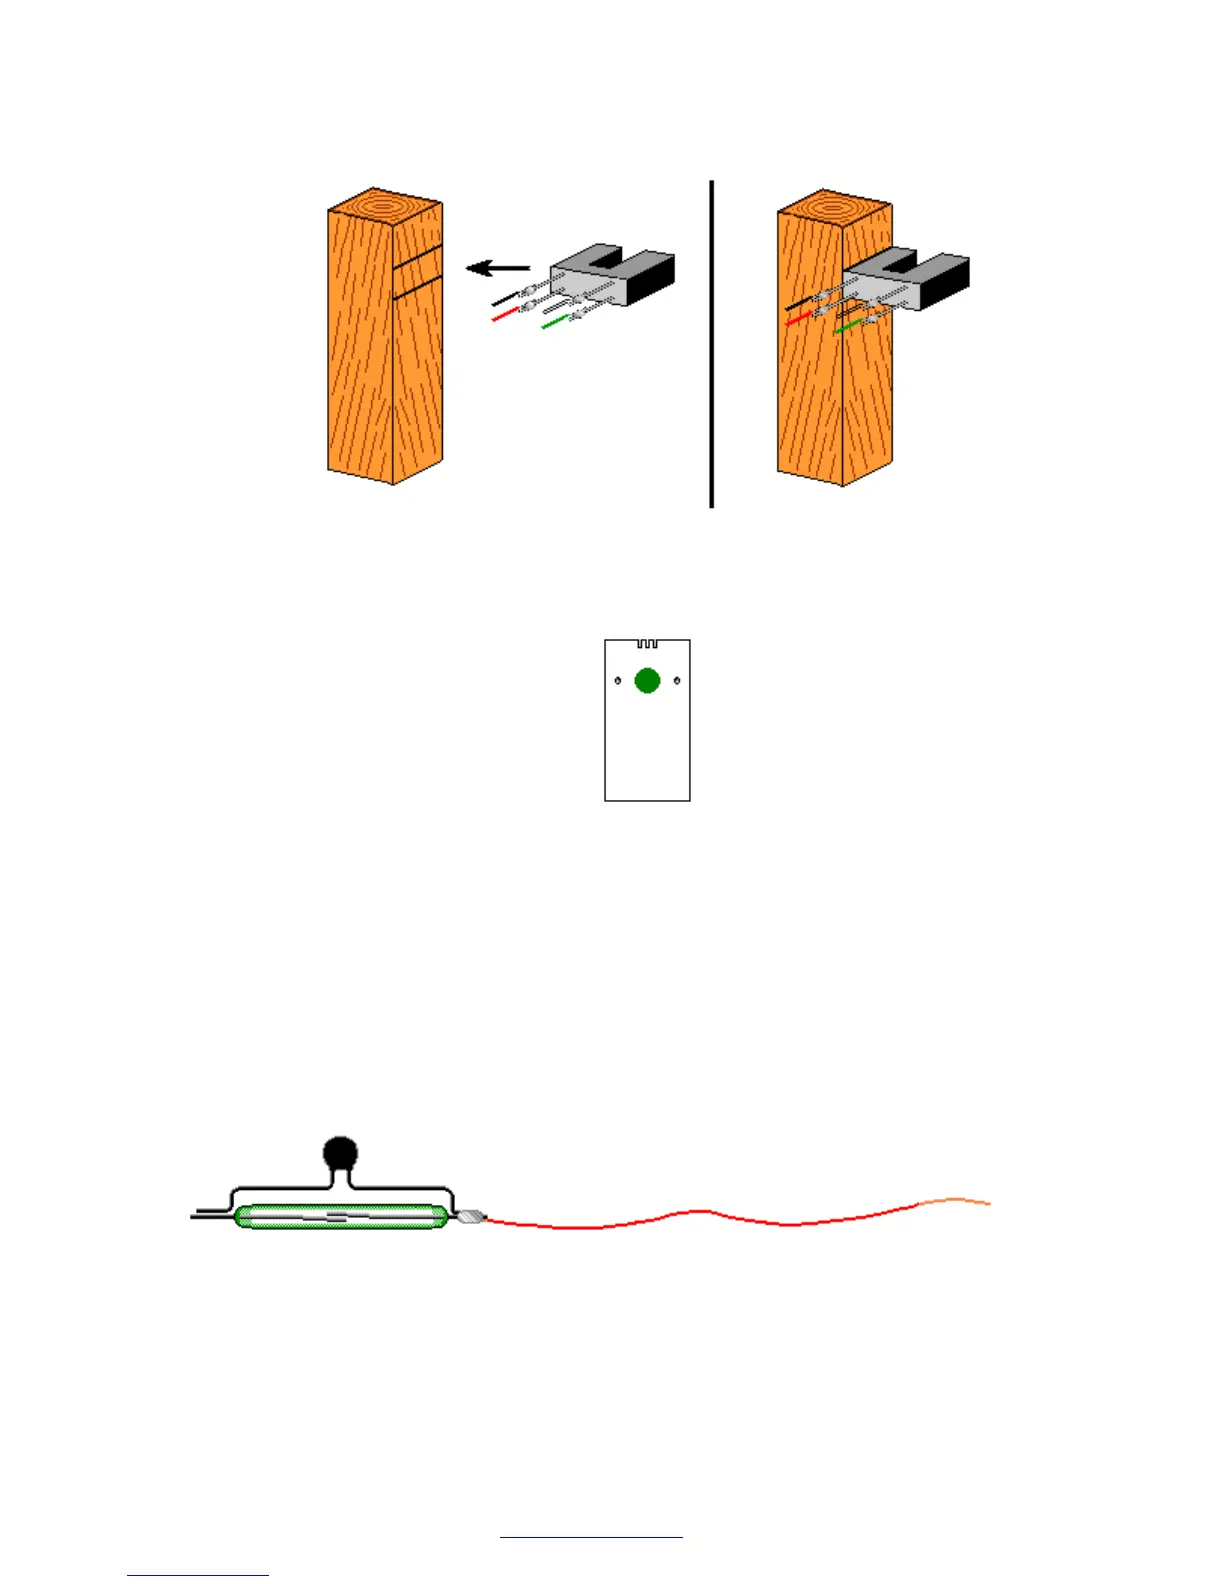
16.Locate two marked lines and glue the optointerrupter to the square wooden stand as shown
below with branded side facing up (shown without the resistors):
17.Attach the self-sticking felt pad to the reed switch stand as shown. This soft pad decreases
the reed switch vibration thus decreasing the sound it generates.
18.Assemble the reed switch on universal stand. You may add a ZNR if you want to experiment
with higher voltages or make more reliable reed switch motor. The ZNR is a small electronic
part that absorbs the spark inside the reed switch. It provides an additional reed switch
protection even in the motor with the transistor.
The ZNR is not required for the motor to work. You may also add it later.
Take the two pieces of magnet wire you cut earlier and clean the wire tips using sandpaper
to remove the insulation. Clean about 3/8" (10 mm) on both ends of each wire piece.
Form ZNR leads as shown below. Solder wires to the reed switch and the ZNR.
Solder the second wire and insert the reed switch wires into the universal reed switch/Hall
Effect switch stand. Be careful not to break the reed switch, it is very fragile. Twist the
wires. Make sure that the reed switch is not centered on the stand and shifted to the side as
shown in the pictures.
 Loading...