10
The 4009 has the following system wiring configurations:
• Style Y (Class B)
• Style Z (Class A)
• Interconnection to Host Panel, Single Signal Card
• Interconnection to Host Panel, Two Signal Cards
• Interconnections as a Single Reverse Polarity Device (single or two signal
card(s), isolated or non-isolated configuration
Notes:
1. The 4009 terminal blocks are labeled with a “TB number”, and each
terminal on the terminal block has a number. (For example, Terminal
No. 1 on Terminal Block No. 1 is labeled TB1-1.)
2. Each terminal on the terminal block is also identified with an
abbreviation of the circuit wire that is connected to it. (For example,
TB2-1 on the 565-386 Signal Card is labeled “SIG3+”.)
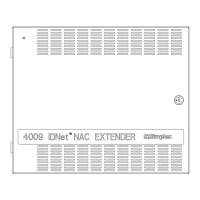
Refer to the 841-925 Field Wiring Diagram and the procedure listed below when
installing the 4009 NAC Power Extender.
1. Connect a 12 AWG copper ground wire from safety ground in the electrical
distribution panel to the 4009 green grounding screw.
2. Connect external NACs to TB1-1 (SIG +) and TB1-2 (SIG -) on the first
Signal Card.
3. Install jumper in position 2-3 of P3 on the first 4009 Signal Card, install
jumper in position 1-2 of P3 if used with 4003 (Assemblies 565-360, 565-
386, 565-388, 565-545, 565-569).
4. Install and connect additional 4009 Signal Card as required.
5. Install jumper in position 1-2 of P3 on the second Signal Card (if installed).
6. Install battery charger options as required.
• For external batteries and charger, install jumper to position 1-2 on P4
of 565-367 or 565-488 Power Supply.
• When external battery charger is used, splicing into existing 733-807
harness is required. Refer to Field Wiring Diagram 841-925.
• To charge 18 Ah or 10 Ah lead-acid batteries, install jumper to position
2-3 on P4 of 565-367 or 565-488 Power Supply.
7. Install battery switch over option as required.
• For automatic switch to battery upon power failure, install jumper
to position 2-3 on P3 of 565-367 or 565-488 Power Supply.
Continued on next page
System Wiring Configurations
Jumper Placements and
Terminal Connections
System Installation,
Continued
Technical Manuals Online! - http://www.tech-man.com