12
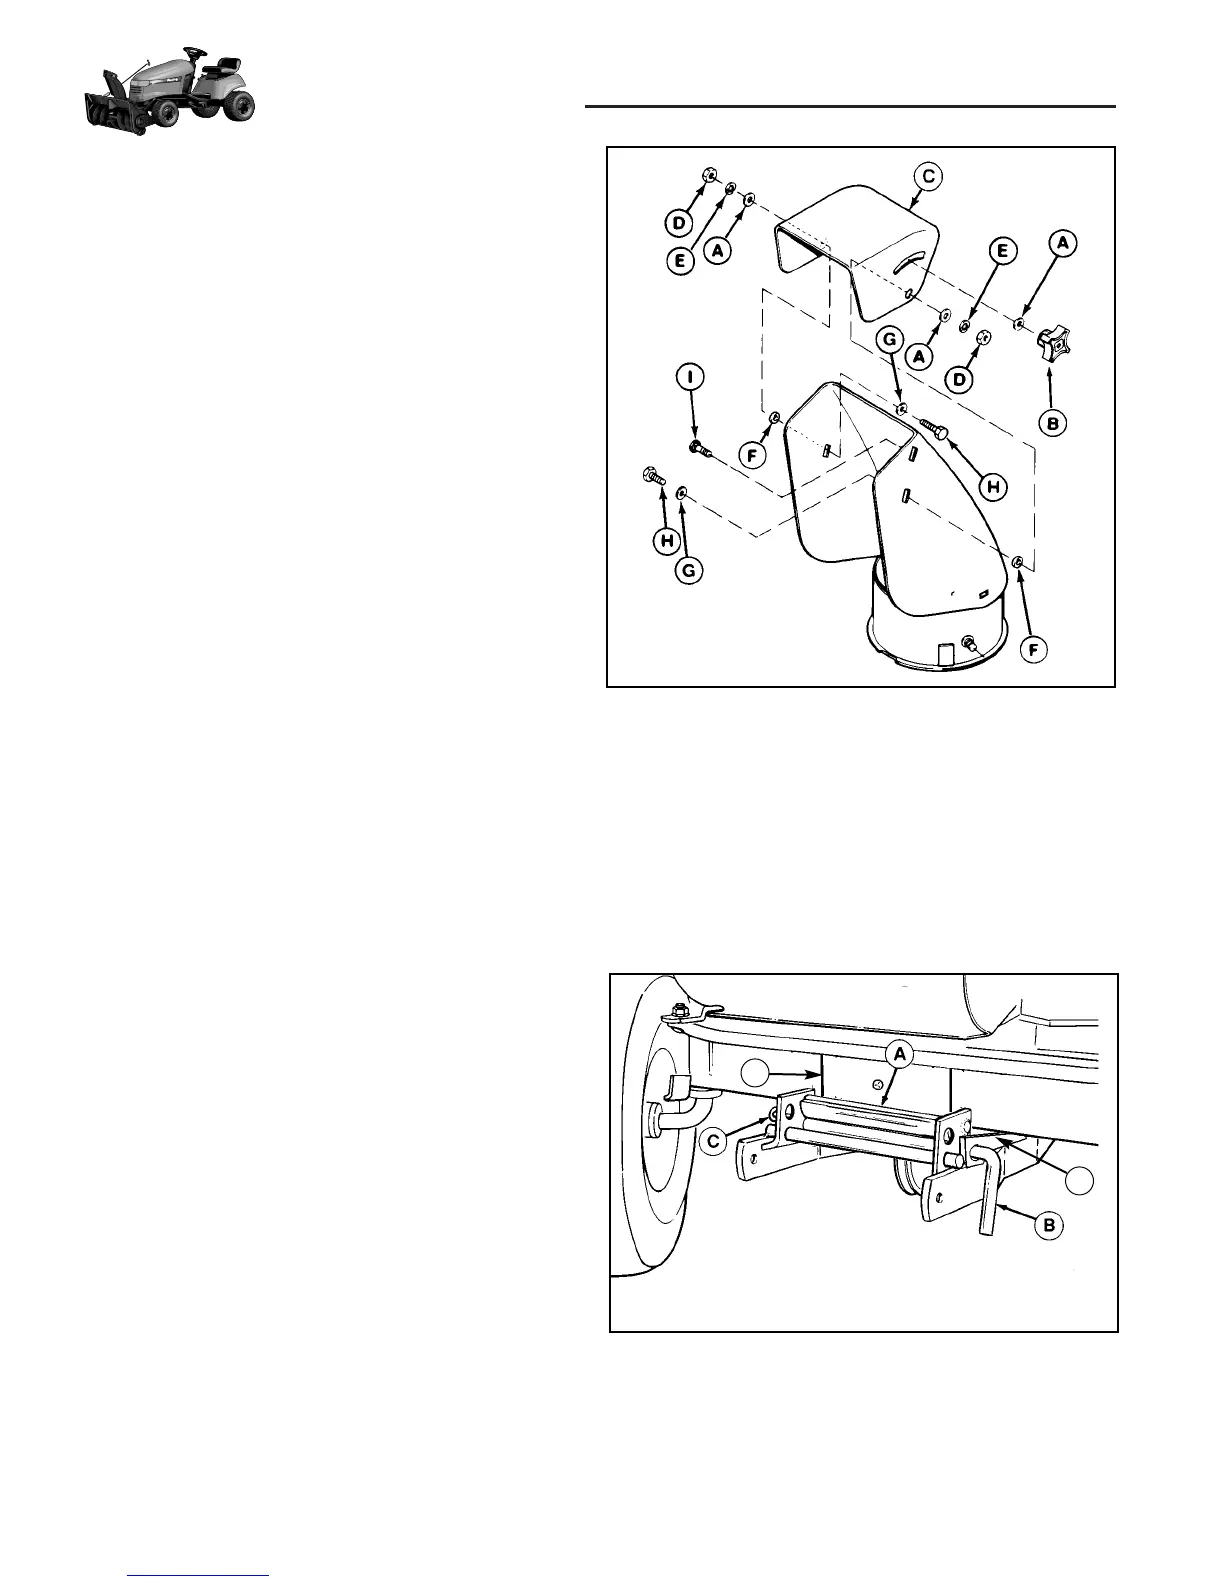
Figure 15. Spout Deflector
A. Washer, 5/16 F. Spacer
B. Knob G. Washer, 5/16
C. Deflector H. Screw, 5/16
D. Nut, 5/16 I. Carriage Bolt, 5/16
E. Lockwasher, 5/16
Assemble the Deflector
Refer to Figure 15.
1. Attach the deflector (C) to the discharge chute with
two screws (H), washers (G), spacers (F), washers
(A), lockwashers (E) and nuts (D).
2. Position the bolt (I) and washer (A), then thread the
knob (B) onto the bolt (I).
Figure 16. Installing Hitch to Front of Tractor
A. Hitch Bar D. Tractor Brackets
B. Hitch Pin E. Up-Stop Brackets
C. Safety Clip
HITCH INSTALLATION
NOTE: If your tractor is not equipped with the Large Lift
Lever, part no.1692623, install it at this time. Follow the
instructions supplied with the kit (a copy of the instruc-
tion sheet can be found in the back of this manual). The
rear hitch bracket, washers, and hairpin clips (B, C, D,
Figure 17) need to be installed with the left lever kit. The
pivot bar of the lift lever kit goes through the rear hitch
bracket and washers.
1. Increase front tire pressure to 20 psi (138 kPa) to
compensate for added weight. Be sure both tires
have equal pressure.
2. From the front of tractor, slide the hitch under the
tractor.
3. See Figure 16. Turn the wheels fully left and lift the
front hitch bar (A) up onto the tractor bracket (D).
Make sure it is seated fully into the tractor bracket.
Install the long hitch pin (B) through the up-stop
brackets (E, one on each side) and hitch. Secure the
pin with a safety clip (C).
E
D
Regent Hitch Installation

 Loading...