27
Landlord -Snowthrower Installation
27
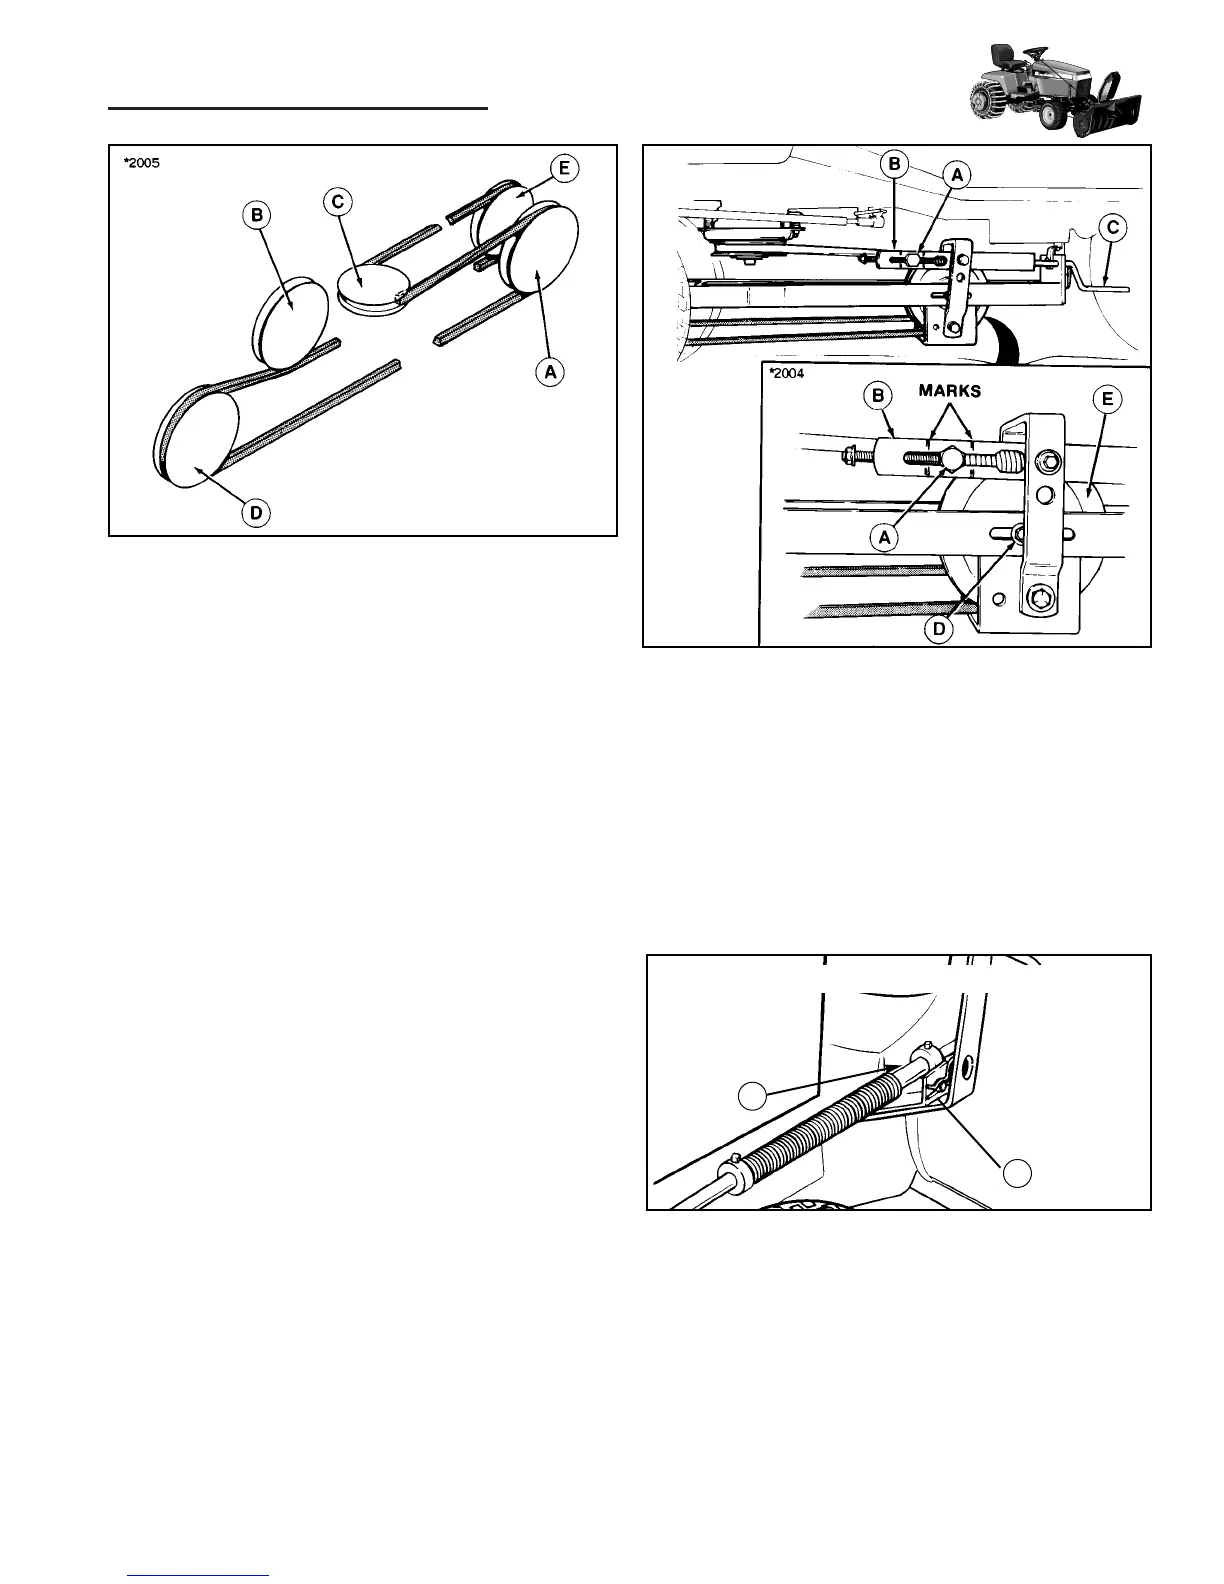
Figure 58. Belt Routing
A. V-pulley C. Electric Clutch Pulley (V-Pulley)
B. Idler Pulley D. Snowthrower Pulley (V-Pulley)
E. Backside Idler
Figure 60. Installing Lift Rod to Snowthrower
A. Rod Guide Assembly
B. Hair Pin Clip
Install lift rod to inside of bracket as shown.
A
B
Install the Belt
1. See Figure 59. To install the belt on the electric
clutch pulley, the trunion (A) on the tension spring
assembly (B) must be fully forward. If it is not, turn
handle (C) to move it forward. Install belt on electric
clutch pulley. Refer to Figure 58 for belt routing.
2. See Figure 59. Turn handle (C) so that trunion (A) is
centered between the marks as shown.
NOTE: If trunion cannot be centered between marks,
loosen capscrew (D, Figure 59) and reposition pulley
(E) rearward. Retighten capscrew (D) and center trunion.
Attach the Lift Rod to the Snowthrower
1. Install the front attachment lift rod to the snowthrower
as shown in Figure 60 and secure with a hair pin clip.
The rod guide assembly (A) may need to be removed
and oriented correctly.
Figure 59. Belt Installation & Adjustment
A. Trunion D. Capscrew
B. Tension Spring Assembly.. E. Pulley
C. Handle
 Loading...