21
en
Check Mower Blade Stopping Time
Mower blades and mower drive belt should come to a com-
1. With tractor in neutral, PTO disengaged and operator in
seat, start the engine.
2. Look over the left-hand footrest at the mower drive belt.
Engage the PTO and wait several seconds. Disengage
the PTO and check the amount of time it takes for the
mower drive belt to stop.
see an authorized dealer.
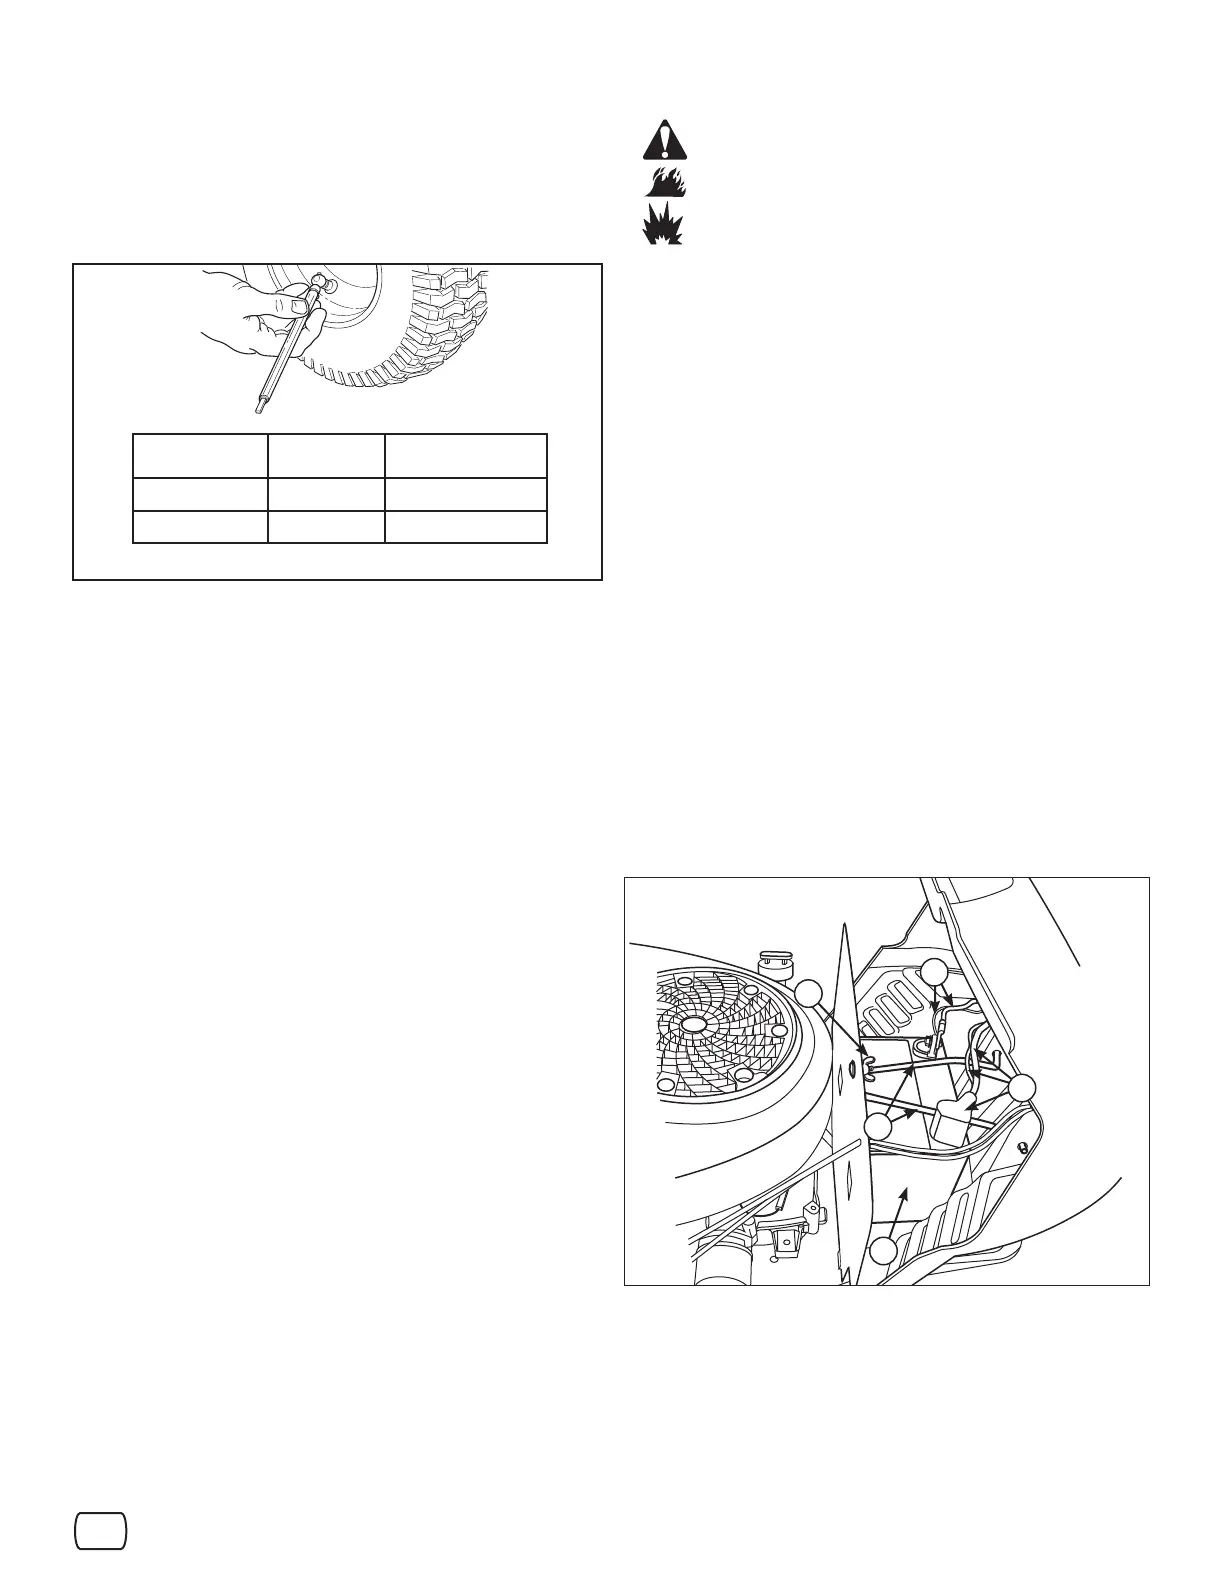
Check Tire Pressure
Tire pressure should be checked periodically, and maintained
at the levels shown in the chart (Figure 7). Note that these pres-
side-wall of the tires. The pressures shown provide proper trac-
tion, improve cut quality, and extend tire life.
Size PSI bar
15 x 6.0-6 12-14 0,82-0,96 bar
20 x 8.0-8 10 0,68 bar
Figure 7
Cleaning the Battery and Cables
1. Disconnect the cables from the battery, negative cables
A, Figure 8) then the cover and positive cables (B).
2. Loosen the wingnut and washer (D).
3. Pivot the hold-down rod (C) up and away from battery.
Secure to steering tower.
4. Remove the battery (E).
5. Clean the battery compartment with a solution of baking
soda and water.
6. Clean the battery terminals and cable ends with a wire
brush and battery terminal cleaner until shiny.
7. Reinstall the battery in the battery compartment.
Secure with the battery hold-down rod and wingnut
and washer.
8. Re-attach the battery cables, positive cables and cover
9. Coat the cable ends and battery terminals with petro-
leum jelly or non-conducting grease.
WARNING
When removing or installing battery cables,
disconnect the negative cable FIRST and
reconnect it LAST. If not done in this order,
the positive terminal can be shorted to the
frame by a tool.
Battery Maintenance
Figure 8
D
E
C
A
B
 Loading...