4 klx
8 klx
12 klx
16 klx
28 klx
32 klx
sunlight
simulator
( 30° = 4 klx)
LED (8) green : measured value
>
threshold
LED (8) red : measured value
<
threshold
24 klx
20 klx
EN Hz Sun Sensor
5107610B
Read carefully these instructions before any use.
Presentation
1
Installation
2
Programming the sensor for an existing roller shutter
3
Operating the sensor
4
Replacing the battery
5
1/1
Replace the battery when the LED (8) turns orange.
Type CR 2430 Li-Mn 3V battery. Make sure the battery is inserted correctly (+/-). Please
separate and dispose of the appliance, batteries and used batteries in a recycling point.
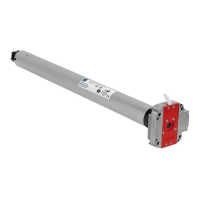
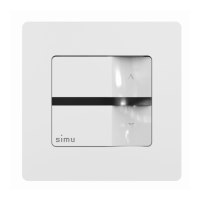
The Hz Sun Sensor is a radio sun sensor enabling the automatic operating of roller shutters and blinds equipped with a SIMU-Hz receiver or motors. It controls
shutters and blinds, opening and closing them depending on the sunlight.
- Clean the surface where the sensor will be positioned. Check that
the sensor is not shaded by anything.
- Do not position the transmitter near metal in order to avoid range
losses.
Do not allow children to play with the remote controls.
Do not place the sensor in liquids.
- To programme it, remove the front cover (1) and place the sensor (9) microswitch on (see § 4.1).
- Dampen the suction cup then x it to the inside of the window or on the window
sill.
- Position the sensor detection zone in the planned shadow zone.
- If your sensor is to control a group of motors: repeat stages 3.1 and 3.2 for each motor in the stage.
- To delete the sensor from the motor memory: Complete stage 3.1 using the individual command transmitter and stage 3.2 using the sensor to delete.
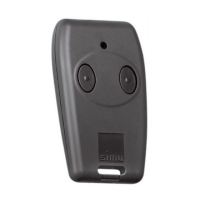
3.1- Open the memory of the motor using the
individual control transmitter:
- Press the PROG button on the transmitter for
approximately 3 seconds. The motor will run for
0,5 second in one direction, then in the other.
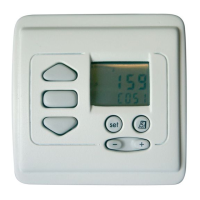
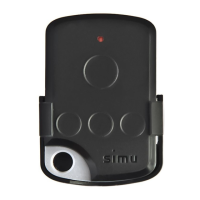
4.1- Starting/stopping the sensor: To start the sensor, place the microswitch (9) on . The LED (8) lights up for 5 seconds.
- If sunlight exceeds the threshold programmed for over 5 minutes (5s. in DEMO mode), the sensor will command the motor to close and then open to position
the roller shutter/blind at the limit of the shadow zone (see §2).
- If the sunlight drops below the threshold between 15 to 30 minutes (30 seconds in DEMO mode), the sensor will command the full opening of roller shutter/
blind (15 minutes if sunlight is continuous, 30 minutes if the clouds occasionally obscure the sun).
If the threshold is crossed several time (upper/lower) during a movement, the sensor will command the roller shutter / blind to roll up and will not
command it again that day.
- To stop the sensor, position the microswitch (9) on OFF. In this mode, the sensor will no longer control the motor(s) according to the sunlight and the PROG
and MODE buttons are deactivated.
4.2- Setting the threshold: To set the threshold, the microswitch (9) must be on . Before setting the threshold, it is
good to know the instant sunlight level (in
klux
- see diagram opposite).
- Briey press the MODE button (11). The LED (8) lights up.
- Position the potentiometer to set threshold (7) on the maximum value (+). Then turn the potentiometer slowly anti-
clockwise (-) until the LED changes from red to green. The position of the potentiometer (7) when the LED changes
colour gives the instant light intensity.
4.3- Demonstration mode: Demonstration mode can be used for demos as well as to adjust the threshold as the reaction times are reduced.
- To activate DEMO mode, press the MODE button for over 3 seconds (11). The LED (8) changes from xed light (2 s.) to ashing for 30 seconds.
- To deactivate DEMO mode, press the MODE button for over 3 seconds (11). The LED (8) changes from ashing (2 s.) to xed light and then goes o.
DEMO mode is automatically deactivated 3 minutes after the last action on the sensor.
Then adjust the threshold as shown below:
- Turn the potentiometer (7) clockwise (+) to raise the threshold.
- Turn the potentiometer (7) anti-clockwise (-) to lower the threshold.
3.2- Validate the operation from the Hz Sun
sensor to be programmed:
- Press the PROG button on the sensor for ap-
proximately 1 second. The motor will run for 0,5
second in one direction, then in the other.
Technical specications:
- Protection level III - Protection Index IP31
- Operating temperature from 0°C to +60°C
- Range 6 m through 2 concrete walls
- Frequency range: 433,050 MHz – 434,790 MHz F: 433,420 MHz
- Max power used: ERP < 10 mW
1. Front cover
2. Sensor module
3. Battery (Li-Mn 3V CR2430)
4. Case
5. Sunlight detection zone
6. Suction cup fastening
7. Sunlight threshold adjustment potentiometer
8. LED
9. ON ( ) / OFF Microswitch
10. PROG Button
11. MODE Button
SIMU S.A.S. au capital de 5 000 000 € - Z.I. Les Giranaux - BP71 - 70103 ARC-LÈS-GRAY CEDEX - FRANCE - RCS VESOUL B 425 650 090 - SIRET 425 650 090 00011 - n° T.V.A CEE FR 87 425 650 090
SIMU hereby declares that the radio equipment covered by these instructions is in compliance with
the requirements of Radio Directive 2014/53/EU and the other essential requirements of the applicable
European Directives. The full text of the EU declaration of conformity is available at www.simu.com.
 Loading...