24
Installation and Maintenance
PP
PP
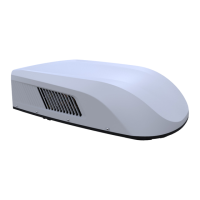
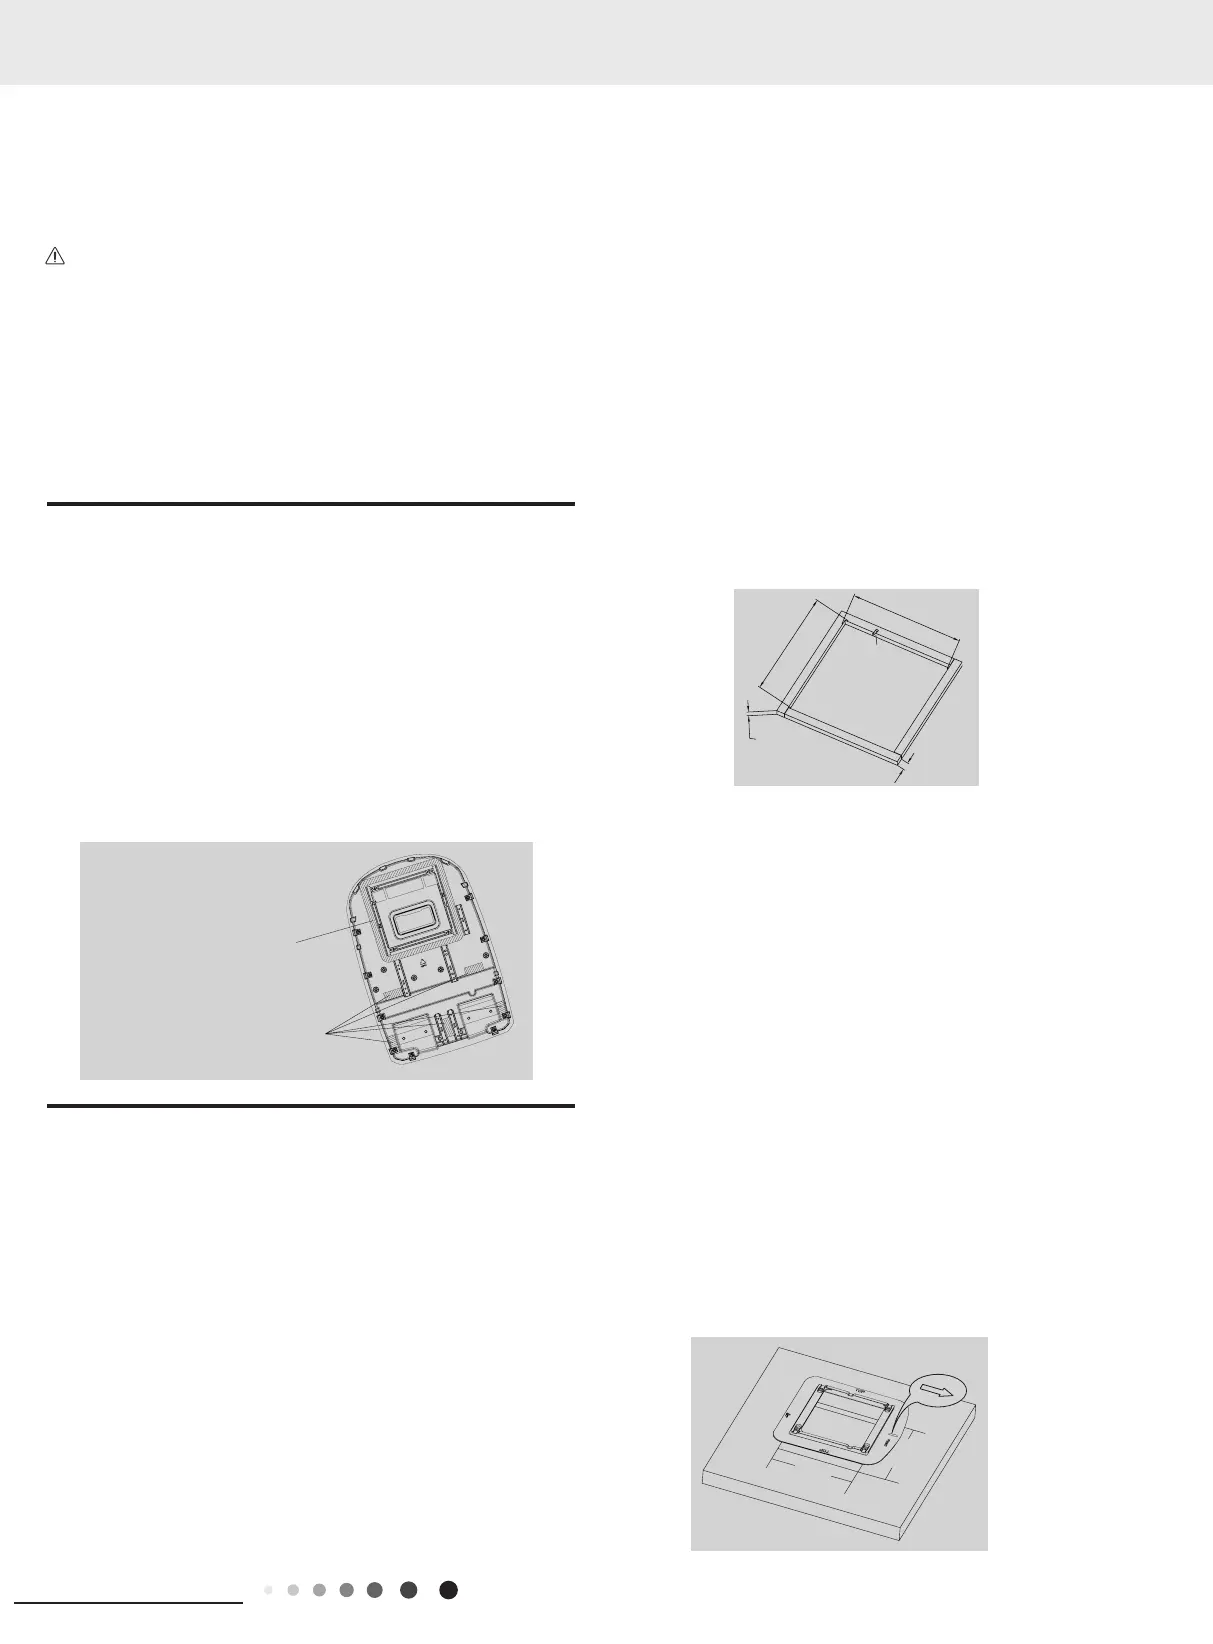
400mm
400mm
19mm
m
Hole for
Wires
Installation method for mounting plat
If the roof already has a 400x400mm opening.
Select the installation position for the recreational vehicle air
conditioner
This mounting plat of switchover opening is applicable for Sinclair
recreational vehicle air conditioner.
The opening size of installation port on the top of the vehicle must
be 400×400mm.
Operation method:
1.Eliminate the sundries around the installation port on the top of
the vehicle and keep the installation surface
flat;
2.Check
whether
there
are
holes
or
grooves
on
surface
of
installation position. If yes, conduct the sealing treatment to prevent
water leakage;
3.Fill
the
groove
on
the
surface
where
the
mount-ing
plate
is
contacting the top part of the vehicle with the unhardened sealant
(the
maximum
thickness
is
1cm);
When
the
mounting
plat
is
installed on the top of vehicle, ll the sealant in the gap between
the mounting plat and the vehicle roof. The mounting plat should be
tightly sealed with the roof of the vehicle to prevent water leakage.
4.Install it into the opening on the top of the vehicle according to the
indicate direction by the arrow (the direction of arrow should be the
same with the head of the vehicle).
Fig. 2
Fig. 3
gasket.
3.Examine the roof opening size, if the opening is small than
400x400mm, the opening must be enlarged.
CASE B.
If a roof vent opening is not used,a new opening(see Fig.2)will be
cut into the vehicl roof.A matching opening will also have to be cut
into the interior vehicle ceiling,be careful when cutting the ceiling
opening because if the ceiling opening is carpeted,snagging could
occur. After the opening in the roof and interior ceiling are the
correct size,a framed support structure must be placed between the
exterior roof top and interior ceiling.The reinforced framed structure
must follow the follwing guidelines:
1.It must be capable of supporting both the weight of the roof top air
conditioner and the interior ceiling assembly.
2.It must be capable of holding the roof outer surface and interior
ceiling apart and supporting them, so that when the roof top air
conditioner and ceiling assembly are bolted together,no collapsing
occurs. A typical support frame is shown in Fig. 2.
3.There must be an opening through the frame for the power supply
wiring. Route the supply wiring through the frame at the same time
the support frame is being installed.
8.2 Before installation
8.4 Selecting an installation location
8.3 Stick Sponge (Sealing Strip) And
Sponge
Test run the unit with proper power supply. Refer to the operation
instruction section in the Owner’s Manual Operation & Installation.
Make sure all the controls operate correctly then disconnect the
power supply of the unit.
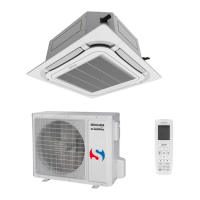
The air conditioner has been designed for use in recreational
vehicles.
Check the roof of the vehicle to determine if it can support both the
roof top unit and the ceiling assembly without additional support.
Make sure the interior ceiling mounting area will not interfere with
existing structures.
Once the location for the air conditioner has been determined. A
reinforced and framed roof hole opening must be cut (if there is no
hole,please refer to CASE B) or you may use existing vent holes
(See CASE A).
CASE A.
If a roof vent is already present in the desired mounting location for
the air conditioner, the following steps must be performed:
1.Remove all screws which secure the roof vent to the vehicle.
Remove the vent and any additional trim. Carefully remove all
chalking from around the opening so the surface is clear.
2.It may be necessary to seal some of the old roof vent mounting
screw holes which may fall outside of the air conditioner basepan
1.Before sticking, clean up the sundries at the sticking position (as
shown in Fig.1) of the chassis of the outdoor unit to ensure that the
sticking position is clean;
2.Take out one piece of sponge (sealing strip) and ve pieces of
sponge from the accessories, and tear off the paper on the glue
surface and align at the edge of the position as shown in Figure 1
to stick the sponge.
If the sponge (sealing strip) is damaged or not stuck on the proper
position, you must replace it with a new one and stick it properly;
3.Check whether the sponge (sealing strip) and the sponge are
tightly adhered, and ensure that they will not fall o.
1.
Moving parts may cause personal injury. Be careful when test
the unit. Do not operate the unit with exterior cover removed.
2. Outdoor unit can't be installed at the low recess of the roof of
vehicle. It must be mounted at the flat surface on the roof of vehicle
to make sure the rain, car-washing water, condensate water,etc.
can be drained smoothly. No water is allowed to be accumulated
around the outdoor unit; otherwise, it will cause malfunction or
safety hazards as the water will pour into the air conditioner.
3.Please use the equipped mounting Plate for installation;
otherwise, it may cause malfunction or damage.
WARNING
Sticking position of sponge
(sealing strip)
Sticking position of ve pieces
of sponge
Fig. 1