5
HTE302172 13/46
6
Low frequency
←→
High frequency
The preparation for operation is described here. Please follow each setting and see the
detail on the page in the hollow arrow .
・ Setting of Soft start ramp-up time
・ Setting of On delay and Off delay time for Overflow
control
・ Speed change with an external signal and etc.
Select the drive frequency range according to your
partsfeeder and linear feeder.
・45 to 90Hz (Half-wave Drive Unit: ER series)
・90 to 180Hz(Full-wave Drive Unit: EA series)
・180 to 360Hz(High-frequency Drive Unit: series)
・65 to 120Hz(Moderate-Frequency LFB/LFG Series)
5)
5)5)
5)
Everyday operation
Everyday operationEveryday operation
Everyday operation
4)
4)4)
4)
Additional Function
Additional FunctionAdditional Function
Additional Function
1)
1)1)
1)
Initial Setting
Initial SettingInitial Setting
Initial Setting
Set the drive frequency
output range according to
your partsfeeder and
linear feeder.
2)
2)2)
2)
Setting of Stroke
Setting of StrokeSetting of Stroke
Setting of Stroke
Set the stroke of the partsfeeder
and linear feeder so smooth that
work pieces are discharging on
the track.
See page 14
See page 24
☆
☆☆
☆Operation mode
Operation modeOperation mode
Operation mode
It is depend on using a stroke sensor or not.
Initial Setting
Initial SettingInitial Setting
Initial Setting
Preparation for operation
Preparation for operationPreparation for operation
Preparation for operation
☆ Output Frequency Range
Auto-tuning mode “AUTO FREQ”:
Using a stroke sensor
The drive frequency chases the
resonant frequency of the
drive unit automatically.
The stroke is set manually.
Constant stroke control at the
set point
Constant Stroke mode
Using a stroke sensor
The drive frequency and stroke
are set manually.
Constant stroke control at the
set point
Constant Output Voltage mode
Using no stroke sensor
The drive frequency and stroke
are set manually
Constant
output voltage
control
Stroke→
Automatic
Stay on the
resonant
Auto-tuning control image
Constant Stroke & Voltage
Stroke→
See page 20
See page 16
See page 18
3)
3)3)
3)
Setting the maximum
Setting the maximum Setting the maximum
Setting the maximum
stroke and Scaling of it.
stroke and Scaling of it.stroke and Scaling of it.
stroke and Scaling of it.
Any trouble arises during the adjustment please initialize the
setting and restart the adjustment from the beginning.
See page 41
5
HTE302172 14/46
6
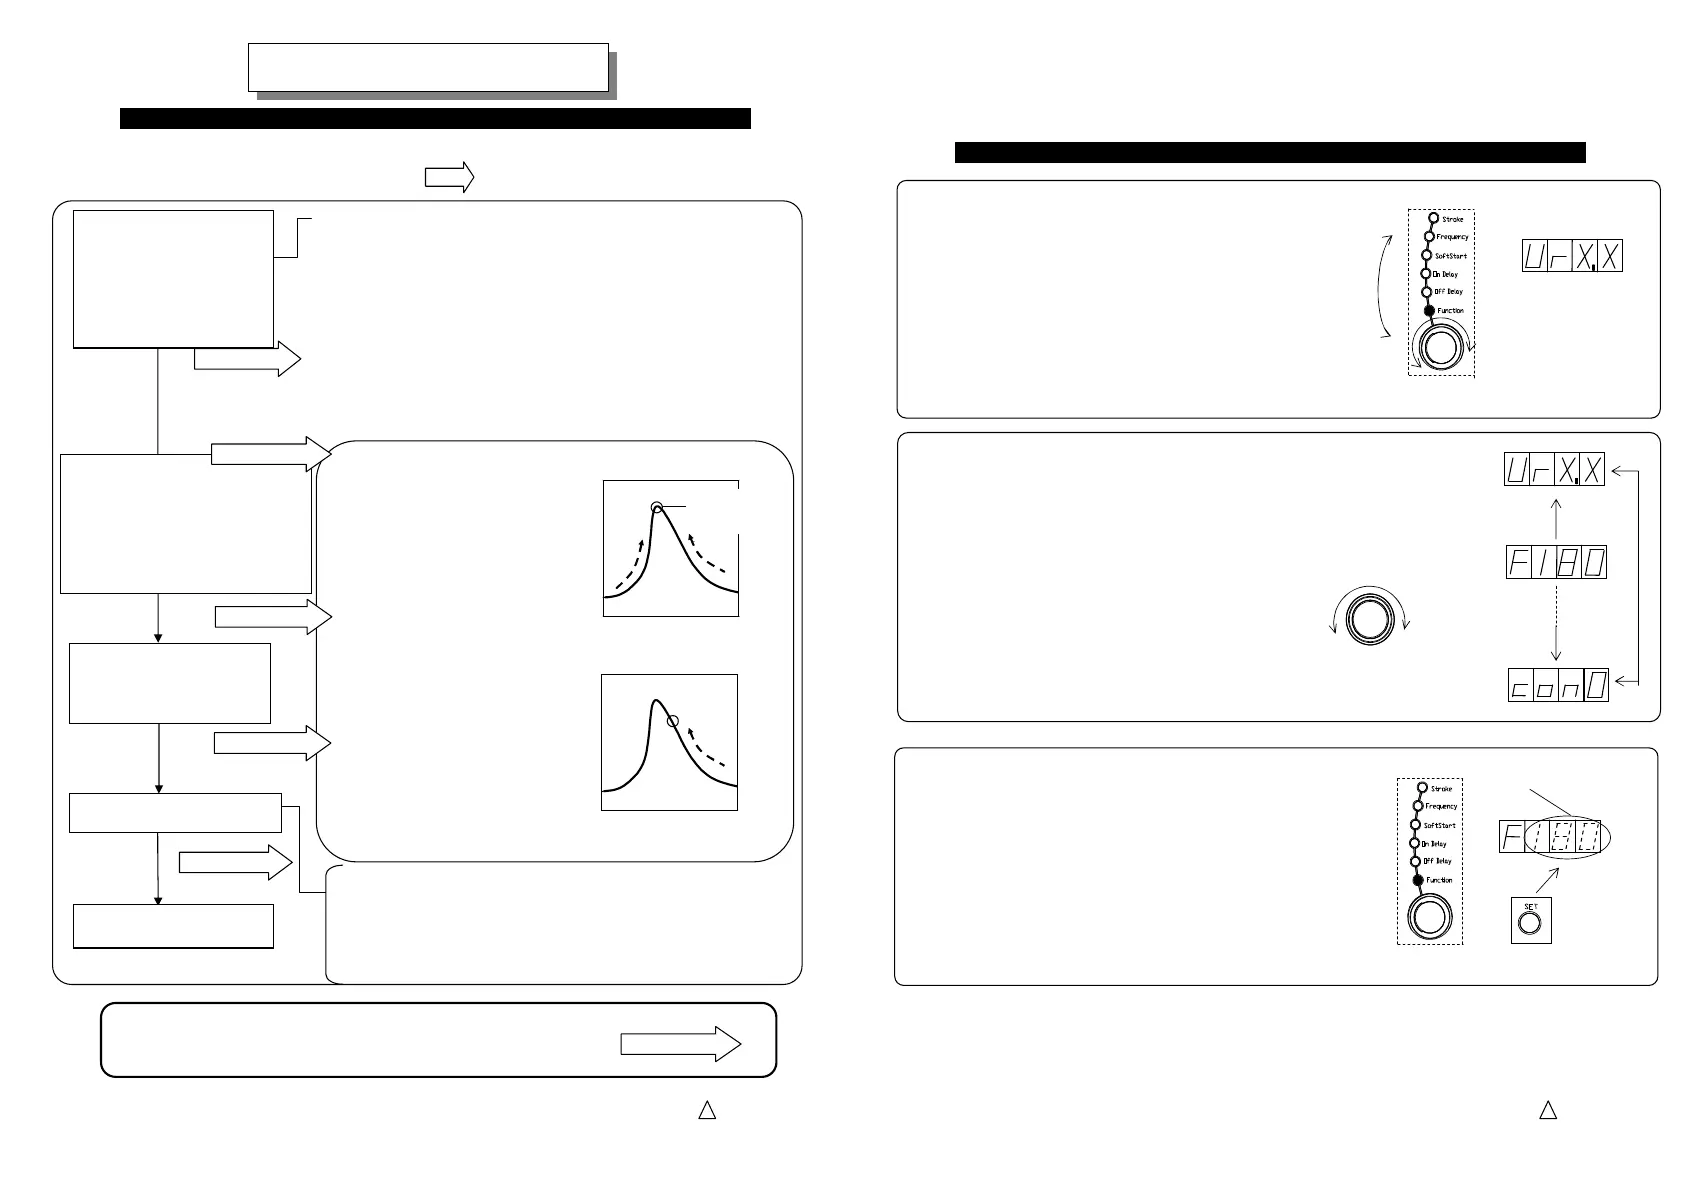
3. Push “Set” button to change the mode from
“Indication” to “Adjust”.
Blinkin
Alteration enable
Push button
2. Dial the setting encoder up to appear code “F”,
Output Frequency Range, on the display.
How to adjust the Drive Frequency Output Range
How to adjust the Drive Frequency Output RangeHow to adjust the Drive Frequency Output Range
How to adjust the Drive Frequency Output Range
Setting Encoder
Dial
1. Dial the selection dial and select the “Function” turning “Function” lamp on.
Function data appears.
Selection Dial
Dial
Turning on
 Loading...