5
HTE302172 15/46
6
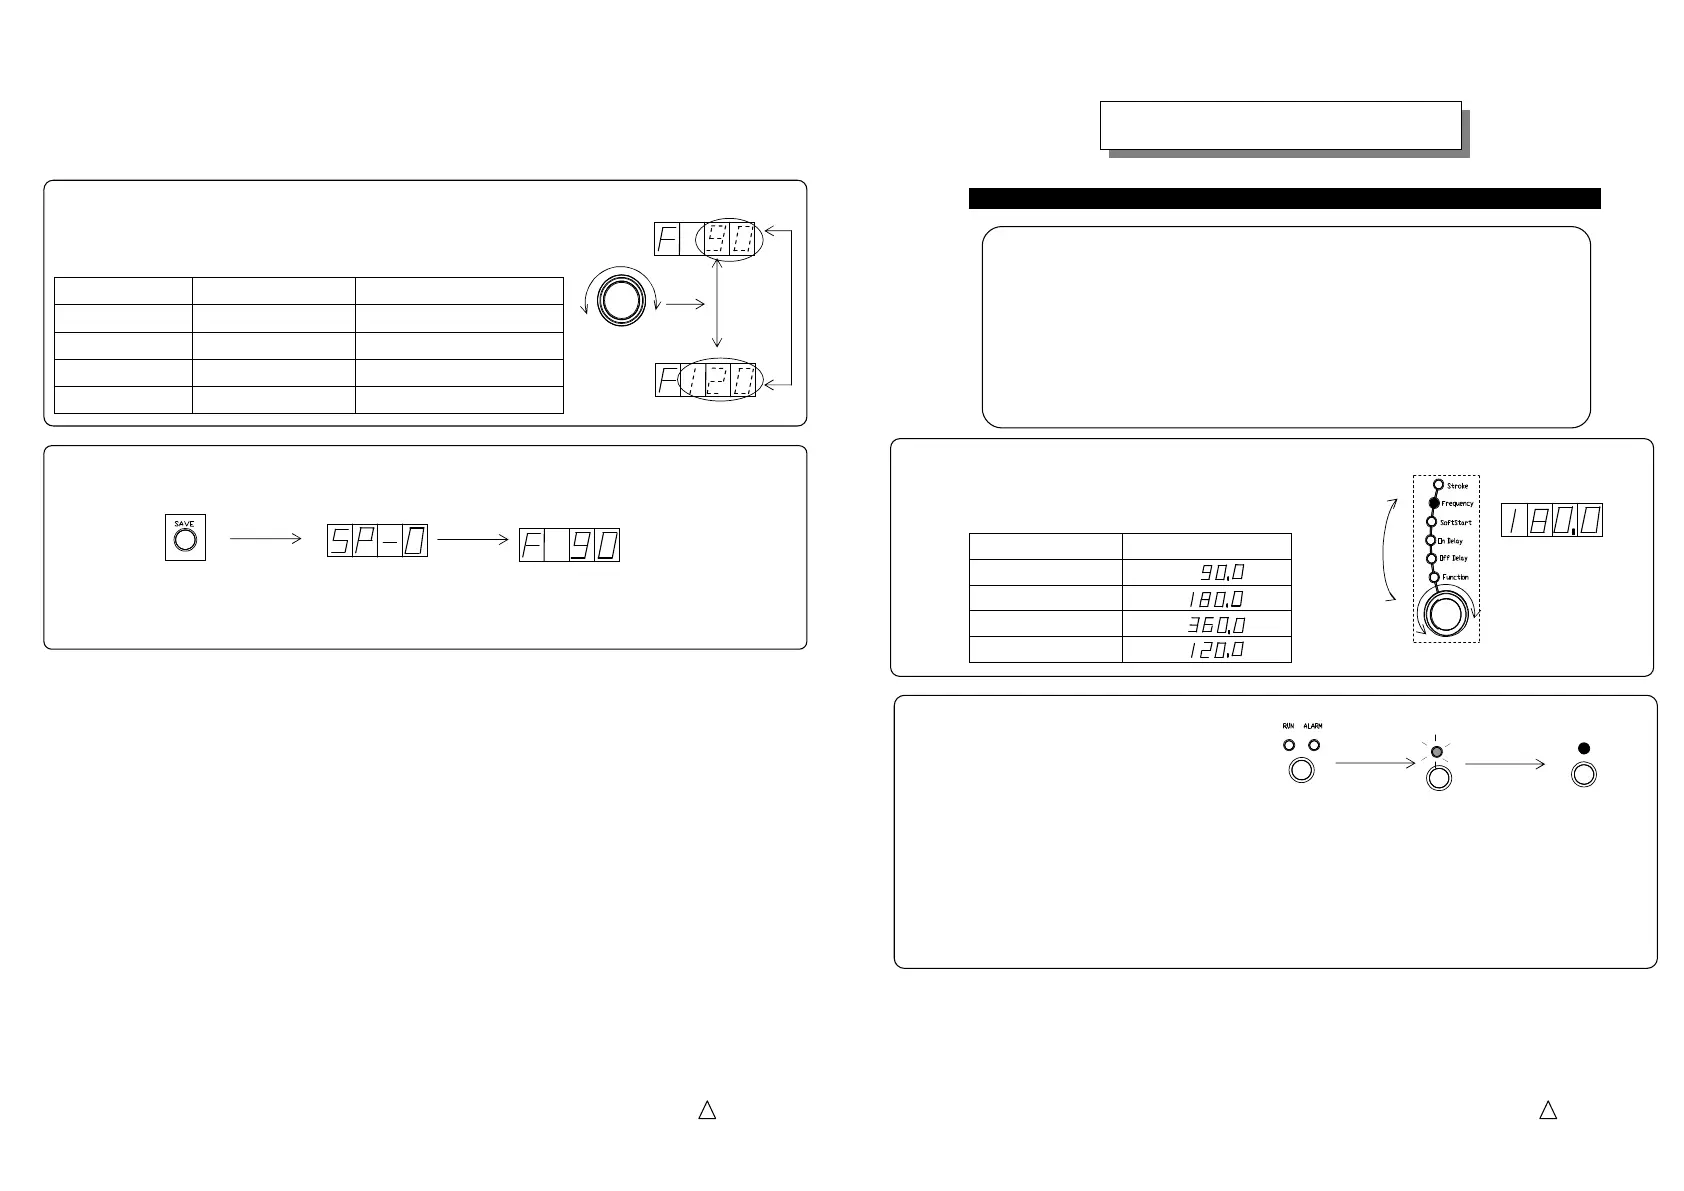
4. Dial the setting encoder and select the drive frequency for the
partsfeeder/linear feeder controlled. The value of the function code shows
the upper limit of the output drive frequency.
5. Push “Save” button to store the data having been set
Output Frequency Range
Type of Drive Unit
F 90 45 to 90Hz
Half-wave Drive Unit ER series
F180 90 to 180Hz
Full-wave Drive Unit EA series
F360 180 to 360Hz
High-Frequency Drive Unit series
F120 65 to 120Hz
Middle-Frequency LFB/LFG Series
Setting Encoder
Dial
Push “Save” button
New data is stored
Storing
5
HTE302172 16/46
6
After finished the setting of “Frequency Range”, please set the stroke
of the partsfeeder or linear feeder.
Put some work pieces in the bowl or chute and set the stroke so that they are
discharged smoothly on the track.
In the case of “Model CF” drive unit the stroke must be set at the maximum
of the unit.
Please make sure:
a. Stroke sensor is connected.
b. “Auto Freq”, indicating auto-tuning mode, lamp is turned on.
How to adjust the Stroke on the auto
How to adjust the Stroke on the autoHow to adjust the Stroke on the auto
How to adjust the Stroke on the auto
tuning mode
tuning modetuning mode
tuning mode
Dial the selection dial and select “Frequency” turning “Frequency” lamp on.
The maximum output frequency selected in the initial
setting appears on the display.
Check the former selection is correct or not.
Frequency Range Value
45~90Hz
90~180Hz
180~360Hz
65~120Hz
Initial Setting
Initial SettingInitial Setting
Initial Setting
-Continued-
Selection Dial
Turning on
Dial
2. Push “RUN/STOP” button.
Then the partsfeeder is running and the output drive frequency chases the resonant frequency of the
drive unit. The drive frequency becomes close to the resonant frequency the auto-tuning is completed.
“Auto Freq” lamp is blinking during the tuning and turning on after it is completed.
Push
Auto Freq: Blinking
Auto Freq
Auto Freq:
Turning on
Auto Freq
How to adjust the Stroke on the auto
How to adjust the Stroke on the autoHow to adjust the Stroke on the auto
How to adjust the Stroke on the auto
tuning mo
tuning motuning mo
tuning mo
 Loading...