14
|
Instruction Manual and Parts List
3.16
3.17
Pedal
Adjustment
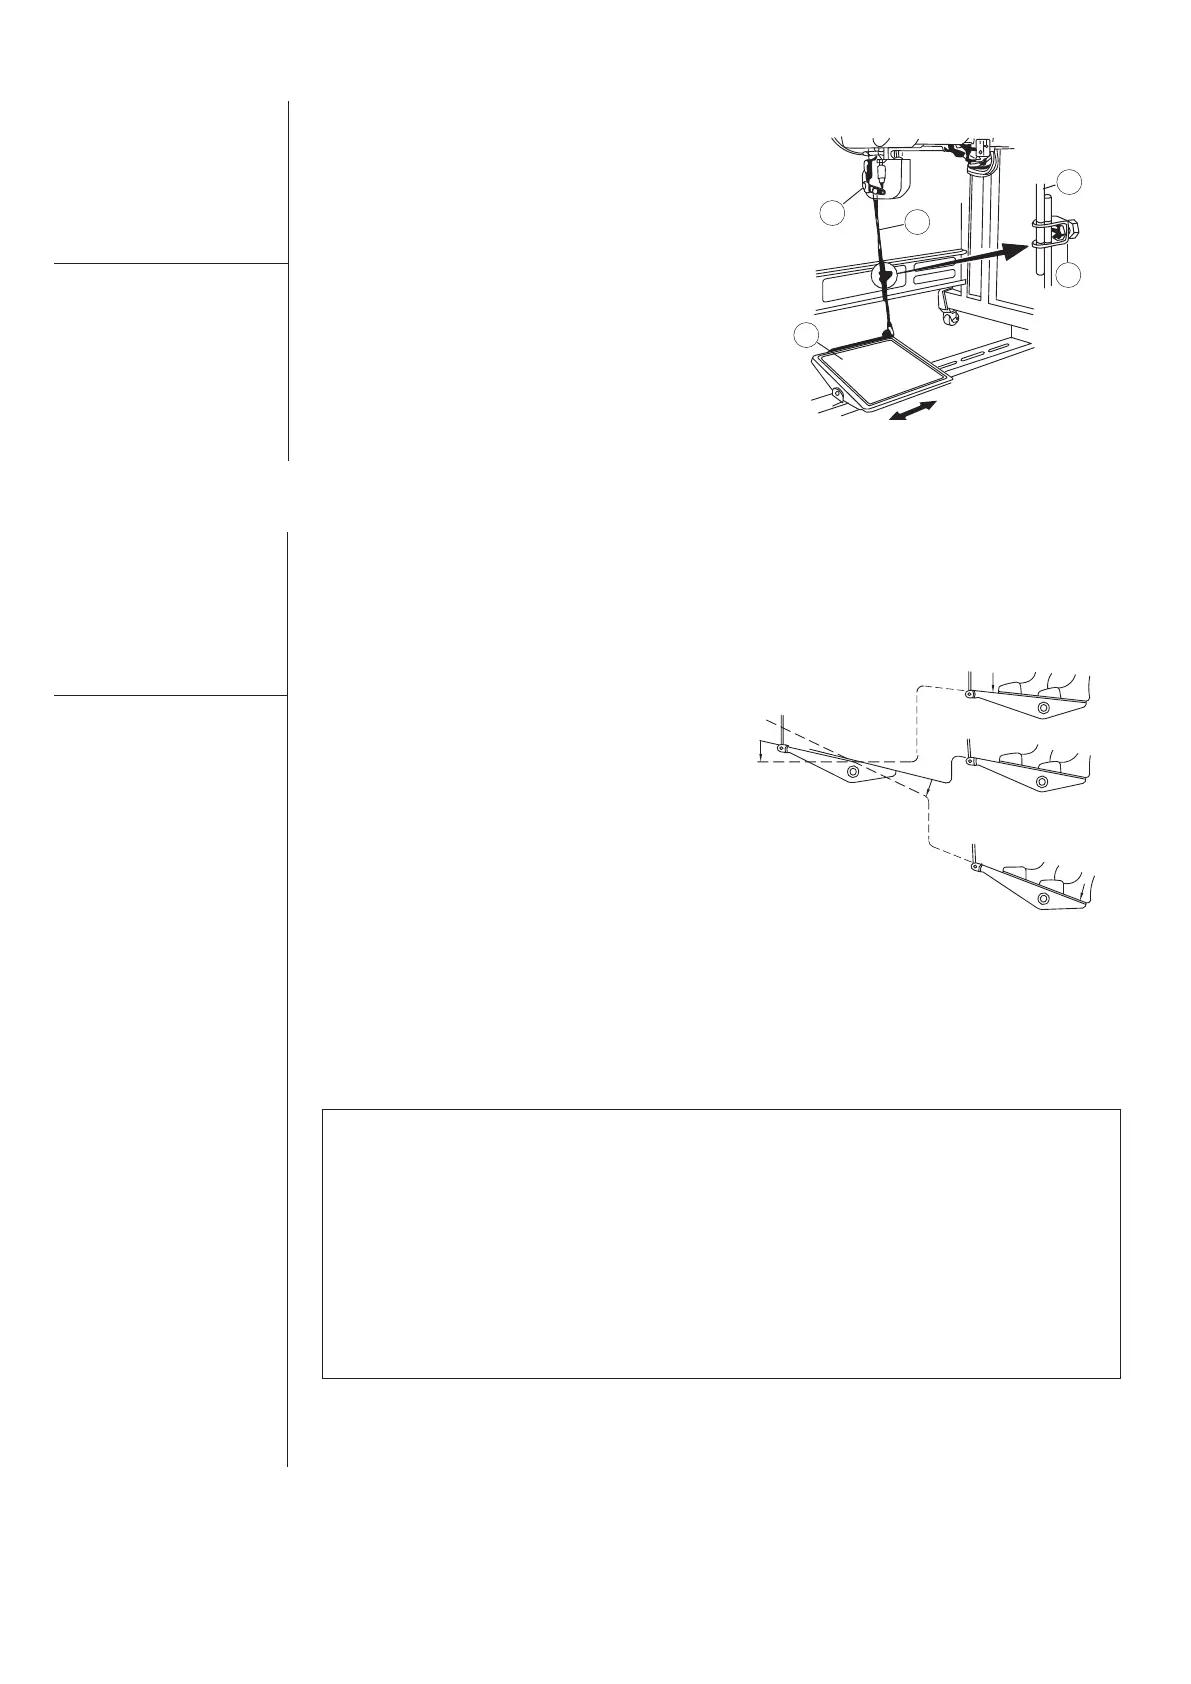
Figure 21
Installing the connecting rod.
Move the pedal ‘3’ to the right or left
as illustrated by the arrows so that
the motor control lever ‘1’ and
connecting rod ‘2’ are straightened.
Adjusting the pedal angle.
The pedal tilt can be freely adjusted
by changing the length of the con-
necting rod ‘2’.
Loosen adjust screw ‘4’, and adjust
the length of connecting rod ‘2’.
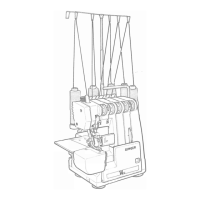
Pedal
Operation
The pedal is operated in the follow-
ing.
Step ‘A’ position
The machine runs at high sewing
speed, when you further depress the
front part of the pedal.
Step ‘B’ position (Neutral)
The machine stops (with its needle
up or down), when you reset the
pedal to its original position.
Step ‘C’ position (Only 141G-20CFA / -30CFA)
The machine trims threads when
you fully depress the back part of
the pedal.
Figure 22
A
B
C
Notes:
1) While the machine is on the auto reverse stitch, if the pedal put it to the neutral position,
the machine will stop after reverse stitches.
2) The machine will perform normal thread trimming even if you depress the back part of
the pedal immediately following high and low speed sewing.
3) The machine will completely perform thread trimming even if you reset the pedal to its
neutral position immediately after the machine started thread trimming function.
4) When the machine stops at the needle down, and if you intend to bring the needle up,
depress the back part of the pedal once.
2
1
3
2
4
Integrated Energy Saving Direct Drive Motor Lockstitch Sewing Machine