3.10
Stitch Length
Adjustment
3.11
Thread Tension
Adjustment
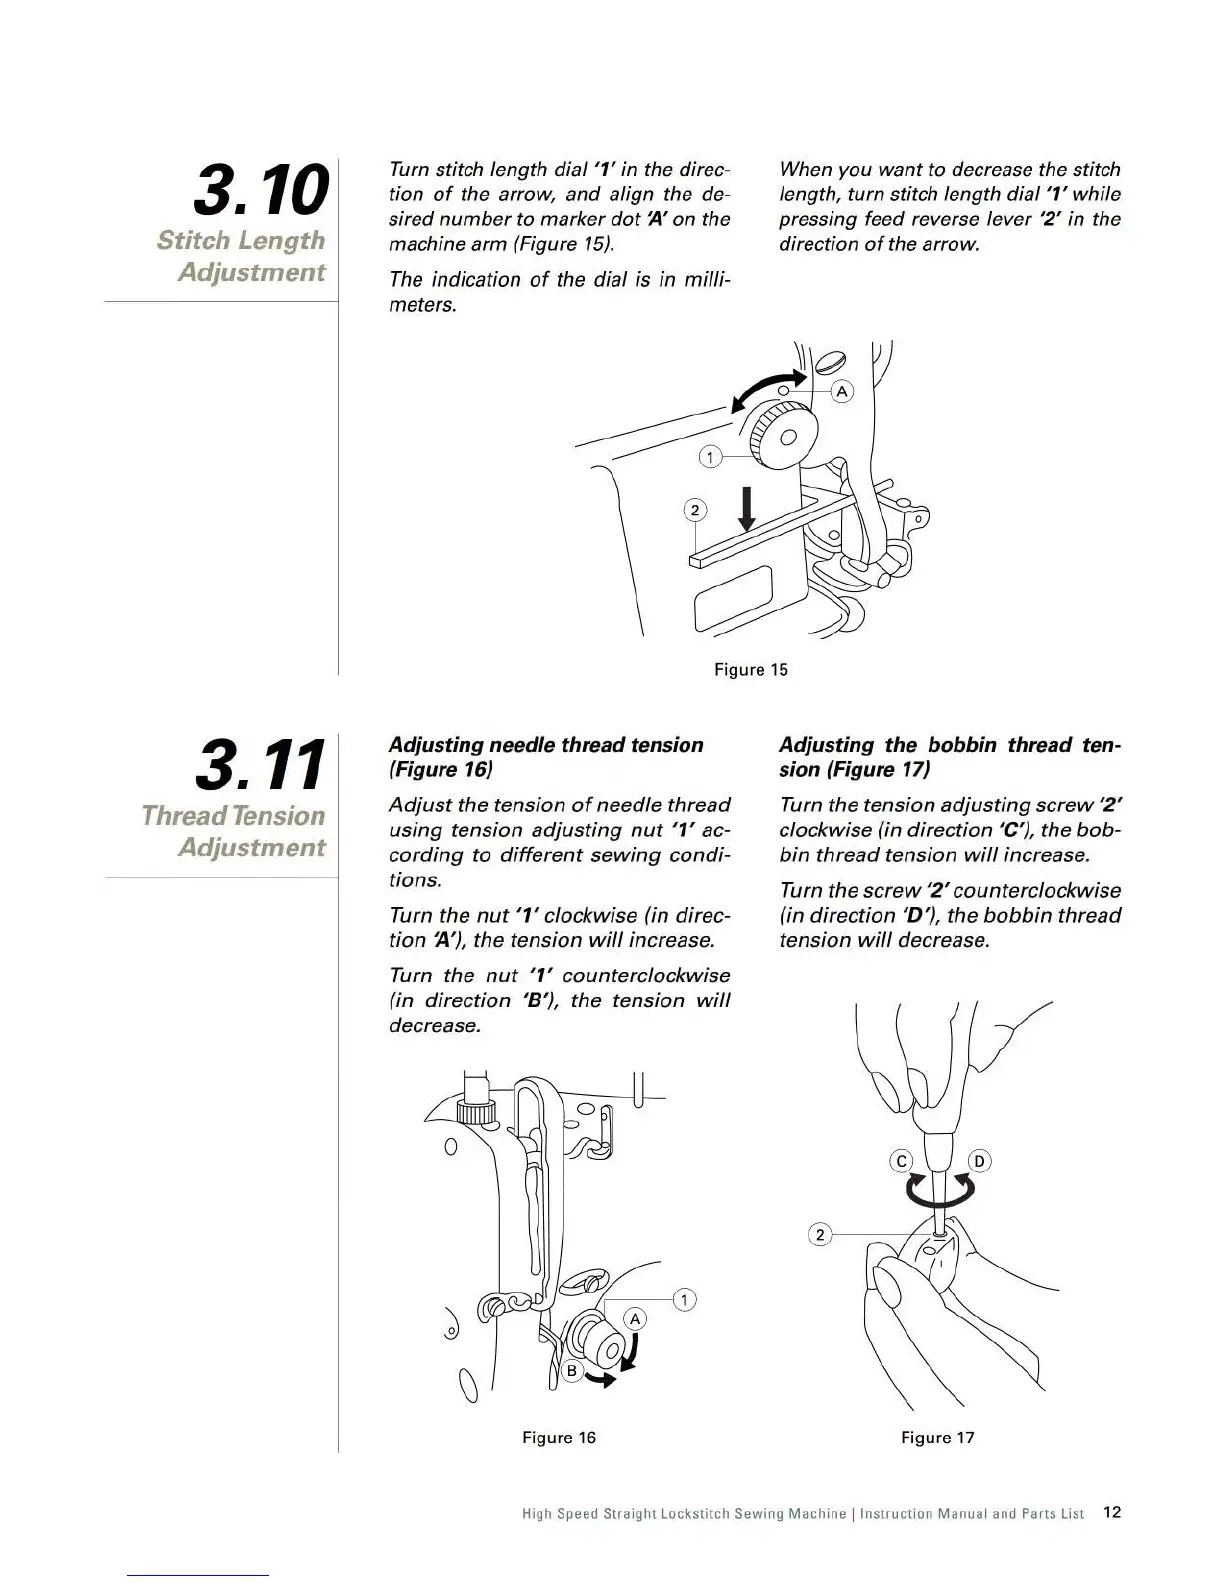
Turn
stitch length dial '1' in the direc-
tion
of
the arrow, and align the
de-
sired number to marker
dot
~,
on
the
machine arm (Figure
15)
.
The
indication
of
the dial is in milli-
meters.
When
you want to decrease the stitch
length, turn stitch length dial
'1' while
pressing feed reverse lever
'2' in the
direction
of
the arrow.
Fi
gure
15
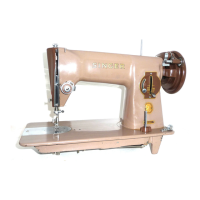
Adjusting nee
dl
e thre
ad
tension
(Fi
gur
e 16)
Adjust
the tension
of
needle thread
using
tension adjusting
nut
'1' ac-
cording
to
different
sewing
condi-
tions.
Turn the
nut
'1' clockwise (in direc-
tion ~
'),
the tension
will
increase.
Turn the
nut
'1' counterclockwise
(in direction
'8
'),
the tension
will
decrease.
Fi
gure
16
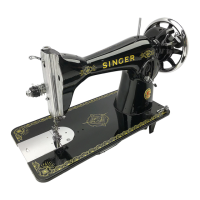
Adjusting the bobbin thre
ad
ten-
sion (Figure 17)
Turn
the
tension
adjusting
screw
'2'
clockwise (in direction 'C'), the
bob-
bin
thread
tension
will
increase.
Turn
the
screw
'2'
counterclockwise
(in direction
'D
'),
the
bobbin
thread
tension
will
decrease.
Figure 17
High Speed Straight Lockstitch Sewing Machine ! Instruction Manual
and
Parts List
12
From the library of: Superior Sewing Machine & Supply LLC