Do you have a question about the Singer 201-1 and is the answer not in the manual?
Guidance on using and identifying authentic Singer needles for optimal sewing machine performance.
Warning against using needles not manufactured by Singer for sewing machines.
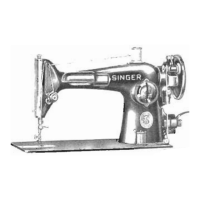
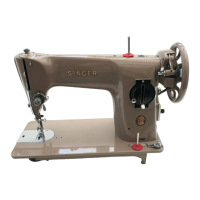
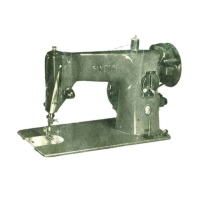
Details on lock stitch, reverse feed, sewing hook, and presser foot features for Class 201 machines.
Overview of 201-1, 201-2, 201-3, 201-4, 1200-1 models and their motorization.
Catalog of Singer P. H. motors with voltage, current, and part numbers for Model 201-2.
Catalog of Singer B. R. motors with voltage, current, and part numbers for Model 201-3.
Guidelines for selecting the correct voltage and demonstrating motors for proper machine operation.
Detailed instructions for wiring Singer P.H. and B.R. motors and Singerlights for models 201-2/3.
Specific wiring diagram and connection instructions for Model 201-2 motor, Singerlight, and controller.
Specific wiring diagram and connection instructions for Model 201-3 motor, Singerlight, and controller.
Instructions for configuring the Bakelite controller for foot-powered sewing operation.
Instructions for configuring the Bakelite controller for knee-powered sewing operation.
Common causes for slow operation or the machine not running, including lubrication and binding issues.
Troubleshooting motor problems like electrical faults, armature binding, and commutator condition.
Detailed explanation of how to diagnose and fix armature binding in sewing machine motors.
Steps to inspect the three-pin terminal for proper seating and tight connections on Model 201-2.
Procedures for checking the electrical connections of the motor and Singerlight on Model 201-2.
Guidance on inspecting the Singerlight socket cap, its connections, and the lamp shade assembly on Model 201-2.
Steps to disconnect Singerlight leads from the three-pin terminal on Model 201-2.
Instructions for safely removing the Singerlight leads tube from the machine arm on Model 201-2.
Procedure for inserting the leads tube and securing it with the clamp on Model 201-2.
Identifies potential issues like power, bulb, switch, or loose connections causing the Singerlight to fail.
Instructions for the correct method to remove and install the sewing machine bulb.
Step-by-step guide to detach the motor unit from the machine arm on Model 201-2.
Procedures for removing the motor cover and brushes on Model 201-2.
Steps for removing the armature and inspecting its winding for damage on Model 201-2.
Guides for reassembling the field core, brush tubes, and insulating bushings on Model 201-2.
Instructions for applying the correct lubricant to the motor's grease tubes and bearings on Model 201-2.
Step-by-step instructions for detaching and reattaching the balance wheel assembly on Model 201-2.
How to check electrical connections of the motor, three-pin terminal, and Singerlight unit on Model 201-3.
Step-by-step guide to detach the motor from the machine bracket on Model 201-3.
Procedures for removing the motor's pulley end cover and brushes on Model 201-3.
Steps for removing the armature and inspecting its winding for damage on Model 201-3.
Instructions for removing the field core shield and commutator end cover from the motor on Model 201-3.
Guides for reinstalling the commutator end cover and field core shield on the motor.
Step-by-step guide to attach motor, Singerlight, and three-pin terminal to the machine.
How to adjust belt tension for optimal power transmission on Model 201-3.
Instructions for oiling the motor's grease tubes and bearings on Model 201-3.
Diagnosing and addressing issues when the motor does not start.
Procedures for examining the controller's carbon resistance unit for proper function.
Troubleshooting steps for motors running too fast, too slow, or erratically.
Method for performing emergency adjustments on the controller's carbon resistance unit.
Steps to diagnose and resolve issues where the motor fails to stop when commanded.
Detailed steps for detaching and reinstalling the rotating hook bobbin case.
Instructions for detaching and reattaching the rotating hook assembly.
Step-by-step guide for timing the rotating hook for optimal stitch formation.
How to adjust the needle bar to the proper height for accurate stitching.
Procedures for removing and reinstalling the rotating hook shaft and its associated bevel gear.
Instructions for removing and replacing the driving shaft bevel gears.
How to adjust the feed dog's vertical position for proper fabric feeding.
Steps to adjust the feed dog's horizontal position within the throat plate slots.
How to center the feed dog teeth relative to the throat plate slots for accurate stitching.
Detailed steps for removing and taking apart the graduated thread tension assembly.
How to adjust the bobbin winder pressure against the balance wheel for effective bobbin winding.
Step-by-step instructions for detaching and reattaching the needle bar assembly.
Procedures for detaching and reinstalling the feed connecting rod, including cap replacement.
Steps to detach and reattach the feed forked connection and feed regulator.
Instructions for removing and reinstalling the upright arm shaft and its bevel gears.
Procedures for replacing the shaft bushing, bevel gear, feed cam, and lifting eccentric.
Guidance on locating and applying oil to specific points on the sewing machine for proper lubrication.
Explains the benefits and correct usage of Singer brand machine oil and motor lubricant.
| Submodel | 201-1 |
|---|---|
| Needle System | 15x1 |
| Tension Control | Manual |
| Presser Foot Lift | Manual |
| Reverse Lever | Yes |
| Material | Cast Iron |
| Built-in Motor | Yes |
| Stitch Type | Straight stitch only |
| Stitch Length | Adjustable up to 4mm |