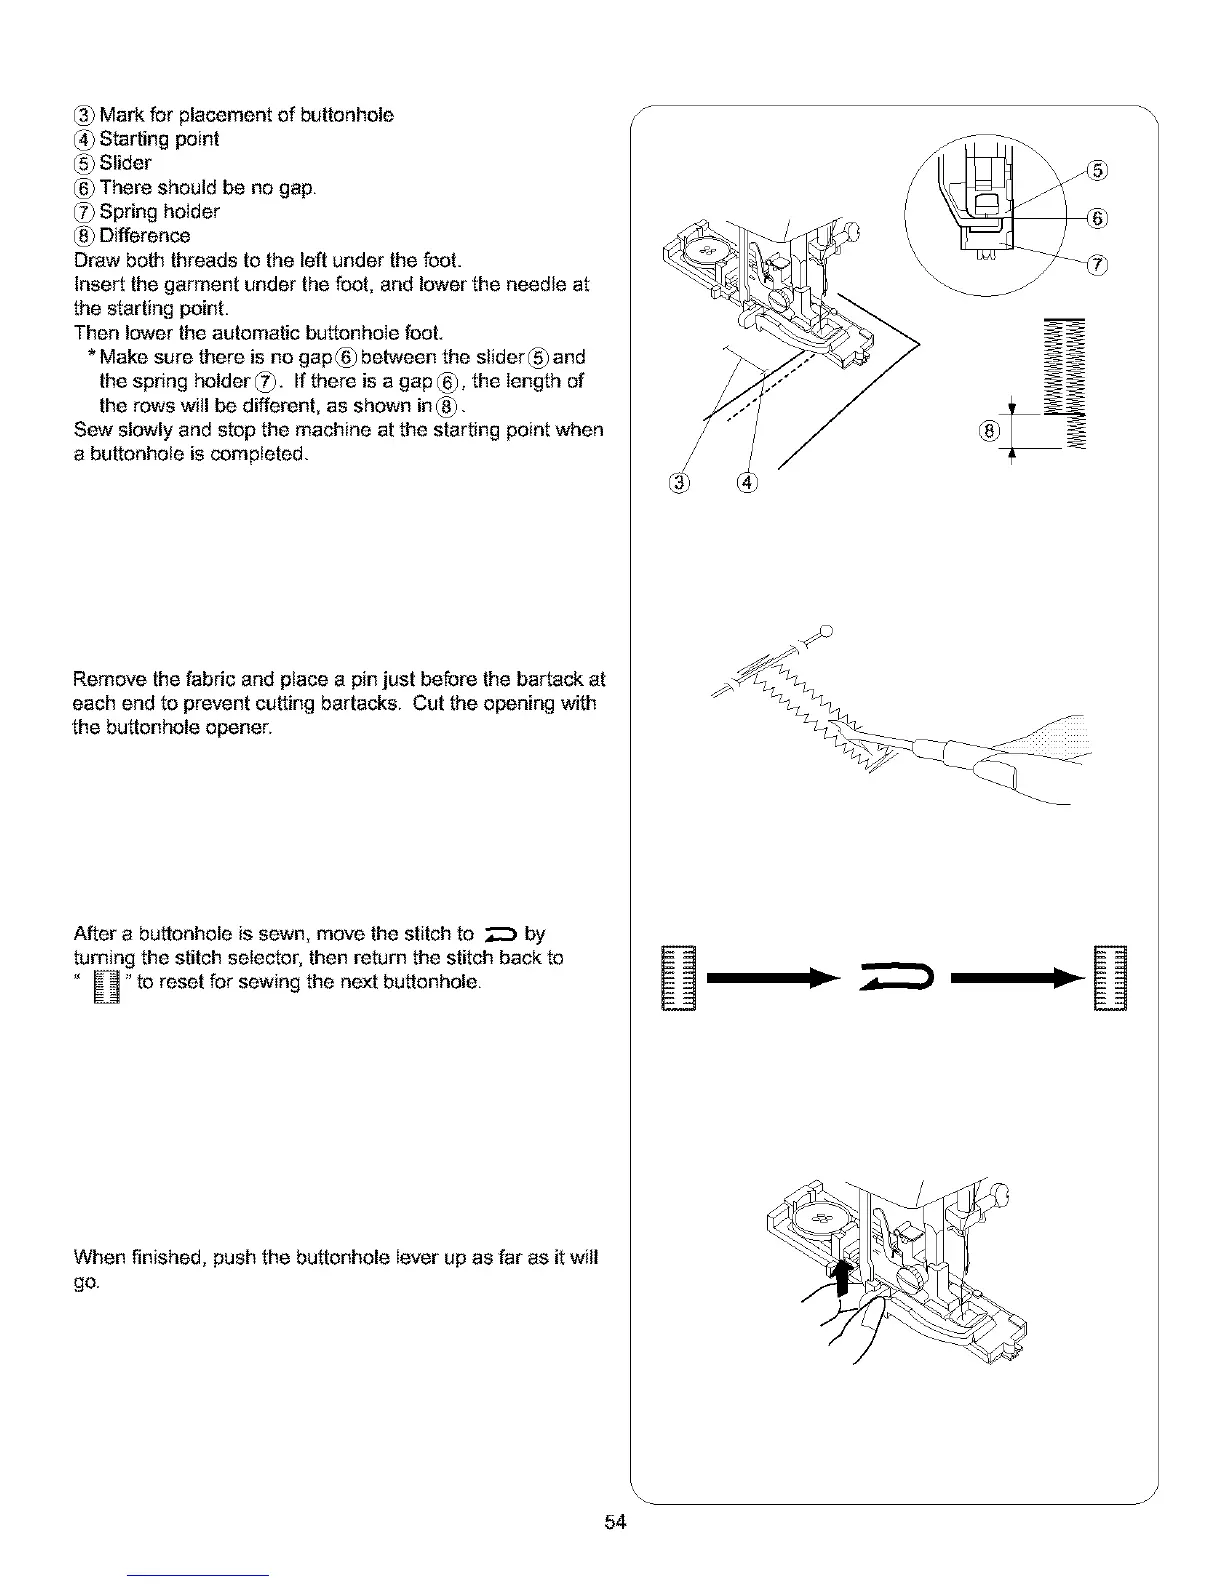
Mark for placement of buttonhole
Starting point
Slider
There should be no gap.
Spring holder
Difference
Draw both threads to the left under the foot.
Insert the garment under the foot, and lower the needle at
the starting point.
Then lower the automatic buttonhole foot.
* Make sure there is no gap _ between the slider_ and
the spring holder _). If there is a gap_), the length of
the rows will be different, as shown in_.
Sew slowly and stop the machine at the starting point when
a buttonhole is completed.
Remove the fabric and place a pin just before the bartack at
each end to prevent cutting barracks. Cut the opening with
the buttonhole opener.
After a buttonhole is sewn move the stitch to ::::) by
turning the stitch selector, then return the stitch back to
" _ "to reset for sewing the next buttonhole.
When finished, push the buttonhole lever up as far as it will
go.
s
D D
54

 Loading...