44
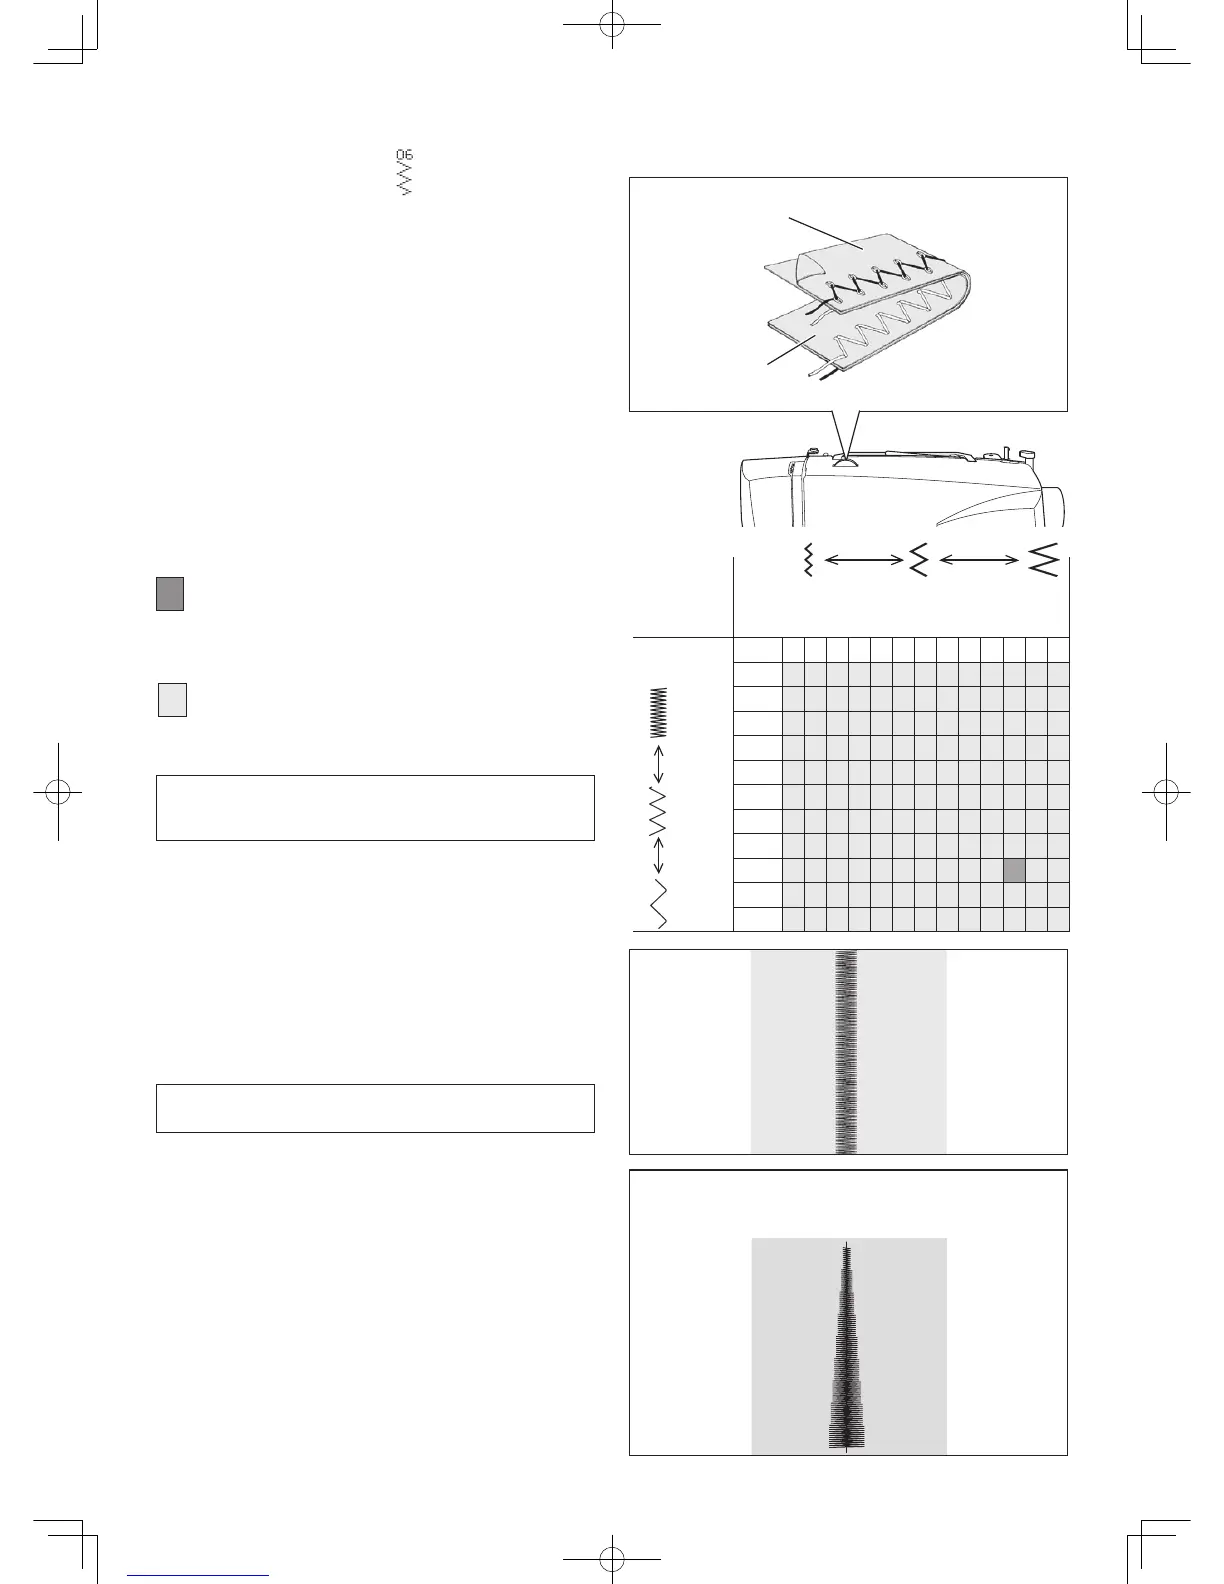
mm 0 0.5 1.0 1.5 2.0 2.5 3.0 3.5 4.0 4.5 5.0 5.5 6.0
0
0.25
0.5
0.75
1.0
1.25
1.5
1.75
2.0
2.5
3.0
Under side
Côté de dessous
Reverso
Top side
Côté de dessus
Cara
ZIGZAG STITCHING
The top thread may appear on the bottom depending on the
thread, fabric, type of stitch and sewing speed, but the bobbin
thread must never appear on the top of the fabric.
If bobbin thread is pulling to the top or you are experiencing
puckering, slightly reduce the tension with the Thread Tension
Control.
SETTINGS :Presser foot - General Purpose Foot
:Thread tension control - AUTO
Dark grey box indicates the Auto/default value set
automatically when the pattern is selected.
For the Zigzag Pattern the stitch length is 2 mm and the
stitch width is 5 mm.
The light grey boxes indicate all the possible personal
preference options available to set manualy.
ADJUSTING STITCH WIDTH AND LENGTH
SATIN STITCH
This is a closely spaced stitch used for appliqué, bar-tacking,
etc. Slightly loosen the top thread tension and manually adjust
the stitch length between 0.5 and 2.0 for satin stitching.
Use a backing of stabilizer or interfacing to avoid puckering.
NOTE: When sewing a dense (closely spaced) Satin
Stitch, the Satin Stitch Foot MUST be used.
NOTE: The values shown in the chart are actual sewing
lengths and widths and do not correspond to the scale
and number markings on the sewing machine.
Center position
Position centrale
Aguja posicionada en el centro
PLACEMENT OF PATTERNS
Stitch width of pattern increases from center needle position
as illustrated.
STITCH LENGTH
LONGUEUR DU POINT
LARGO PUNTADA
STITCH WIDTH
LARGEUR DU POINT
ANCHO PUNTADA