Buttons
Pattern: Zig-Zag
Stitch Width: As required
Needle Position:
Button Foot
Feed Cover Needle Plate
Speed: Moderate
Flat buttons can be sewn on quickly and easily
using the plain zig-zag stitch.
The space between the holes in the button
determines stitch width settings.
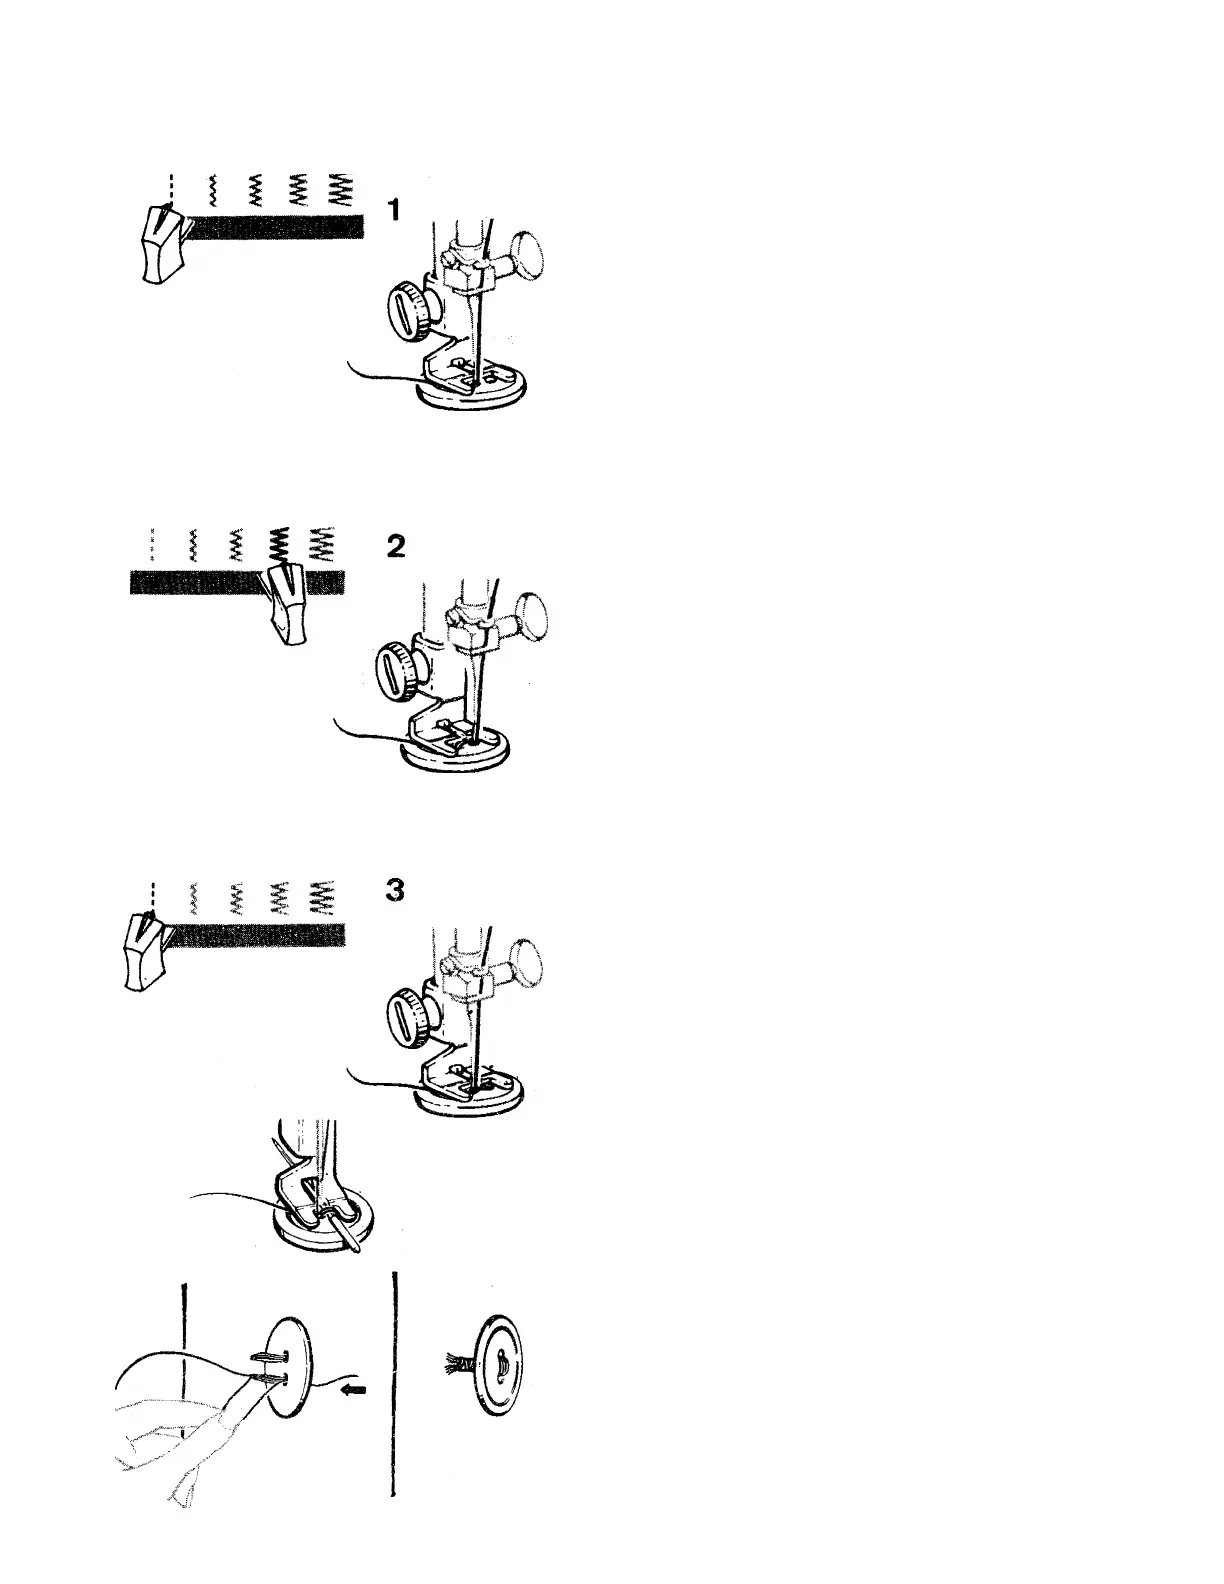
1. Insert feed cover needle plate.
«
2. Set stitch width at | and needle position
selector at Position button under foot
and lower the needle into the center of the
left hole. Lower the foot. Turn hand wheel
toward you until needle rises out of button
and is above the foot.
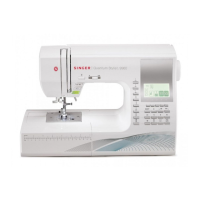
3. Move stitch width selector until needle is
over the other hole in the button. Then,
when you begin to stitch, the needle should
enter into the rigt hole of the button. Take
six or more zig-zag stitches to attach button.
E nd on left side.
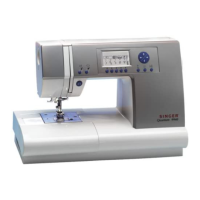
4. To fasten stitching, adjust stitch width to|
and take three or four stitches. '
5. Remove work, draw threads to underside
fasten, and trim.
Forming a Th road Shank
To form a thread shank, sew over the blade of
a regular machine needle.
• Position button and lower button foot. Pla
ce needle in groove of foot so that the point
enters the hole in the foot. The farther in
you push the needle, the longer the shank
wilt be.
• After stitching, remove the needle from the
groove. Renrwve work and cut the threads
about 15 centimeters (6 inches) from fabric.
Pull thread erxls to back of button and form
a firm shank between button and fabric by
wiriding threads tightly around the attachirig
stitches. Tie thread ends securely.
55